88_
printing
printing
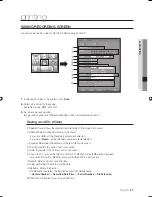
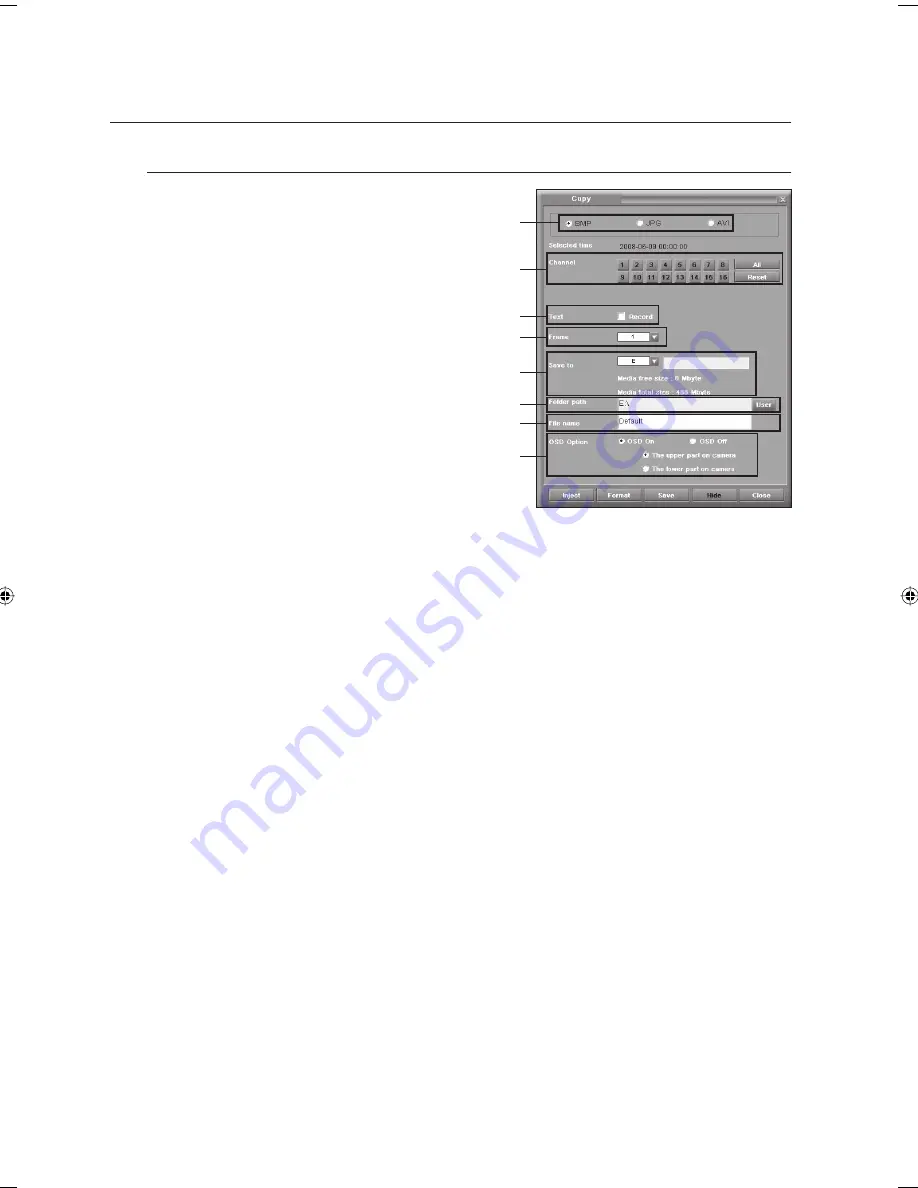
Saving as <BMP> or <JPG> (Still Picture)
➀
Selected Time: Shows the selected recorded time of the
image to be saved.
➁
Channel: If you click <
All
>, all the channels (cameras)
are
selected.
If you click <
Reset
>, all the channels (cameras) are
deselected.
➂
Text: If you select this option, text is also saved.
➃
Frame: Select the number of the images to be saved.
➄
Save to: Select a drive to save the data.
➅
Folder path: Select a path to save the data.
➆
File name: Enter a fi le name.
If no fi le name is entered, the fi le will be saved with
default
name.
<
Camera Number
> - <
Recorded Date/Time
> -
<
Serial Number
> - <
File Extension
>.
➇
OSD Option: If you select <
OSD On
>, an option window will appear where you can select position
(top/bottom) of recording information in the camera screen.
Click <
Save
>.
The image is saved.
Until the saving operation is completed, you cannot use other functions.
If free space in the specifi ed drive is insuffi cient while saving the data, the save operation will be canceled.
Click <
Close
>.
<
Save Image
> is fi nished.
Other buttons
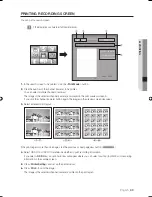
Eject/Inject: Ejects or closes the tray of the CD-RW/DVD drive.
Format: Formats the disc in the CD-RW/DVD drive to prepare saving operation.
Hide: Hides save image window while saving images.
If the save image window disappears, the backup icon of the status display bar is displayed in yellow color.
4.
J
5.
6.
•
•
•
①
②
③
④
⑤
⑥
⑦
⑧
02093A-SNR-1162-ENG.indb 88
02093A-SNR-1162-ENG.indb 88
2008-11-07 오후 2:33:02
2008-11-07 오후 2:33:02

