background image

68_


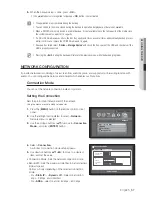
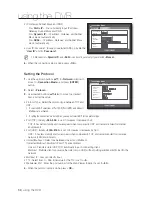
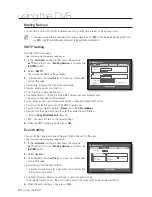
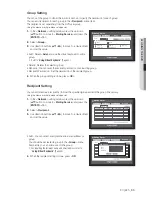
search & play

search & play

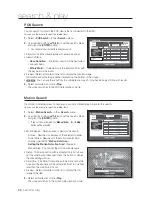
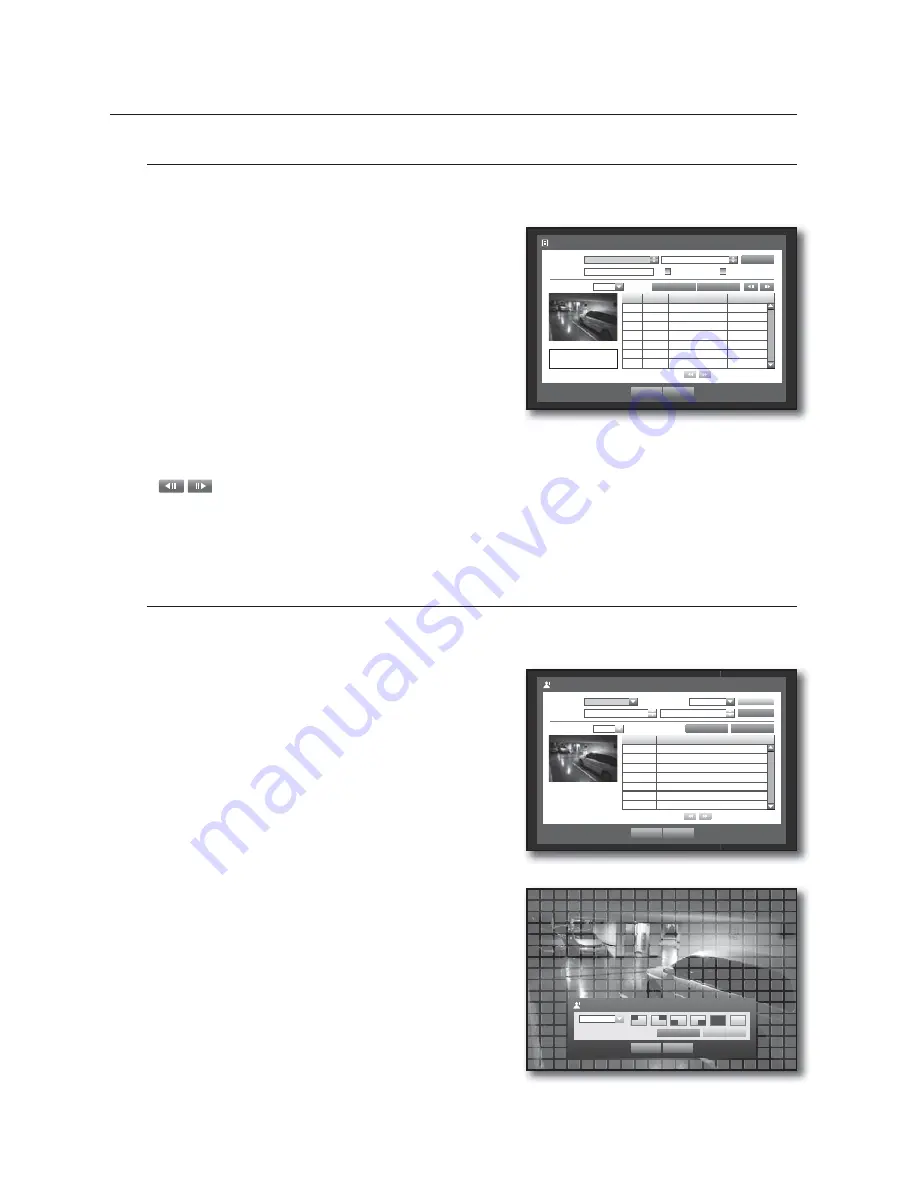
POS Search

You can search for data in the POS device that is connected to the DVR.

You can use the mouse to select the related items.

1. 

Select <

POS Search

> in the <

Search

> menu.

2. 

Use direction buttons (

 ◄ ►

) to set the search criteria 

and press the [

ENTER

] button.


You can enter specific text to refine your search.

• 

Keyword : Use the virtual keyboard to enter a keyword.

• 

Search Criteria :

- <

Case Sensitive

> : If selected, search will be performed 

case-sensitively.

- <

Whole Word

> : If selected, only the exact matches with 

the keyword will be found.

• 

Preview : Select a data item in the list to display the preview image.
Information about the image will be displayed on the bottom of the screen.

• 


: You can use these buttons to accelerate your search if you have a huge list of search results.

3. 

Select a data item and click <

Play

>.

The screen switches to the POS data playback mode.

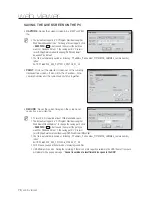
Motion Search

If a motion is detected in each channel, you can set a desired area to perform the search.

You can use the mouse to select the related items.

1. 

Select <

Motion Search

> in the <

Search

> menu.

2. 

Use direction buttons (

 ◄ ►

) to set the search criteria 

and press the [

ENTER

] button.


If you set the motion area to <

Manual Area

>, the <

Setup

button will be activated.

• 

Motion Region : Select an area to perform the search.

-  All Area : Searches for all areas of the selected channel.

-  Current Area : Searches for the motion area for each 

channel specified in “

Motion Detection 

Setting the Motion Detection Area

”. (Page 54)

-  Manual Area : You can set the motion area manually.

• 

Setup : The Setup button will be activated only if you have 
set the motion area to Manual. Press this button to display 
the area setting window.

• 

Date/Time : The Date/Time will be automatically set by the 
hour, and the end time will be automatically set to one hour 
later than the start time if it is set.

• 

Preview : Select a data item in the list to display the still 
image of the item.

3. 

Select a data item and click <

Play

>.

The screen switches to the motion data playback mode.

Motion Region

 OK 

Cancel

Apply to All CH

1 CH

Individual

Motion Search

Date/Time 

2011-01-01  03:41:18 

2011-01-01  05:11:44

 Play 

Return

 No. 

Start 

Time

 7 

01:01:30

 6 

01:01:25

 5 

01:01:20

 4 

01:01:15

 3 

01:01:10

 2 

01:01:05

 1 

01:01:01

Previous/Next Page

Search

Channel 

CAM 01 

Motion Region 

All Area

Setup

2011/01/01  01:01:30

Go to First

Go to Last

Overlapped Data 

List1

POS Search

Date/Time 

2011-01-01  02:41:18 

2011-01-01  03:41:18

 Play 

Return

 POS 

CH 

Start 

Date/Time 

Keyword


2011-01-01 03:41:15 

CHANGE _


2011-01-01 03:41:15 

CASH _


2011-01-01 03:41:10 

CASH _

Previous/Next Page

Search

Keyword 


Case Sensitive 

Whole Word

Go to First

Go to Last

CHANGE

5.95

2011/01/01  03:41:15

Overlapped Data  List1

Summary of Contents for SRD-470D

Page 1: ...4 CHANNEL DVR User Manual SRD 470 470D...

Page 2: ...Samsung Techwin reserves the right to change the contents of this document without prior notice Warranty If the product does not operate properly in normal conditions please let us know Samsung Techwi...

Page 3: ...e blade or the third prong are provided for your safety if the provided plug does not fit into your outlet consult an electrician for replacement of the obsolete outlet 10 Protect the power cord from...

Page 4: ...ries shall not be exposed to excessive heat such as sunshine fire or the like System Shutdown Turning off the power while the product is in operation or undertaking improper actions may cause damage o...

Page 5: ...the Video Audio and Monitor 17 Connecting the USB 17 Connecting POS Device 18 Connecting the Alarm Input Output 18 Connecting the RS485 Device 19 Connecting the Network LIVE 21 21 Getting Started 23...

Page 6: ...71 Introducing Web Viewer 72 Connecting Web Viewer 73 Using Live Viewer 79 Using Search Viewer 83 Viewer Setup 93 About 93 Mobile Viewer BACKUP VIEWER 94 94 SEC Backup Viewer APPENDIX 96 96 Product Sp...

Page 7: ...rdless of the recording conditions using network specific codec Improved quality using de interlace chip HDD information and status with HDD SMART Record at 4CIF Size 120 NTSC 100 PAL IPS 4 CH Loop Th...

Page 8: ...tion of this equipment in a residential area is likely to cause harmful interference in which case the user will be required to correct the interference at his own expense Package Contents Please unwr...

Page 9: ...f the audio signal AUDIO IN 1 4 Output ports RCA jacks for the audio signal NETWORK Network connection port DC 12V Port to be connected to the 12V power source ALARM IN 1 4 G Alarm input ports ALARM O...

Page 10: ...10_ overview overview PART NAMES AND FUNCTIONS FRONT SRD 470 SRD 470D SRD 470 1 3 5 8 7 6 9 2 SRD 470D 3 5 8 7 6 4 9 2 1...

Page 11: ...AUSE Open Close Used to open and close the DVR RW disc tray available for SRD 470D only LED Indicator ALARM Lights on when an event occurs HDD Displays the normal access to HDD Upon access to HDD LED...

Page 12: ...the numeric input keys or displays a single channel T W Zooms in or out BACKUP Displays the Backup Menu MODE Changes the screen mode MENU Goes to the system menu screen Up Down Left Right ENTER Moves...

Page 13: ...ent If installed in a closed or multi unit rack assembly the operating ambient temperature of the rack environment may be greater than room ambient Therefore consideration should be given to installin...

Page 14: ...ure that the HDD is free from such shock We are not liable for any damage to the HDD incurred by user s carelessness or miss use Cases might cause damage to HDD or recorded data To minimize the risk o...

Page 15: ...screws on both sides and remove the cover 2 Loosen the left and right screws on the lower hard disk bracket to remove it 3 Insert the additional hard disk into the bracket and fix it using the provide...

Page 16: ...lower bracket and fix it using the provided screws 5 When done connect the power cable and connect the signal cable SATA cable to the connector for the main board 6 Check if the connectors are properl...

Page 17: ...lugging which connects removes the USB device during the system operation J If you use the USB device for Backup purposes format it with FAT32 on PC if it is not formatted on the DVR CONNECTING POS DE...

Page 18: ...strand of the sensor signal line two strands to the alarm output port and connect the other to the COM port CONNECTING THE RS485 DEVICE Connect the rear RS485 ports to the external device M You can c...

Page 19: ...rnet through Ethernet 10 100 1000BaseT Connecting to the Internet using the router Windows Network Viewer Back Bone Hub Switcher Hub Switcher RJ 45 Ethernet Cable Direct Cable NETWORK DDNS Server Data...

Page 20: ..._ connecting with other device connecting with other device Connecting to Internet through ADSL Hub Switcher Phone ADSL Line ADSL MODEM RJ 45 Ethernet Cable Direct Cable Windows Network Viewer INTERNE...

Page 21: ...e DVR You require permission to shut down the system if you are not logged in as admin 1 Press the POWER button on the remote control or the front panel or right click to display the context sensitive...

Page 22: ...ed to change the password after installing the product Note that the security and other related issues caused by the unchanged password shall be responsible for the user M For the restricted permissio...

Page 23: ...ord Displayed if no HDD is installed or the existing HDD should be replaced Displayed if the HDD needs a technical examination Displayed if a new firmware is found from the network Video Input Status...

Page 24: ...panel or the remote control you can access a desired menu by right clicking the mouse any area in live mode The context sensitive menu that appears by right clicking the screen may differ depending on...

Page 25: ...o the Using the DVR section Page 32 Shutdown Turns down the DVR Show Hide Launcher Shows or hides the launcher Refer to View the Launcher Menu Page 26 Login Logout You can log in or out Single Mode Me...

Page 26: ...you set 12 hours for the time format in System Date Time Language Time Page 32 Screen Mode Press this button to switch the screen mode in sequence Menu Expansion Button Click to display the hidden me...

Page 27: ...E button on the front panel or the remote control to switch the mode in the sequence of the launcher menu items Switching the screen automatically With SRD 470 470D you can display 4 live single scree...

Page 28: ...op it to a desired channel this can also change the channel position Ex if switching CH 1 to CH 4 Switching to Single Mode When in split mode select and double click a desired channel to switch to its...

Page 29: ...desired area and use the Zoom function to enlarge it twice 1 Select ZOOM in the right click menu Press the ZOOM button on the front panel or the remote control or simply click in the launcher menu The...

Page 30: ...trol or click Freeze in the launcher menu The playback of the image is stopped temporarily 2 Press the FREEZE button again or click Freeze This will release the freeze EVENT MONITORING This will displ...

Page 31: ...e after the first event occurred in CH 1 M Press the ALARM button to reset the alarm settings and to release the event mode If an alarm activates in the condition you have set the event record and pre...

Page 32: ...g to setup Date Time and Language 5 Use direction buttons to select an item to set and make your changes Date Sets the date that will appear on the screen You can select the date format Time Sets the...

Page 33: ...TER button 4 Use direction buttons to select a desired date and press the ENTER button You will see the Setting Holiday screen Ex Select January 10th and check on 1 10 only to make every January 10th...

Page 34: ...e press OK Using Virtual Keyboard For alphanumeric inputs the virtual keyboard window appears Use direction buttons to move to a desired character and press the ENTER button In the upper text input bo...

Page 35: ...oup permission is assigned will be displayed in the Live menu when a group user logs in Live View You can set the permission to access the Live screen according to the channel Search You can set the p...

Page 36: ...ed only the accessible context menus should appear To change the user password If you log in with a user account that is restricted to access the menu you can change your own password only 1 Log in wi...

Page 37: ...icted Access Restriction on Network Access Auto Log out Manual Input of ID setup screen appear 3 Use direction buttons to move to a desired item and set the value Restricted Access All menu items allo...

Page 38: ...NTER button 2 Check the Version Broadcast Format and MAC Address System Information Shows the current system s information The values can not be changed by a user S W Upgrade Updates the DVR s softwar...

Page 39: ...arting M If Upgrade Failed appears retry from the step 4 When you experience continued failure consult the service center for assistance Software Version V1 00h_100315180929 Broadcast Format NTSC MAC...

Page 40: ...and events System Log System Log shows log and timestamp on every system start up system shutdown and changes on system settings Using the mouse may help make setup easier 1 Use the up down buttons i...

Page 41: ...wn button to move to Log Information and press the ENTER button 2 Select Backup Log 3 Use the four direction buttons to move to a desired item 4 Specify a search term and select Search in the right co...

Page 42: ...er than the video of the selected channel For privacy protection it does not display the video while the recording continues Covert2 Shows nothing but an empty screen while the recording continues Aud...

Page 43: ...other settings refer to the Remote Devices settings Page 46 Using the mouse may help make setup easier 1 Use the up down buttons in Device window to move to Camera and press ENTER button 2 Select PTZ...

Page 44: ...hows the used total capacity of the storage device Usage Sets the storage device s usage USB memory and storage media such as CD DVD are used for backup purpose only Status Management Shows the curren...

Page 45: ...ports and their durations appears 3 Use direction buttons to move to the desired item Alarm Alarm signal will output through the alarm out port on the rear side when selected 1 2 If BEEP was selected...

Page 46: ...te settings of the DVR PTZ camera and system keyboard should be matched for proper operations 4 Make sure to match IDs of the DVR System Keyboard and Remote Control and press OK M For changing the rem...

Page 47: ...connection COM1 For RS 232C connections 7001 7016 For Ethernet connections 3 When the POS Device setup is done press OK POS USE POS CH Preset Port Ethernet 1 None No preset None 2 None No preset None...

Page 48: ...atch with this player Sharpness You can adjust the sharpness of the video output signal 4 When the monitor setup is done press OK Setting Display position Some monitors many not display information ca...

Page 49: ...he mouse right button in Live screen Refer to Spot Out Page 29 4 When the Spot Out is done press OK Setting the Screen Mode You can configure the Live screen and Split Screens Using the mouse may help...

Page 50: ...rection buttons to move to a desired item and set the value Apply to All CH If selected Apply to All CH Apply to All CH window appears Press OK to apply the setup to all channels 6 When the recording...

Page 51: ...he event POST Event The recording will continue for a pre determined time after the actual end of an event If it is set to 5 seconds the recording ends in 5 seconds after an event 3 When the event rec...

Page 52: ...ning rate as double of the specified frame rate if selecting level 9 4 When the Event recording setup is done press OK Record Option You can set the recording to stop or overwrite when the HDD is full...

Page 53: ...channel to be connected to the sensor If selected camera Cam Preset setup window appears Select a channel and setup the preset Preset setup can be done in PTZ mode Refer to Preset Setting page 65 Alar...

Page 54: ...n Motion Region window In the Motion Region window select desired region from To set the area using Individual selection In the Motion Region window you can select cells individually by using Individu...

Page 55: ...window of Alarm Schedule settings appears 3 Alarm Sets the alarm output method For further information on alarm output refer to HDD Alarm Alarm Page 45 ON Marked in orange and always generates alarm...

Page 56: ...have built in internal DVD Writer internal CD DVD backup is not available Type Sets the backup data format AVI Saves the CODEC information provided by the DVR with the recording data and saved data c...

Page 57: ...ail forwarding function with events You can configure the network environment which enables such functions Connection Mode You can set the network connection route and protocol Setting the Connection...

Page 58: ...It has better stability and lower speed when compared to UDP and recommended for internet environments Port UDP Initially 8000 8160 is set It increases decreases by 160 UDP It has less stability and f...

Page 59: ...onsult your network manager for IP Gateway and Subnet Mask Dynamic IP DHCP mode Internet connection Connect the DVR directly to a cable modem DHCP ADSL modem or FTTH network DVR Network Settings Set t...

Page 60: ...1 1 2 At this stage make the local PC s windows network configurations to the below example Ex IP 192 168 1 2 Subnet Mask 255 255 255 0 Gateway 192 168 1 1 Once connected to the Broadband Router it p...

Page 61: ...enu of the connected DVR to the following Ex Protocol Type TCP Port TCP 0554 0555 0556 0557 0558 DDNS Site Samsung DDNS DDNS Settings of the Router Select the corresponding menu for the network transf...

Page 62: ...ever and TLS if available Sender Use the virtual keyboard to enter the sender s e mail address Refer to Using Virtual Keyboard Page 34 TEST Conducts the test on the server settings 4 When the SMTP set...

Page 63: ...m the specified group and edit the group if necessary Using the mouse may help make setup easier 1 In the Network setting window press the up down button to move to Mailing Service and press the ENTER...

Page 64: ...preference in a desired mode 1 Launch the PTZ Control menu As the PTZ icon on the bottom right corner turns yellow you access the PTZ Control mode to display the PTZ Control menu M Be sure to configur...

Page 65: ...esets Delete Deletes the selected preset Delete All Deletes all existing presets M If you replace the camera of the channel that stores the preset list with a new one you should reset the preset accor...

Page 66: ...can be displayed differently depending on time zone and DST settings Using the mouse may help make setup easier 1 Select Time Search in the Search menu 2 Select a date to search Refer to Using the Cal...

Page 67: ...d click Play The screen switches to the event data playback mode Backup Search Searches for backup data in the connected backup device Only data in the format of DVR is included in the search Refer to...

Page 68: ...lect an area to perform the search All Area Searches for all areas of the selected channel Current Area Searches for the motion area for each channel specified in Motion Detection Setting the Motion D...

Page 69: ...time of backup you can specify a backup area using the mouse yellow triangle Click again to set the current time to the end time of the backup and the Backup Range window appears Type Supports formats...

Page 70: ...ay Ensured to play forward up to 4 channels simultaneously at a low speed In a split mode the real time playback may not be supported depending on the record quality resolution and number of channels...

Page 71: ...format images Record video in AVI format compatible with popular media players needed the Xvid codec SYSTEM REQUIREMENTS The following lists the minimum suggested hardware and operating system require...

Page 72: ...d to a hacking thread so it is recommended to change the password after installing the product Note that the security and other related issues caused by the unchanged password shall be responsible for...

Page 73: ...reen split and full screen mode Shows the IP address and model name of the connected DVR Select the format of OSD information that will be displayed on Live Viewer These buttons are used for sequence...

Page 74: ...ed the ALARM button of the DVR It displays whether the PTZ controls are active M If you have set PTZ cameras for the DVR PTZ is displayed on the screen Select a PTZ camera channel and use the PTZ butt...

Page 75: ...the time of the PC currently running the Web Viewer Audio Sound On Off OSD Turn on off the OSD icon CHANGING THE LIVE SCREEN MODE 4 split mode does not support SEQUENCE PREVIOUS and NEXT SEQUENCE When...

Page 76: ...number and the current event status together RECORD Saves the current image on the screen and saves it as a avi video file M To record it it is required at least 1GB of available space The default sa...

Page 77: ...ive screen If you select 4 split mode the channel button for each of cameras 1 4 will turn blue USING PTZ CAMERA Click the direction buttons to control the camera You can zoom in or out an image by us...

Page 78: ...ing to the pattern M While the DVR controls a PTZ camera Web Viewer cannot control the camera Camera menu setup is only available for camera supporting the function Each function of PTZ is same to tha...

Page 79: ...t of OSD information that will be displayed on Live Viewer These buttons are used for capture print and save the image This displays a calendar at which you can search the recorded video This displays...

Page 80: ...d camera connected to the DVR in QUAD MODE CONNECTED DVR The IP of the connected DVR will be displayed And you can also select to turn on off the sound and change the OSD information format to your pr...

Page 81: ...address time camera number and current event state RECORD While in playback press this button saves the video data of the selected channel as an AVI file It is saved in the designated folder on your P...

Page 82: ...of the current PC SEARCHING THE RECORDED VIDEO IN THE TIMELINE It displays the recorded video data status on the DVR after a date is selected The normal mode displays the time ranging from 0 to 24 Ho...

Page 83: ...p Forward Performs one step forward by one frame Go to Last Moves the last time of recorded video in the time line VIEWER SETUP You can configure the DVR settings remotely on the network To configure...

Page 84: ...an hour ahead of the standard time of the time zone Language Select a preferred language for the DVR Holiday You can set specific dates to Holidays according to your preferences For more information r...

Page 85: ...l add a group User You can add change or remove a user or users Setup You can set the user permission System Management For more information refer to System Management in the System Setup menu Page 38...

Page 86: ...ge 42 Camera Camera You can configure the settings of the camera that is connected to the DVR PTZ You can configure the settings of the PTZ camera that is connected to the DVR Set the ID and protocol...

Page 87: ...TZ cameras and system keyboards that are connected to the RS 485 port of the DVR and configure the necessary settings POS Device You can set the channel preset and communication port of the POS device...

Page 88: ...o output mode for external monitoring Mode You can switch between live mode and play mode Record For more information refer to Setting the Recording Page 50 Recording Schedule If you set a recording s...

Page 89: ...ty Resolution Standard Event You can set the resolution frame rate and recording quality for each channel Record Option You can set the Disk End Mode Event For more information refer to Setting the Ev...

Page 90: ...type and the duration Motion Region Set the target motion detection area Video Loss Detection You can set the alarm output time if a video loss occurs Alarm Schedule You can schedule the alarm output...

Page 91: ...he network to check the current mode and the IP address Connection You can set the network connection route Protocol You can configure the protocol related settings DDNS You can check the DDNS setting...

Page 92: ...et the server that sends mails and specify if you use the authentication process Event You can set the event interval and specify which events the server sends mails for Group You can add a group to r...

Page 93: ...DVR Digital Video Recorder remotely and control the video playback and PTZ operations if confi gured in real time Key Features Remote access via Smart phone Voice Recognition 1 split and 4 split modes...

Page 94: ...viewer If you run the backup file viewer the backup data file will be automatically played Recommended System Requirements PCs with a lower specification than the recommended below may not fully suppo...

Page 95: ...ed video file You can move the gridline of the range bar to select a time point to play Speed A toggle button each time you press this button the Slow Playback icon changes its color to display it s a...

Page 96: ...240 PAL Up to 100ips 704x288 NTSC Up to 120ips 352x240 PAL Up to 100ips 352x288 Mode NTSC Manual Schedule Continuous Event Event Pre Post Time lapse 0 9 1 9 3 8 7 5 15 30 ips PAL Manual Schedule Conti...

Page 97: ...2 expansion bay up to 4 HDD each DVD Writer Back up YES USB Back up 2 USB Ports File Format Back up AVI BU DVR Play back EXE Include Player Security Password Protection 1Admin 10 Group 10 User per 1 G...

Page 98: ...use Remote Controller PTZ Protocol support Samsung E Samsung T Pelco D Pelco P Panasonic Phillips AD DIAMOND ERNA GE VCL TP VICON General Electrical Input Voltage Current DC12V 4A Power consumption Ma...

Page 99: ...English _99 APPENDIX PRODUCT OVERVIEW SRD 470 470D unit mm inches SRD 470D SRD 470 215 8 46 215 8 46 351 7 13 85 88 3 46 10 0 39 88 3 46 10 0 39 11 1 0 44...

Page 100: ...ser Category Details Factory Default System Settings Date Time Language Date Time Language Date YYYY MM DD Time Format 24 hours Time Zone GMT Time Synchronize OFF DST OFF Language English Permission M...

Page 101: ...Level1 Low Display Position Setup 30 Spot Out Spot Out 1 CH1 CH4 Mode Live Mode ALL Play Mode ALL Recording Recording Schedule Channel 1 Event Event Record Duration PRE Event OFF POST Event 1 min REC...

Page 102: ...tion 10 sec Alarm Schedule Alarm1 Event Sync Network Connection Mode Connection Connection Mode Static IP Bandwidth 2Mbps IP 192 168 1 200 Gateway 192 168 1 1 Subnet Mask 255 255 255 0 DNS 168 126 63...

Page 103: ...logo image repeatedly This may occur from a problem with the main board or the related software is corrupt Contact the nearest service center for more information The Channel button does not work on t...

Page 104: ...al HDD is supported by the DVR For the compatibility list contact the retailer where you purchased the DVR I have connected an external storage device external SATA HDD to the DVR but the DVR seems no...

Page 105: ...y if the event is of alarm motion detection and video loss If there is no event found recording will not perform Continuous Event Record If there is no event found Continuous recording will perform Wh...

Page 106: ...t shipment of this product by sending email to help cctv samsung com If you want to obtain the complete Corresponding Source code in the physical medium such as CD ROM the cost of physically performin...

Page 107: ...r the terms of Sections 1 and 2 above on a medium customarily used for software interchange or b Accompany it with a written offer valid for at least three years to give any third party for a charge n...

Page 108: ...9 The Free Software Foundation may publish revised and or new versions of the General Public License from time to time Such new versions will be similar in spirit to the present version but may differ...

Page 109: ...ot permit incorporating your program into proprietary programs If your program is a subroutine library you may consider it more useful to permit linking proprietary applications with the library If th...

Page 110: ...rough a computer network with no transfer of a copy is not conveying An interactive user interface displays Appropriate Legal Notices to the extent that it includes a convenient and prominently visibl...

Page 111: ...ion 7 apply to the code keep intact all notices of the absence of any warranty and give all recipients a copy of this License along with the Program You may charge any price or no price for each copy...

Page 112: ...uses represent the only significant mode of use of the product Installation Information for a User Product means any methods procedures authorization keys or other information required to install and...

Page 113: ...e then your license from a particular copyright holder is reinstated a provisionally unless and until the copyright holder explicitly and finally terminates your license and b permanently if the copyr...

Page 114: ...license you grant is automatically extended to all recipients of the covered work and works based on it A patent license is discriminatory if it does not include within the scope of its coverage prohi...

Page 115: ...urn for a fee END OF TERMS AND CONDITIONS GNU LESSER GENERAL PUBLIC LICENSE Version 2 1 February 1999 Copyright C 1991 1999 Free Software Foundation Inc 51 Franklin Street Fifth Floor Boston MA 02110...

Page 116: ...riant the GNU Linux operating system Although the Lesser General Public License is Less protective of the users freedom it does ensure that the user of a program that is linked with the Library has th...

Page 117: ...n specify that version instead if you wish Do not make any other change in these notices Once this change is made in a given copy it is irreversible for that copy so the ordinary GNU General Public Li...

Page 118: ...them and the Library together in an executable that you distribute 7 You may place library facilities that are a work based on the Library side by side in a single library together with other library...

Page 119: ...erving the free status of all derivatives of our free software and of promoting the sharing and reuse of software generally NO WARRANTY 15 BECAUSE THE LIBRARY IS LICENSED FREE OF CHARGE THERE IS NO WA...

Page 120: ...NEGLIGENCE OR OTHERWISE ARISING IN ANY WAY OUT OF THE USE OF THIS SOFTWARE EVEN IF ADVISED OF THE POSSIBILITY OF SUCH DAMAGE This product includes cryptographic software written by Eric Young eay cry...

Page 121: ...OR OTHERWISE ARISING IN ANY WAY OUT OF THE USE OF THIS SOFTWARE EVEN IF ADVISED OF THE POSSIBILITY OF SUCH DAMAGE The licence and distribution terms for any publically available version or derivative...

Page 122: ...nvironmentally safe recycling Business users should contact their supplier and check the terms and conditions of the purchase contract This product and its electronic accessories should not be mixed w...

Page 123: ...A Inc 100 Challenger Rd Suite 700 Ridgefield Park NJ 07660 Toll Free 1 877 213 1222 Direct 1 201 325 6920 Fax 1 201 373 0124 www samsungcctvusa com SAMSUNG TECHWIN EUROPE LTD Samsung House 1000 Hillsw...

Reviews: