background image

GB

41

B

40

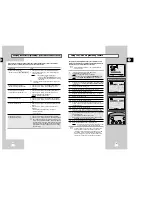
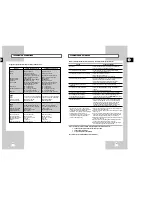
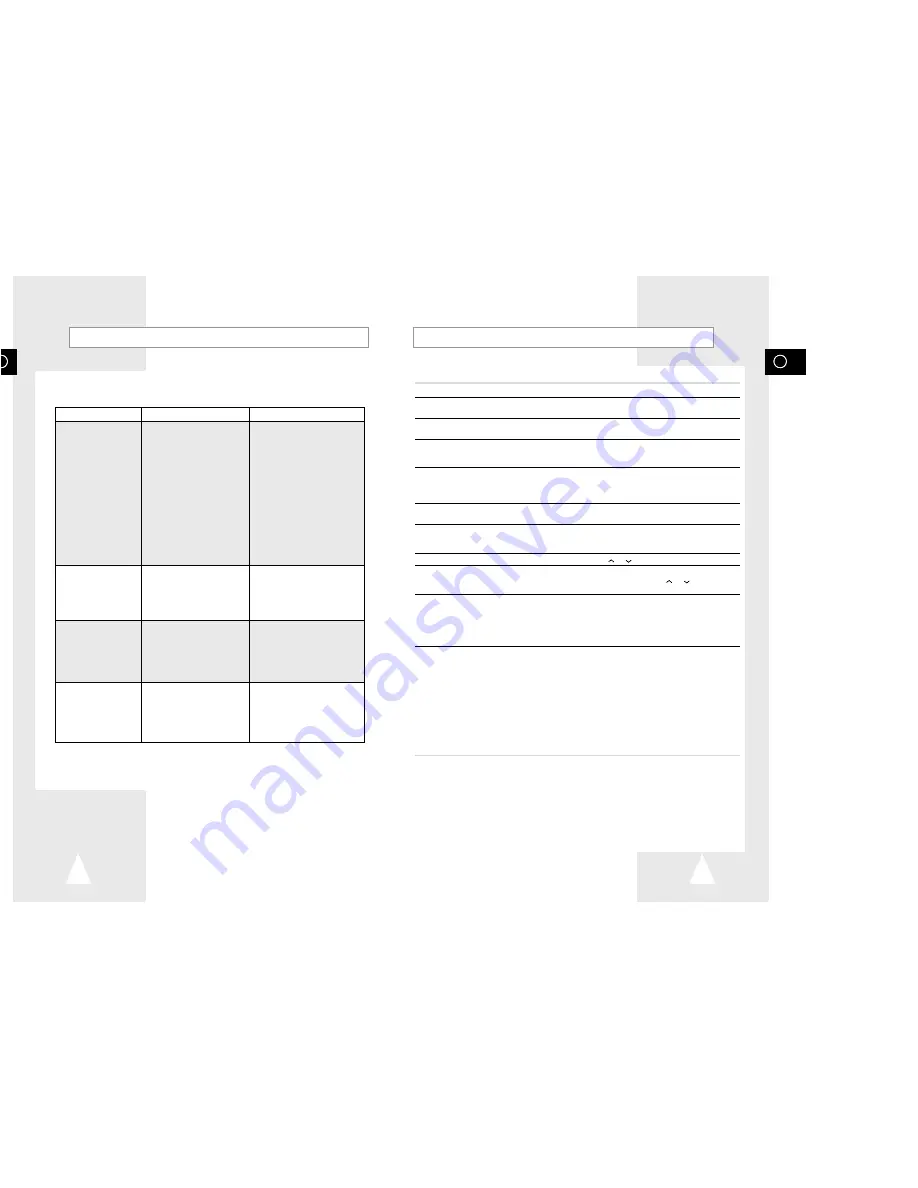
Problems and Solutions

Before contacting the Samsung after-sales service, perform the following simple checks.

Problem

Explanation/Solution

No power

Check that the power plug is connected to a wall outlet.

Have you pressed the STANDBY/ON button?

You cannot insert a video cassette

A video cassette can only be inserted with the window 
side up and the safety tab facing you.

The television programme was not recorded

Check the VCR aerial connections.

Is the VCR tuner properly set?

Check if the safety tab is intact on the cassette.

Timer recording was unsuccessful

Was the STANDBY/ON button pressed to activate the timer?

Re-check the recording start/stop time settings.

If there was a power failure or interruption during timer 
recording, the recording will have been cancelled.

No playback picture or the picture 

Check to see if you are using a prerecorded tape. 

is distorted

You cannot see normal broadcasts

Check the TUNER/EXTERNAL setting. It should be on 
TUNER.

Check the TV/VCR aerial connections.

Noise bars or streaks on playback

Press the TRK (

or

) buttons to minimize this effect.

When the 

II button is pressed

A still picture may have “noise bars”, depending on the 

during playback, the still picture

condition of the tape. Press the TRK (

or

) buttons during  

has severe “noise bars” streaks

SLOW motion to minimize this effect.

Video Head Cleaning 

If poor pictures appear on a variety of cassettes, the video 
heads may need cleaning. This is not a common problem 
and unless it appears, the heads should not be cleaned. 
When cleaning the video heads, read all instructions 
provided with the head cleaning cassette. Incorrect head 
cleaning can permanently damage the video heads.

If when tuning in your TV to the VCR test  

1. Remove the aerial input plug from the socket marked (aerial  

pattern your TV does not find the test pattern 

symbol) on the rear of the VCR. 

or the pattern when found suffers from 

2. Carry out the instructions “Tuning Your Television for the VCR”

interference, it may be due to the VCR output

(see page 14).

channel clashing with the normal TV 

3. Carry out the instructions “Setting the VCR output Channel” 

transmissions in your area. To prevent this 

(see page 16), move the channel number several channels 

you will need to change the VCR output 

down from the original setting. (example: from 60 to 57). 

channel in the following way 

4. Replace the aerial plug into the socket marked (aerial symbol) 

on the rear of the VCR. 

5. Re-tune your TV to the VCR again by following instructions 

“Tuning Your Television for the VCR” (page 14). 

6. If the problem still exists repeat steps 1 to 5 moving several 

more channels away from the original setting.

If you are unable to solve the problem after reading the above instructions, note:

The model and serial number on the rear of your VCR

The warranty information

A clear description of the problem

Then contact your nearest SAMSUNG after-sales service.

Technical Specifications

Design and specifications are subject to change without notice.

Format

VHS PAL standard

VHS PAL standard

Heads

Video: 4 rotary heads

Video: 2 rotary heads

Hi-Fi audio: 2 rotary heads
Audio/Control: 1 stationary head

Audio/Control: 1 stationary head

Erase: 1 full track erase head

Erase: 1 full track erase head

Receiving channel

UHF 21-69CH

UHF 21-69CH

Television system

STANDARD I-NICAM STEREO

STANDARD I

Luminance

FM azimuth recording

FM azimuth recording

Colour system

PAL: Down converted subcarrier 

PAL: Down converted subcarrier

phase shifted direct recording

phase shifted direct recording

NTSC PB on PAL TV

NTSC PB on PAL TV

Tape speed

SP    23.39 mm/sec

SP    23.39 mm/sec

LP    11.69 mm/sec

LP    11.69 mm/sec

Recording/playback time

SP    3 hours (E-180 Tape)

SP    3 hours (E-180 Tape)

LP    6 hours (E-180 Tape)

LP    6 hours (E-180 Tape)

REW time

About 60 sec in REW with E-180

About 100 sec in REW with E-180

VIDEO
Input

0.5 to 2.0 Vp-p; 75 ohm unbalanced

0.5 to 2.0 Vp-p; 75 ohm unbalanced

Output

1.0 ± 0.2 Vp-p; 75 ohm unbalanced

1.0 ± 0.2 Vp-p; 75 ohm unbalanced

Signal-to-noise ratio

Better than 43 dB (SP)

Better than 43 dB (SP)

Horizontal resolution

More than 240 lines

More than 240 lines

AUDIO
Input

-8 dBm, 47 Kohm unbalanced

-8 dBm, 47 Kohm unbalanced

Output

-8 ± 3 dBm, 1 Kohm unbalanced

-8 ± 3 dBm, 1 Kohm unbalanced

Wow and flutter (WTD)

0.4% max (SP)

0.4% max (SP)

Signal-to-noise ratio

68 dB min (IHF A filter)

42 dB min (IHF A filter)

Frequency response

20Hz - 20kHz

Power requirement

230V (AC 50-60 Hz)

230V (AC 50-60 Hz)

Power consumption

Approx. 17 watts

Approx. 15 watts

Operation temperature

41°F-104°F (5°C-40°C)

41°F-104°F (5°C-40°C)

Operation humidity

10%-75%

10%-75%

Weight

3.3 Kg (net)

3.3 Kg (net)

Dimensions (WxHxD)

360 x 94 x 285 mm

360 x 94 x 285 mm

MODEL                       SV-633B/SV-630B/SV-6303B                 SV-233B/SV-231B/SV-230B

Summary of Contents for SV-232B

Page 1: ...VIDEO CASSETTE RECORDER SV 633B SV 630B SV 6303B SV 233B SV 231B SV 230B Instruction Manual PAL www samsungvcr com ...

Page 2: ...nts in your house or the cable is not long enough to reach a power point you should obtain a suitable safety approved extension lead or consult your dealer for assistance However if there is no alternative to cutting off the plug remove the fuse and then safely dispose of the plug Do not connect the plug to a mains socket as there is a risk of shock hazard from the bared flexible cord IMPORTANT Th...

Page 3: ...er Equipment 12 Connecting the Audio Output Cable SV 633B SV 630B SV 6303B Only 13 Plug Auto Set Up 13 Tuning Your Television for the VCR 14 SETTING UP YOUR VIDEO CASSETTE RECORDER Inserting Batteries in the Remote Control 15 Setting the Date and Time 15 Displaying Hiding On Screen Information 16 Setting the VCR Output Channel 16 Presetting the Stations Automatically 17 Presetting the Stations Man...

Page 4: ... and above 40 C or to extreme humidity conditions less than 10 and more than 75 Do NOT expose the VCR to direct sunlight Do NOT expose the VCR to any liquids Do NOT place any objects on the VCR or remote control During a storm and or light ning unplug the VCR from the mains socket and aerial If the remote control is not used for a long period of time remove the batteries and store it in a cool dry...

Page 5: ...EED REPEAT OK 5 Record indicator 6 NICAM indicator SV 633B SV 630B SV 6303B Only 7 Hi Fi indicator SV 633B SV 630B SV 6303B Only STANDBY ON BUTTON SLOW BUTTON SV 633B SV 630B SV 6303B ONLY SHUTTLE BUTTON V LOCK BUTTON CLEAR AND RESET BUTTON INDEX BUTTON TUNER AV1 AV2 SV 633B SV 630B SV 6303B ONLY SELECTION BUTTON REPEAT SELECTION BUTTON MENU BUTTON RECORD BUTTON RECORDING SPEED SELECTION BUTTON PL...

Page 6: ... VCR is equipped with the following connectors Connector Location Type Direction Recommended Use AV1 EURO AV Rear SCART In Out Television Satellite receiver Other VCR OUT TO TV Rear 75 Ω Out Television coaxial IN FROM ANT Rear 75 Ω In Aerial coaxial Cable television network Satellite receiver AV2 IN Rear SCART In Satellite receiver Other VCR SV 633B SV 630B SV 6303B Only Audio output Rear Audio RC...

Page 7: ... sources 2 By means of RF Coaxial Cable After making this connection you must preset the station received through the satellite tuner RF output channel of the satellite receiver should be adjusted away from channel 60 which is used by the VCR e g re adjust to channel 65 AV1 TV TV Aerial Connector Aerial Aerial Connector 1 1 2 2 TV 1 AV2 IN By means of 21 pin Scart Cable SV 633B SV 630B SV 6303B On...

Page 8: ... Check that the VCR starts reading the cassette if not press II button 5 Start a scan on your television or set the television to UHF channel 60 6 Fine tune the television until the pictures and sound are obtained clearly 7 If you cannot find the pictures and sound or there is interference from nearby channels it may be necessary to change the setting of the VCR output channel see Setting the VCR ...

Page 9: ...lock and calendar used to Automatically stop programme recording Preset your VCR to record a programme automatically You must set the date and time when You purchase the video cassette recorder The power supply remains off for more than 60 minutes The time and date are set automatically from the broadcast signal If the signal is weak or ghosting occurs the time and date may not be set automati cal...

Page 10: ...CR OUTPUT CH CH60 END MENU AUTO SET UP PLEASE WAIT 2 I I END MENU YOUR DATA WILL BE LOST PRESS OK TO CONTINUE MENU TO EXIT SV 633B SV 630B SV 6303B OPTIONS OSD ON TAPE SELECT E180 COLOUR SYSTEM AUTO IPC ON END MENU SV 233B SV 231B SV 230B You do not need to preset the stations if you have already set them automatically see Plug Auto Set Up on page 13 Your VCR contains a built in tuner used to rece...

Page 11: ...ng menu is displayed 2 Press the corresponding or buttons to select the INSTALLATION option 3 Press the OK button to select this option Result The INSTALLATION menu is displayed 4 Press the corresponding or buttons until the cursor is placed in front of the MANUAL SET UP option 5 Press the button to select a MANUAL SET UP option Result The TV STATION TABLE menu is displayed 6 Press the or buttons ...

Page 12: ... control 2 Press the corresponding or buttons to select the INSTALLATION option 3 Press the OK button to select this option Result The INSTALLATION menu is displayed 4 Press the corresponding or buttons until the cursor is placed in front of the MANUAL SET UP option 5 Press the button to select this option Result The TV STATION TABLE menu is displayed 6 Press the corresponding or buttons until the...

Page 13: ...MENU twice to exit the menu USER SET PROG OPTIONS INSTALL CLOCK BONUS LANG OPTIONS OK END MENU OPTIONS OSD ON TAPE SELECT E180 COLOUR SYSTEM AUTO IPC ON FORMAT 16 9 AUTO NICAM ON END MENU Before recording a programme you must have preset the corres ponding station unless you are recording via an external video source If you have not done so refer to pages 17 and 18 1 Switch on the television 2 To ...

Page 14: ...V 6303B only source using the INPUT button for a satellite tuner or external video source Result The channel number is displayed and the programme can be seen on the television 5 Select the recording speed by pressing the SPEED button as many times as required see page 21 6 Hold the REC button down for a while to start recording Result The record indicator appears on the television screen and VCR ...

Page 15: ...is displayed When using the VIDEOPLUS function for the first time with stored stations the programme number flashes This one time you must enter the station number manually by pressing the or buttons Refer to the following page if The programme number or times flash You wish to modify the programme 4 If the programme and times are correct press the MENU button 5 Press the STANDBY ON button to acti...

Page 16: ...he duration of the timer recording to the actual recording time remaining on the tape loaded If there is insufficient tape to complete a timer recording in AUTO mode the VCR automatically switches to LP mode to record the whole programme PROG 1 JAN SAT 12 09 PR DAY START STOP V P 1 SA 9 12 00 12 50SP DELETE CLR RST MENU PROG 1 JAN SAT 12 09 PR DAY START STOP 1 SA 9 12 00 12 50SP DELETE CLR RST MEN...

Page 17: ...g a Preset Recording You can cancel any programmes that are Incorrect No longer required 1 Press the Q PRO button or Press MENU on the remote control Result The programming menu is displayed Press the OK button to select TIMER PROGRAMMING option Result The TIMER PROGRAMMING menu is displayed 2 Select the programme to be cancelled by pressing the or buttons 3 Press the CLR RST button to cancel the ...

Page 18: ...remote control Result The programming menu is displayed 2 Press the corresponding or buttons to select the USER SET option 3 Press the OK button to select this option Result The USER SET menu is displayed 4 Press the corresponding or buttons until the cursor is placed in front of the COLOUR SYSTEM option 5 Press the button to select AUTO PAL B W AUTO When playing back a cassette the system standar...

Page 19: ...C MENU AUDIO REPEAT 1 1 V LOCK SLOW 2 2 You can select the mode in which the sound is reproduced on the loudspeakers and AV outputs The following options are available Option Description L Used to listen to the sound on the left Hi Fi channel R Used to listen to the sound on the right Hi Fi channel MIX Used to listen to the mixed sound of the Hi Fi and normal channels MONO Used to listen to the so...

Page 20: ... press ll When you have been using the Frame by Frame function for more than about five minutes the VCR will auto matically play to protect the cassette and video heads Vertical stability When playing back frame by frame interference may be seen on the screen Press the V LOCK buttons to minimize this effect SLOW D SHUTTLE V LOCK C S Playing a Sequence Frame by Frame Playing a Sequence at Variable ...

Page 21: ...button to select this option Result The EASY OPERATION menu is displayed 4 Press the corresponding or buttons until the cursor is placed in front of the NO OF INTERVAL REPEAT option 5 To Press until Interval Repeat Play 5 10 15 is displayed choose an interval repeat of 5 10 or 15 times Cancel Interval Repeat Play OFF is displayed 6 On completion press MENU twice to exit the menu 7 To select Interv...

Page 22: ...io and video input connectors on the rear of your VCR as indicated on page 12 2 Insert a blank cassette in your VCR 3 Insert the pre recorded cassette in the other video source VCR or camcorder 4 Press the INPUT button to select the appropriate input on your VCR AV1 or AV2 SV 633B SV 630B SV 6303B only for the SCART input 5 Start playing back the cassette to be copied 6 Hold REC down for a while t...

Page 23: ...e the VCR output down from the original setting example from 60 to 57 channel in the following way 4 Replace the aerial plug into the socket marked aerial symbol on the rear of the VCR 5 Re tune your TV to the VCR again by following instructions Tuning Your Television for the VCR page 14 6 If the problem still exists repeat steps 1 to 5 moving several more channels away from the original setting I...

Page 24: ...E AVERY ELECTRONICS TEL 01622 682138 LANCASHIRE BLACKPOOL KENNETH GARDNER TEL 01253 824047 LANCASTER KENNETH GARDNER TEL 01524 64468 ROCHDALE CTV SERVICES TEL 01706 654983 LEICESTERSHIRE LEICESTER SOUNT VISION CENTRE TEL 01162 730444 LINCOLNSHIRE BRANSTON STUART WALLACE TEL 01522 791496 LONDON HIGH HOLBORN BERRYS OF HOLBORN TEL 0171 405 1157 LONDON ARMSTRONG SERVICES TEL 0181 523 0023 0051 WEST EA...

Reviews: