GB
17
NICAM
★
(SV-665GX/ SV-661GX
Only)
Selecting the Cassette Type
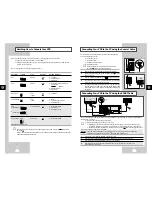
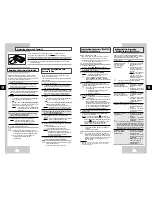
Switching between the TV and VCR
Modes
The TV/VCR button allows you to record one
channel with the VCR while you watch another
channel on the TV.
When the VCR
Your television...
indicator is...
On
The television receives the
picture from the VCR and you
can select channels with the
PROG/TRK (
or
❷
) / PROG
(
or
❷
) buttons on the VCR or
the remote control.
Off (or the VCR
The television receives the is
turned off)
picture from your home aerial or
cable television system as it did
before you connected the VCR.
You can then use the programme
(
or
❷
) buttons on your
television to select the channels.
To switch the VCR indicator on and off, simply press
the TV/VCR button.
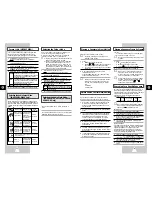
Selecting the Recording Speed
★
(SV-665GX/SV-661GX/
SV-465GX/SV-461GX Only)
You can record a cassette at two different speeds:
◆
SP (Standard Play)
◆
LP (Long Play)
In Long Play modes:
◆
Each cassette lasts twice as long
◆
The recording is of a slightly lower
quality
To record a cassette...
Press the SPEED button
on the remote control,
until...
In standard play mode
SP
is displayed.
In long play mode
LP
is displayed.
Type
Recording Time (in SP)
E-180
180 mins. or 3 hours
E-240
240 mins. or 4 hours
E-260
260 mins. or
4 hours and 20 mins.
E-300
300 mins. or 5 hours
GB
16
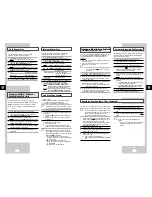
Clearing a Preset Station
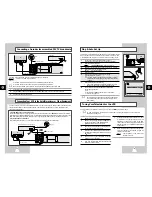
Presetting the Stations Manually
☛
You do not need to preset the stations
manually if you have already set them
automatically.
➢
To enable the VCR to decode a scrambled
TV station, the decoder must be switched on.
1 Press the MENU button on the remote control.
Result: The programming menu is displayed.
2 Press the corresponding
,
❷
or
➛
,
❿
buttons to
select the
INSTALLATION
option.
3 Press the OK button to select this option.
Result: The
INSTALLATION
menu is displayed.
4 Press the corresponding
or
❷
buttons, until the
MANUAL SET UP
option is selected.
5 Press the
❿
button to select
MANUAL SET UP
option.
Result: The
TV STATION TABLE
menu is displayed.
6 Press the
or
❷
buttons to select a programme
number as required.
7 Press the
❿
button to preset the station.
Result: The
MANUAL TUNING
menu is displayed.
8 Press the
➛
or
❿
buttons to start scanning.
Result: The frequency band is scanned and the first
station found is displayed.
If you know the number of the channel you want,
press the numeric buttons on the remote control for
example, for channel E21, first press “0” and then
press “2”, “1” (see page 29).
9 Press the
❷
button, until the
DECODER
is selected.
10 Press the
❿
button to activate or deactivate use of
the decoder for the TV station, if necessary.
11 Press the
or
❷
buttons until the
NAME
is selected.
12 To change the programme’s name, press the
❿
button.
Result: The first letter of the name flashes.
13 To...
Then...
Select a character
Press the
or
❷
button until
in the name
the required character is displayed
(letters, numbers or “-” character).
Move to the next or
Press the
❿
or
➛
buttons
previous character
respectively.
14 If you...
Then...
Wish to store the
◆
Press the corresponding
station displayed
or
❷
buttons, until the
MFT
is selected.
◆
Press the
➛
or
❿
buttons to
adjust the picture, if necessary.
◆
Press OK to store the station .
Do not wish to
◆
Press the corresponding
store the station
or
❷
buttons, until the
CH
displayed
is selected.
◆
Press the
➛
or
❿
buttons to
go on scanning the frequency
band and display the next
station
◆
Go back to the beginning of
Step
14
15 Repeat this procedure from Step 6 onwards, until all
the required stations have been stored.
16 On completion, press the MENU button three times to
exit the menu.
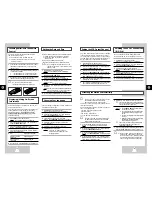
Changing the Preset Station Table
You can rearrange the preset TV stations according to your
own preferences programme number assigned to the station.
1 Press the MENU button on the remote control.
Result: The programming menu is displayed.
2 Press the corresponding
,
❷
or
➛
,
❿
buttons to
select the
INSTALLATION
option.
3 Press the OK button to select this option.
Result: The
INSTALLATION
menu is displayed.
4 Press the corresponding
or
❷
buttons, until the
MANUAL SET UP
option is selected.
Result: The
TV STATION TABLE
menu is displayed.
5 Press the corresponding
or
❷
buttons, until the
required preset TV programme is selected.
Result: The selected station is displayed at the same
time on the television screen.
6 To change the programme number assigned to a
station press the OK button on the remote control.
(For example, To move a TV station in programme 1
to programme 3)
7 Press the
or
❷
buttons to select required position.
And then press OK again to swap the position.
8 You can modify this station by repeating the same
procedure from Step
5 onwards.
9 On completion, press the MENU button three times
to exit the menu.
If you have stored a TV station:
◆
That you do not require
◆
At the wrong programme position
you can cancel it.
1 Press the MENU button on the remote control.
Result: The programming menu is displayed.
2 Press the corresponding
,
❷
or
➛
,
❿
buttons to
select the
INSTALLATION
option.
3 Press the OK button to select this option.
Result: The
INSTALLATION
menu is displayed.
4 Press the corresponding
or
❷
buttons, until the
MANUAL SET UP
option is selected.
5 Press the
❿
button to select this option.
Result: The
TV STATION TABLE
menu is displayed.
6 Press the corresponding
or
❷
buttons, until the
required preset TV station (PR) is selected.
7 Press the CLR/RST button.
8 Repeat the same procedure from Step 6 onwards
until all the required stations have been cleared.
9 On completion, press the MENU button three times
to exit the menu.
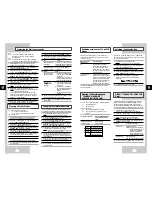
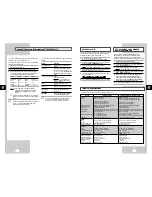
If you wish to use the tape counter to display the
time remaining on a cassette, you must indicate the
type of cassette inserted.
1 Press MENU on the remote control.
Result: The programming menu is displayed.
2 Press the corresponding
,
❷
or
➛
,
❿
buttons to
select the
USER SET
option.
3 Press the OK button to select this option.
4 Press the corresponding
or
❷
buttons, until the
TAPE SELECT
option is selected.
5 Press the
➛
or
❿
buttons as many times as
required, until the correct cassette length is
displayed.
E180 E240
E 300 E260
6 Press MENU twice to exit the menu.
NICAM programmes are divided into 3 types. NICAM
Stereo, NICAM Mono and Bilingual (transmission in
another language). NICAM programmes are always
accompanied by a standard mono sound broadcast and
you can select the desired sound. Please refer to page 22.
1 Press MENU on the remote control.
Result: The programming menu is displayed.
2 Press the corresponding
,
❷
or
➛
,
❿
buttons to
select the
USER SET
option.
3 Press the OK button to select this option.
Result: The
USER SET
menu is displayed.
4 Press the corresponding
or
❷
buttons, until the
NICAM
option is selected.
5 To...
Press
➛
or
❿
, until...
Mono mode
OFF
is displayed.
OFF
: Only set at this position to
record the standard mono
sound during a NICAM
broadcast if the stereo
sound is distorted due to
inferior reception conditions.
NICAM mode
ON
is displayed.
ON
: Normally set at this position.
6 On completion, press MENU twice to exit the menu.


