background image

25

24

3

LENGTH 2:30

SET LENGTH :

PRESS 

REC

OK

REC

      MENU

 SPEED          DUB        TV/VCR       TIMER

5

6

      VCR                INPUT

REPEAT

OL         PROG/TRK

DISP./

CT

          IPC                INPUT

REPEAT

RK          PROG

DISPLA

4

4

4

4

1

TRK          PROG

REC

      MENU

7

OK

REC

      MENU

 SPEED          DUB        TV/VCR       TIMER

5

6

      VCR                INPUT

REPEAT

OL         PROG/TRK

DISP./

CT

          IPC                INPUT

REPEAT

RK          PROG

DISPLA

4

4

4

4

(SV-266I/SV-262I)

(SV-667I/SV-466I)

(SV-266I/SV-262I)

(SV-667I/SV-466I)

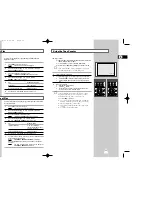
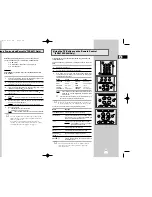
Recording a Programme with Automatic Stop

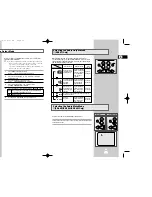
Recording a Programme Immediately

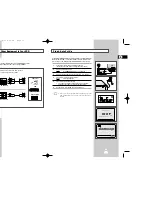
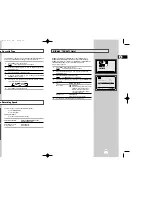
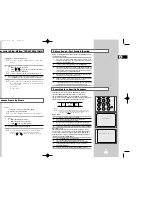
Protecting a Recorded Cassette

Video cassettes have a safety tab to prevent accidental erasure.
When this tab has been removed, you cannot record on the tape.

1

If you wish to protect a cassette, break off the tab using a small
screwdriver.

2

To re-record over a protected cassette (safety tab broken), cover
the hole with adhesive tape.

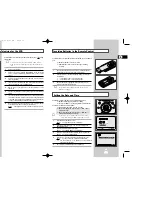
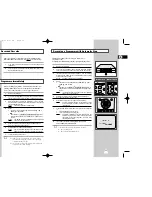
Before recording a programme, you must have preset the corres-
ponding station (unless you are recording via an external video
source). If you have not done so, refer to pages 18 and 19.

1

Switch on the television.

2

To monitor the programme being recorded, select the television
channel reserved for use with your VCR (or the AV input if used).

3

Insert the cassette on which the programme is to be recorded,
with the window visible and the safety tab intact or the opening
covered with adhesive tape.
Result:

The VCR is switched on automatically.

4

Select:

The station to be recorded using the PROG/TRK (

or 

) /

PROG (

or 

) buttons

or

The LINE IN 1 or LINE IN 2 

(SV-667I/SV-466I only) source

using the INPUT button for a satellite tuner or external video
source

Result:

The station number is displayed and the programme
can be seen on the television.

5

Select the recording speed by pressing the SPEED button as 
many times as required (see page 22).

6

Hold REC down for a while to start recording.
Result:

The record indicator appears on the television and VCR
display. An index is recorded on the tape (see page 33).

7

To stop recording, press 

once.

If the cassette is ejected when you start recording,
check that the safety tab is intact or the opening is
covered with adhesive tape.

If you reach the end of the tape while recording, the
cassette rewinds automatically.

This function enables you to record up to nine hours of
programmes. (LP)
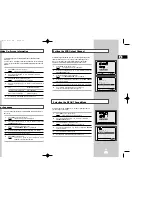
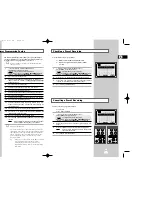
Your VCR stops automatically after the requested length of time.

1

Switch on the television.

2

To monitor the programme being recorded, select the television
channel reserved for use with your VCR (or the AV input if used)

3

Insert the cassette on which the programme is to be recorded,
with the window visible and the safety tab intact or the opening
covered with adhesive tape.
Result:

The VCR is switched on automatically.

4

Select:

The station to be recorded using the PROG/TRK (

or 

) /

PROG (

or 

) buttons

or

The LINE IN 1 or LINE IN 2 

(SV-667I/SV-466I only) source

using the INPUT button for a satellite tuner or external video
source

Result:

The channel number is displayed and the programme
can be seen on the television.

5

Select the recording speed by pressing the SPEED button as 
many times as required (see page 22).

6

Hold the REC button down for a while to start recording.
Result:

The record indicator appears on the television screen
and VCR display. An index is recorded on the tape
(see page 33).

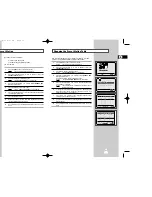
7

Press the REC button several times to increase the recording time
in:

30-minute intervals up to four hours

1-hour intervals up to nine hours (LP)

Result:

The length is displayed on the television displays. The
selected programme is recorded for the length of time
requested. At the end of that time, the VCR stops
recording automatically.

8

If you wish to cancel the recording before the end, press 
VCR STANDBY/ON (STANDBY/ON).

If the end of the tape is reached while recording:

The recording stops

The VCR automatically turns off

GB

GB

 02008A SV-667I/XFA-GB2  11/18/03 6:01 PM  Page 24

Summary of Contents for SV-667I

Page 1: ......

Page 2: ... Preset Station 20 Changing the Preset Station Table 21 RECORDING TELEVISION BROADCASTS Selecting the Cassette Type 22 Selecting the Recording Speed 22 NICAM SV 667I Only 23 Protecting a Recorded Cassette 24 Recording a Programme Immediately 24 Recording a Programme with Automatic Stop 25 Using the Timer Programming Feature 26 Checking a Preset Recording 27 Cancelling a Preset Recording 27 manual ...

Page 3: ...R from the mains socket and aerial If the remote control is not used for a long period of time remove the batteries and store it in a cool dry place ont e 28 Alignment Automatically SV 266I SV 262I Only 28 Alignment Manually 28 Control 29 Control SV 266I SV 262I Only 29 our Mode 30 dio Output Mode SV 667I Only 31 dio Mute Mode SV 466I SV 266I SV 262I Only 31 ENCE e in Slow Motion SV 667I SV 466I O...

Page 4: ...NNECTOR II Y ON PROG REC STOP II I II P S REW F F VIDEO CASSETTE COMPARTMENT PAUSE STILL BUTTON BY ON N STOP BUTTON RECORD BUTTON FF BUTTON REW BUTTON PROGRAM SELECTION BUTTONS PLAY BUTTON BY ON N PROGRAM SELECTION BUTTONS RECORD BUTTON F F BUTTON REW BUTTON Y ON LINE IN 2 PROG REC STOP PLAY REW F F TANDBY ON UTTON VIDEO CASSETTE COMPARTMENT SHUTTLE RING PLAY BUTTON RECORD BUTTON PROGRAM SELECTION...

Page 5: ...E X A TR K IPC INPU T REPE AT TRK PRO G AUD IO REC MEN U SPEE D DUB TV VC R TIME R DISP LAY REMOTE CONTROL OWNER S INSTRUCTIONS COAXIAL CABLE Display Indicator VIDEO STEREO 1 2 3 4 5 OK VCRSTANDBY ON TVSTANDBY ON SLOW SHUTTLE V LOCK CLR RST F ADV INDEX TV VCR INPUT REPEAT VOL PROG TRK AUDIO REC MENU SPEED DUB TV VCR TIMER DISP SELECT N N N N N N N NS N Y N Y N N N N N N N Y TV STANDBY ON BUTTON IN...

Page 6: ... cable supplied Otherwise no picture will be visible on the screen when the VCR is switched off Make sure that both the television and the VCR are switched off before connecting the cables 1 Connect the coaxial cable as indicated in the above section 2 Connect one end of the RCA Audio Video cable to the Video output and Audio output socket on the rear of the VCR 3 Plug the other end into the appro...

Page 7: ...t the auto scanning The number of stations automatically stored by the VCR depends on the number of stations that it has found 6 On completion press MENU twice to exit the menu TV TV LINE IN 1 VIDEO AUDIO LINE OUT AUTO SET UP PLEASE WAIT 60 I I END MENU CLOCK WED 12 00 1 JAN 2003 END MENU 2 Other Equipment to Your VCR d or video equipment to your VCR in different ways few examples of the connectio...

Page 8: ...t a scan on your television or set the television to UHF channel 40 6 Fine tune the television until the pictures and sound are obtained clearly 7 If you cannot find the pictures and sound or there is interference from nearby channels it may be necessary to change the setting of the VCR output channel see Setting the VCR Output Channel on page 17 and Problems and Solutions on page 42 8 When the pi...

Page 9: ...s option Result The INSTALLATION menu is displayed 4 Press the corresponding or buttons until the TV SYSTEM option is selected 5 Press the button to select I K or G 6 On completion press MENU twice to exit the menu Selecting the RF OUT Sound Mode Hiding On Screen Information our Language You can change the language in which information is displayed on the screen 1 Press MENU on the remote control ...

Page 10: ...g of Step 9 12 Repeat this procedure from Step 6 onwards until all the required stations have been stored 13 On completion press the MENU button three times to exit the menu INSTALL AUTO SET UP MANUAL SET UP TV SYSTEM I VCR OUTPUT CH CH36 END MENU TV STATION TABLE PR CH SYSTEM 1 005 I 2 I 3 I 4 I 5 I SWAPPING OK DELETE CLR RST MENU MANUAL TUNING SYSTEM I PR 1 CH MFT MEMORY OK END MENU the Stations...

Page 11: ...procedure from Step 5 onwards 9 On completion press the MENU button three times to exit the menu INSTALLATION PROG OPTIONS INSTALL CLOCK BONUS LANG INSTALL OK END MENU INSTALL AUTO SET UP MANUAL SET UP TV SYSTEM I VCR OUTPUT CH CH36 END MENU If you have stored a TV station That you do not require At the wrong programme position you can cancel it 1 Press the MENU button on the remote control Result...

Page 12: ...played NICAM SV 667I Only NICAM programmes are divided into 3 types NICAM Stereo NICAM Mono and Bilingual transmission in another language NICAM programmes are always accompanied by a standard mono sound broadcast and you can select the desired sound Please refer to page 31 1 Press MENU on the remote control Result The programming menu is displayed 2 Press the corresponding or buttons to select th...

Page 13: ...ge 33 7 To stop recording press once If the cassette is ejected when you start recording check that the safety tab is intact or the opening is covered with adhesive tape If you reach the end of the tape while recording the cassette rewinds automatically This function enables you to record up to nine hours of programmes LP Your VCR stops automatically after the requested length of time 1 Switch on ...

Page 14: ...ording the VCR compares the timer duration with the remaining time on the cassette Auto Tape Speed Select The VCR s Auto Tape Speed Select function compares the duration of the timer recording to the actual recording time remaining on the tape loaded If there is insufficient tape to complete a timer recording in AUTO mode the VCR automatically switches to LP mode to record the whole programme E g ...

Page 15: ... Eject the cassette EJECT assette icture Alignment Manually The Picture Alignment feature allows you to adjust the alignment manually to obtain the best possible picture When noise bars or streaks appear during playback adjust alignment manually by pressing the PROG TRK or TRK or buttons until the picture is clear and stable Result The tracking bar appears The image is adjusted The tracking bar di...

Page 16: ...When playing back a cassette the system standard is automatically selected by the VCR B W Black and White 6 On completion press MENU twice to exit the menu When monitoring a TV programme or playing back a Hi Fi recorded video tape press the AUDIO button to select a desired sound output As the AUDIO button is pressed the sound output and the indicator change as below Selecting the Audio Output Mode...

Page 17: ...ontinue searching for the next Index mark 4 If you want to watch the tape from a particular Index simply press II Index Skip Search This feature will enable you to fast forward rewind to a specific point on a tape E g if you have recorded 3 different programmes on a tape and you have rewound the tape to the beginning by using this feature you can go directly to the start of programme 2 simply by p...

Page 18: ... set repeat play to repeat the tape continuously from beginning to end 1 Press MENU on the remote control Result The programming menu is displayed 2 Press the corresponding or buttons to select the EASY OPERATION option 3 Press the OK button to select this option Result The EASY OPERATION menu is displayed 4 Press the corresponding or buttons until the REPEAT PLAY option is selected 5 To Press or ...

Page 19: ...rce VCR or camcorder 4 Press the INPUT button to select the appropriate input on your VCR LINE IN 1 for the rear input LINE IN 2 for the front input SV 667I SV 466I only 5 Start playing back the cassette to be copied 6 Hold REC down for a while to start recording on your VCR 7 When you have finished recording press on both VCRs If you wish to view the cassette being copied Your VCR must be connect...

Page 20: ...ol towards the television 3 Hold down the TV button and enter the two figure code corresponding to the brand of your television by pressing the appropriate numeric buttons Brand Codes Brand Codes SAMSUNG 01 to 06 PHILIPS 02 20 22 AKAI 09 23 SABA 13 14 22 to 24 GRUNDIG 09 17 21 SONY 15 16 LOEWE 02 THOMSON 13 14 24 PANASONIC 08 23 to 27 TOSHIBA 07 16 to 19 21 Result If your television is compatible ...

Page 21: ... 2 Vp p 75 ohm unbalanced Signal to noise ratio Better than 43 dB SP Better than 43 dB SP Horizontal resolution More than 240 lines More than 240 lines AUDIO Input 8 dBm 47 Kohm unbalanced 8 dBm 47 Kohm unbalanced Output 8 3 dBm 1 Kohm unbalanced 8 3 dBm 1 Kohm unbalanced Wow and flutter WTD 0 4 max SP 0 4 max Signal to noise ratio 68 dB min IHF A filter 42 dB min IHF A filter Frequency response 2...

Page 22: ...HF 495 25 CCIR 025 E25 UHF 503 25 CCIR 026 E26 UHF 511 25 CCIR 027 E27 UHF 519 25 CCIR 028 E28 UHF 527 25 CCIR 029 E29 UHF 535 25 CCIR 030 E30 UHF 543 25 CCIR 031 E31 UHF 551 25 CCIR 032 E32 UHF 559 25 CCIR 033 E33 UHF 567 25 CCIR 034 E34 UHF 575 25 CCIR 035 E35 UHF 583 25 CCIR 036 E36 UHF 591 25 CCIR 037 E37 UHF 599 25 CCIR 038 E38 UHF 607 25 CCIR 039 E39 UHF 615 25 CCIR 040 E40 UHF 623 25 CCIR 0...

Page 23: ......

Reviews: