


GB
9
GB
8
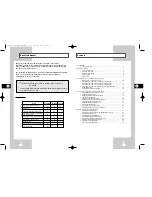
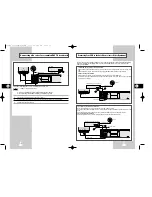
Accessories
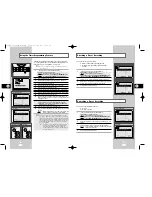
You have just purchased a SAMSUNG Video Cassette Recorder (VCR).
Together with your VCR, you will find the following accessories in the box.
O
K
ST
AN
DB
Y/O
N
EJ
EC
T
SL
O
W
SH
UT
TLE
V-L
OC
K
CL
R/R
ST
F.A
DV
IN
DE
X
A.T
RK
I
PC
IN
PU
T
RE
PE
AT
TR
K
P
RO
G
AU
DIO
RE
C
M
EN
U
SP
EE
D
D
UB
TV
/VC
R
T
IM
ER
DIS
PL
AY
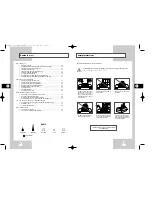
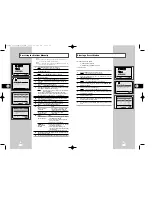
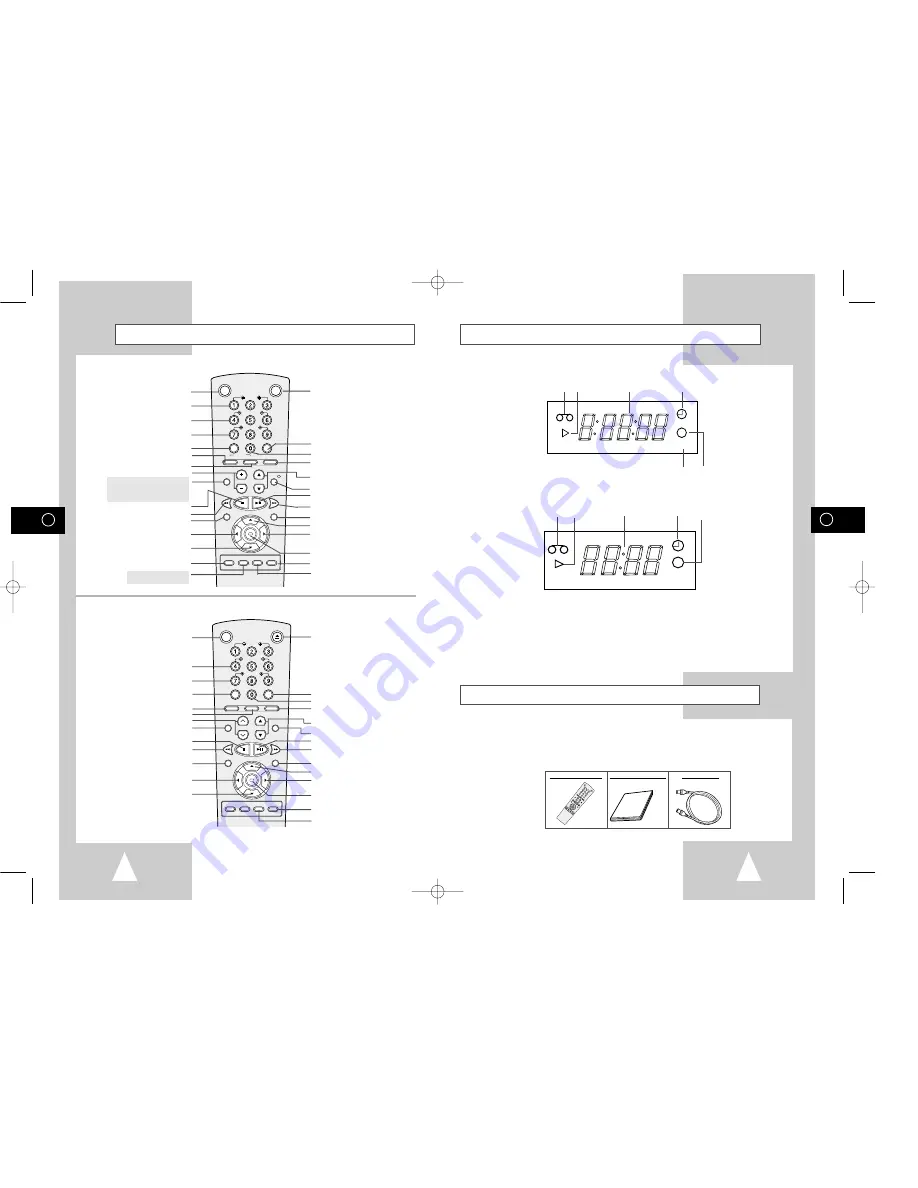
REMOTE CONTROL
OWNER’S INSTRUCTIONS
COAXIAL CABLE
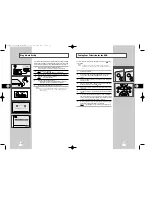
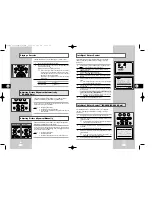
Infrared Remote Control
OK
STANDBY/ON EJECT
SLOW
SHUTTLE
V-LOCK
CLR/RST F.ADV INDEX
A.TRK IPC INPUT
REPEAT
TRK PROG
AUDIO
REC
MENU
SPEED DUB TV/VCR TIMER
DISPLAY
EJECT BUTTON
INDEX BUTTON
FRAME ADVANCE BUTTON
TUNER, LINE IN 1, LINE IN 2 SELECTION /
REPEAT SELECTION BUTTON
PROGRAMME SELECTION BUTTON
DISPLAY BUTTON
PLAY/PAUSE/STILL BUTTON
FAST-FORWARD/FORWARD
SEARCH BUTTON
MENU BUTTON
MENU SELECTION UP BUTTON
MENU SELECTION BUTTON
OK BUTTON
TIMER BUTTON
TV/VCR SELECTION BUTTON
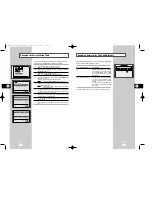
(SV-H620K/SV-H80K)
(SV-H30K)
OK
VCR STANDBY/ON TV STANDBY/ON
SLOW
SHUTTLE
V-LOCK
CLR/RST F.ADV INDEX
TV VCR INPUT
REPEAT
VOL PROG/TRK
AUDIO
REC
MENU
SPEED DUB TV/VCR TIMER
DISP./
SELECT
-/--
VCR STANDBY/ON BUTTON
SLOW BUTTON
SHUTTLE BUTTON
V-LOCK BUTTON
CLEAR AND RESET BUTTON
TV BUTTON
VCR BUTTON
VOLUME BUTTONS
AUDIO MODE SELECTION BUTTON
★
(SV-H620K ONLY)
AUDIO MUTE BUTTON
★
(SV-H80K ONLY)
STOP BUTTON
REWIND/REVERSE PICTURE SEARCH BUTTON
RECORD BUTTON
MENU SELECTION BUTTON
MENU SELECTION DOWN BUTTON
RECORDING SPEED SELECTION BUTTON
AUDIO DUBBING BUTTON
★
(SV-H620K ONLY)
TV STANDBY/ON BUTTON
INDEX BUTTON
FRAME ADVANCE BUTTON
TUNER, LINE IN 1, LINE IN 2 SELECTION /
REPEAT SELECTION BUTTON
PROGRAMME SELECTION /
TRACKING BUTTONS
DISPLAY BUTTON
PLAY/PAUSE/STILL BUTTON
FAST-FORWARD/FORWARD
SEARCH BUTTON
MENU BUTTON
MENU SELECTION UP BUTTON
MENU SELECTION BUTTON
OK BUTTON
TIMER BUTTON
TV/VCR SELECTION BUTTON
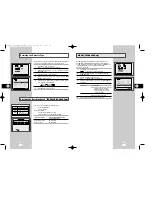
STANDBY/ON BUTTON
SHUTTLE BUTTON
V-LOCK BUTTON
CLEAR AND RESET BUTTON
AUTO TRACKING BUTTON
IPC BUTTON
TRACKING BUTTONS
AUDIO MUTE BUTTON
STOP BUTTON
REWIND/REVERSE PICTURE
SEARCH BUTTON
RECORD BUTTON
MENU SELECTION BUTTON
MENU SELECTION DOWN BUTTON
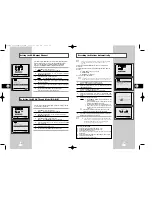
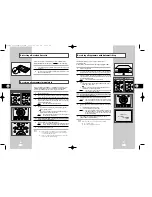
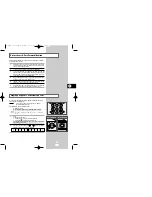
Display Indicator
1 Cassette loaded indicator
2 PLAY indicator
3 Multi-function display
4 Timer indicator
5 REC indicator
6 STEREO indicator
VIDEO
STEREO
STEREO
5
6
1
2
3
4 5
1
2
3
4
(SV-H620K)
(SV-H80K/SV-H30K)
01823S SV-H620K/DIN-GB1 3/21/03 5:02 PM Page 8


