background image

27

26

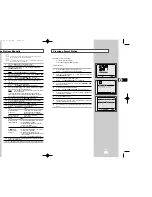
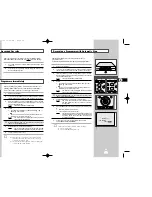
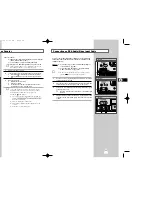
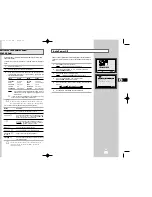
Recording a Programme with Automatic Stop

3

This function enables you to record up to nine hours of
programmes. (LP)
Your VCR stops automatically after the requested length of time.

1

Switch on the television.

2

To monitor the programme being recorded, select the television
channel reserved for use with your VCR (or the AV input if used)

3

Insert the cassette on which the programme is to be recorded,
with the window visible and the safety tab intact or the opening
covered with adhesive tape.
Result:

The VCR is switched on automatically.

4

Select:

The station to be recorded using the PROG/TRK (

œ

or 

) /

PROG (

œ

or 

) buttons

or

The AV1, AV2 or AUX source using the INPUT button for a
satellite tuner or external video source

Result:

The channel number is displayed and the programme
can be seen on the television.

With SV-L620K/SV-L80K, you can select the recording speed
(SP/LP). Press the SPEED button.

5

Hold the REC button down for a while to start recording.
Result:

The record indicator appears on the television screen
and VCR display. An index is recorded on the tape
(see page 36).

6

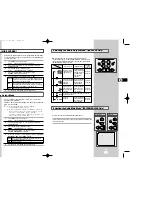
Press the REC button several times to increase the recording time
in:

30-minute intervals up to four hours

1-hour intervals up to nine hours (LP)

Result:

The length is displayed on the television displays. The
selected programme is recorded for the length of time
requested. At the end of that time, the VCR stops
recording automatically.

7

If you wish to cancel the recording before the end, press 
VCR STANDBY/ON (STANDBY/ON).

If the end of the tape is reached while recording:

The recording stops

The VCR automatically turns off

LENGTH 2:30

SET LENGTH :

PRESS 

REC

OK

REC

      MENU

 SPEED          DUB        TV/VCR       TIMER

5

      VCR                INPUT

REPEAT

OL         PROG/TRK

DISP./

CT

          IPC                INPUT

REPEAT

RK          PROG

DISPLA

4

4

4

4

(SV-L620K/SV-L80K)

(SV-L30K)

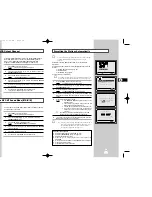
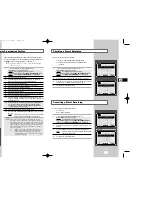
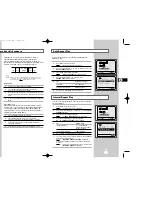
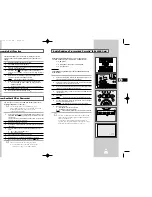
Recording a Programme Immediately

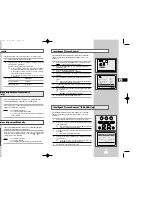
Protecting a Recorded Cassette

Video cassettes have a safety tab to prevent accidental erasure.
When this tab has been removed, you cannot record on the tape.

1

If you wish to protect a cassette, break off the tab using a small
screwdriver.

2

To re-record over a protected cassette (safety tab broken), cover
the hole with adhesive tape.

1

Before recording a programme, you must have preset the corres-
ponding station (unless you are recording via an external video
source). If you have not done so, refer to pages 19 and 20.

1

Switch on the television.

2

To monitor the programme being recorded, select the television
channel reserved for use with your VCR (or the AV input if used).

3

Insert the cassette on which the programme is to be recorded,
with the window visible and the safety tab intact or the opening
covered with adhesive tape.
Result:

The VCR is switched on automatically.

4

Select:

The station to be recorded using the PROG/TRK (

œ

or 

) /

PROG (

œ

or 

) buttons

or

The AV1, AV2 or AUX source using the INPUT button for a
satellite tuner or external video source

Result:

The station number is displayed and the programme
can be seen on the television.

With SV-L620K/SV-L80K, you can select the recording speed
(SP/LP).  Press the SPEED button.

5

Hold REC down for a while to start recording.
Result:

The record indicator appears on the television and VCR
display. An index is recorded on the tape (see page 36).

6

To stop recording, press 

once.

If the cassette is ejected when you start recording,
check that the safety tab is intact or the opening is
covered with adhesive tape.

If you reach the end of the tape while recording, the
cassette rewinds automatically.

TRK          PROG

REC

      MENU

6

OK

REC

      MENU

 SPEED          DUB        TV/VCR       TIMER

5

      VCR                INPUT

REPEAT

OL         PROG/TRK

DISP./

CT

          IPC                INPUT

REPEAT

RK          PROG

DISPLA

4

4

4

4

(SV-L620K/SV-L80K)

(SV-L30K)

GB

GB

02001A SV-L620K/DIN-GB2  6/19/03 11:55 AM  Page 26

Summary of Contents for SV-L30K

Page 1: ......

Page 2: ... Clearing a Preset Station 21 Changing the Preset Station Table 22 Switching between the TV and VCR Modes 23 RECORDING TELEVISION BROADCASTS Selecting the Cassette Type 24 Selecting the Recording Speed SV L620K SV L80K Only 24 NICAM SV L620K Only 25 Protecting a Recorded Cassette 26 Recording a Programme Immediately 26 Recording a Programme with Automatic Stop 27 Using the Timer Programming Featur...

Page 3: ...from the mains socket and aerial If the remote control is not used for a long period of time remove the batteries and store it in a cool dry place ont e 30 Alignment Automatically SV L30K Only 30 Alignment Manually 30 Control 31 Control SV L30K Only 31 DE SCREEN 32 our Mode 32 io Output Mode SV L620K Only 33 io Mute Mode SV L80K SV L30K Only 33 ENCE e in Slow Motion 34 ce Frame by Frame 34 ast For...

Page 4: ...OP PROG I II P S STANDBY ON REW F F II II AUDIO UX STANDBY ON BUTTON STANDBY ON BUTTON STANDBY ON BUTTON UX AUDIO OCKETS UX AUDIO SOCKETS PROGRAM SELECTION BUTTONS PROGRAM SELECTION BUTTONS PLAY BUTTON PLAY BUTTON F F BUTTON F F BUTTON REW BUTTON REW BUTTON STOP BUTTON STOP BUTTON PAUSE STILL BUTTON PAUSE STILL BUTTON RECORD BUTTON RECORD BUTTON VIDEO CASSETTE COMPARTMENT VIDEO CASSETTE COMPARTMEN...

Page 5: ...RCH BUTTON MENU BUTTON MENU SELECTION UP BUTTON MENU SELECTION BUTTON OK BUTTON TIMER BUTTON TV VCR SELECTION BUTTON OK VCRSTANDBY ON TVSTANDBY ON SLOW SHUTTLE V LOCK CLR RST F ADV INDEX TV VCR INPUT REPEAT VOL PROG TRK AUDIO REC MENU SPEED DUB TV VCR TIMER DISP SELECT ON ON ON ON ON ON ON NS ON Y ON Y ON ON ON ON ON ON ON Y TV STANDBY ON BUTTON INDEX BUTTON FRAME ADVANCE BUTTON TUNER LINE IN 1 LI...

Page 6: ...atellite receiver Other VCR Audio Video RCA In Audio system Camcorder Other VCR Audio Video RCA In Audio system Camcorder Other VCR Audio RCA Out Audio Hi Fi system 75 Ω Out Television coaxial 75 Ω In Aerial coaxial Cable television network Satellite receiver nect an audio or video system to your VCR ensure that all elements are entation supplied with your equipment for detailed connection instruc...

Page 7: ...er equipment is connected to the AV2 socket Plug the SCART Cable with satellite receiver or other equipment into the AV2 DEC EXT socket on the rear of the VCR After making this connection select the source by pressing the INPUT button for the AV2 input sources 2 By means of RF Coaxial Cable After making this connection you must preset the station received through the satellite tuner Satellite Rece...

Page 8: ... Problems and Solutions on page 45 8 When the picture and sound are perfectly clear store this channel at the desired programme position on the television Result That programme is now reserved for use with your VCR SV L620K SV L80K SV L30K OK REC MENU 4 VCRSTANDBY ON S STANDBY ON S 2 2 Set Up Your VCR will automatically set itself up when it is plugged into the mains for the first time TV stations...

Page 9: ...ENU OPTIONS Date and Time Your VCR contains a 24 hour clock and calendar used to Automatically stop programme recording Preset your VCR to record a programme automatically You must set the date and time when The power supply remains off for more than 1 hour SV L620K only The power supply remains off for more than 30 sec SV L80K SV L30K only Do not forget to reset the time when you change clocks fr...

Page 10: ... WAIT 2 I I END MENU YOUR DATA WILL BE LOST PRESS OK TO CONTINUE MENU TO EXIT INSTALLATION PROG OPTIONS INSTALL CLOCK BONUS LANG INSTALL OK END MENU INSTALL AUTO SET UP MANUAL SET UP TV SYSTEM K VCR OUTPUT CH CH36 END MENU Your VCR output channel may need to be changed if the pictures suffer from interference or if your TV cannot find the pictures Also you can change the VCR output channel to adju...

Page 11: ...t The TV STATION TABLE menu is displayed 6 Press the or buttons to select a programme number as required 7 Press the button to preset the station Result The MANUAL TUNING menu is displayed 8 Press the corresponding or buttons until the CH is selected Press the or buttons to start scanning Result The frequency band is scanned and the first station found is displayed If you know the number of the ch...

Page 12: ...ess the MENU button on the remote control Result The programming menu is displayed 2 Press the corresponding or buttons to select the INSTALLATION option 3 Press the OK button to select this option Result The INSTALLATION menu is displayed 4 Press the corresponding or buttons until the MANUAL SET UP option is selected And then press the button to select this option Result The TV STATION TABLE menu...

Page 13: ...long play mode LP is displayed NICAM SV L620K Only NICAM programmes are divided into 3 types NICAM Stereo NICAM Mono and Bilingual transmission in another language NICAM programmes are always accompanied by a standard mono sound broadcast and you can select the desired sound Please refer to page 33 1 Press MENU on the remote control Result The programming menu is displayed 2 Press the correspondin...

Page 14: ...S REC OK REC MENU SPEED DUB TV VCR TIMER 5 VCR INPUT REPEAT OL PROG TRK DISP CT IPC INPUT REPEAT RK PROG DISPLA 4 4 4 4 SV L620K SV L80K SV L30K a Programme Immediately a Recorded Cassette Video cassettes have a safety tab to prevent accidental erasure When this tab has been removed you cannot record on the tape 1 If you wish to protect a cassette break off the tab using a small screwdriver 2 To r...

Page 15: ...by pressing the buttons or INPUT to select the AV1 AV2 or AUX input sources 4 Press to select the recording day 5 Select the required day by pressing the or buttons 6 Press to select the recording start time 7 Select the required hour value by pressing the or buttons 8 Press to select the minutes 9 Select the required minute value by pressing the or buttons 10 Press to select the recording end tim...

Page 16: ...ars automatically 5 On completion press the IPC button again Intelligent Picture Control SV L30K Only OPTIONS OSD ON TAPE SELECT E180 COLOUR SYSTEM AUTO FORMAT 16 9 AUTO NICAM ON IPC ON END MENU CLR RST F ADV INDEX A TRK IPC INPUT REPEAT TRK PROG AUDIO DISPLAY 1 PICTURE IPC OFF SOFTEN SHARPEN ON OFF USER SET PROG OPTIONS INSTALL CLOCK BONUS LANG OK END MENU OPTIONS This function allows you to play...

Page 17: ...the corresponding or buttons to select the USER SET option 3 Press the OK button to select this option Result The USER SET menu is displayed 4 Press the corresponding or buttons until the FORMAT 16 9 option is selected 5 Press the button to select AUTO ON OFF AUTO Set when you use a wide TV The VCR detects wide TV programmes and normal TV programmes automatically when playing back and recording ON...

Page 18: ......

Page 19: ......

Page 20: ...om a particular Index simply press II Index Skip Search This feature will enable you to fast forward rewind to a specific point on a tape E g if you have recorded 3 different programmes on a tape and you have rewound the tape to the beginning by using this feature you can go directly to the start of programme 2 simply by pressing the INDEX button 1 Press the INDEX to start the Index search 2 Press...

Page 21: ... tape counter Indicates the elapsed time in the play and record modes hours minutes and seconds Is reset when a cassette is inserted in the VCR Allows you to find the beginning of a sequence easily If the remaining time is to be calculated correctly you must indicate the type of cassette being used 1 Insert a cassette in your VCR 2 To set the tape counter to zero at the beginning of a sequence Pre...

Page 22: ...ate input on your VCR AV1 or AV2 for the SCART input AUX for the RCA input 5 Start playing back the cassette to be copied 6 Hold REC down for a while to start recording on your VCR 7 When you have finished recording press on both VCRs If you wish to view the cassette being copied Your VCR must be connected as usual to the television see page 11 for further details F ADV With the Audio Dubbing func...

Page 23: ...television by pressing the appropriate numeric buttons Brand Codes Brand Codes SAMSUNG 01 to 06 PHILIPS 02 20 22 AKAI 09 23 SABA 13 14 22 to 24 GRUNDIG 09 17 21 SONY 15 16 LOEWE 02 THOMSON 13 14 24 PANASONIC 08 23 to 27 TOSHIBA 07 16 to 19 21 Result If your television is compatible with the remote control it is switched off It is now programmed to operate with the remote control If several codes a...

Page 24: ...nnel transmissions in your area To prevent this see page 18 move the channel number several channels you will need to change the VCR output down from the original setting example from 36 to 33 channel in the following way 4 Replace the aerial plug into the socket marked aerial symbol on the rear of the VCR 5 Re tune your TV to the VCR again by following instructions Tuning Your Television for the ...

Page 25: ...4 V H 327 25 CCIR 125 S25 V H 335 25 CCIR 126 S26 V H 343 25 CCIR 127 S27 V H 351 25 CCIR 128 S28 V H 359 25 CCIR 129 S29 V H 367 25 CCIR 130 S30 V H 375 25 CCIR 131 S31 V H 383 25 CCIR 132 S32 V H 391 25 CCIR 133 S33 V H 399 25 CCIR 134 S34 V H 407 25 CCIR 135 S35 V H 415 25 CCIR 136 S36 V H 423 25 CCIR 137 S37 UHF 431 25 CCIR 138 S38 UHF 439 25 CCIR 139 S39 UHF 447 25 CCIR 140 S40 UHF 455 25 CCI...

Reviews: