background image

INSTALLATION

Leave some space 

Space at least 15cm between the washer 
and the wall.

Place the washer on a sturdy flat surface.

If the washer is placed on an uneven or weak 
surface, noise or vibration may be occured.
(Allowable is 2˚)

Never install the washer near water.

Do not place the washer in steamy rooms or 
where the washer is directly exposed  to rain.
Moisture may destroy the electrical insulation 
and  cause  an electrical shock hazard.

Avoid direct sunlight or heating devices.

As plastic and electrical components are 
affected by direct heat, never place the
washer near heaters, boilers,etc. 
Do not place under direct sunlight.

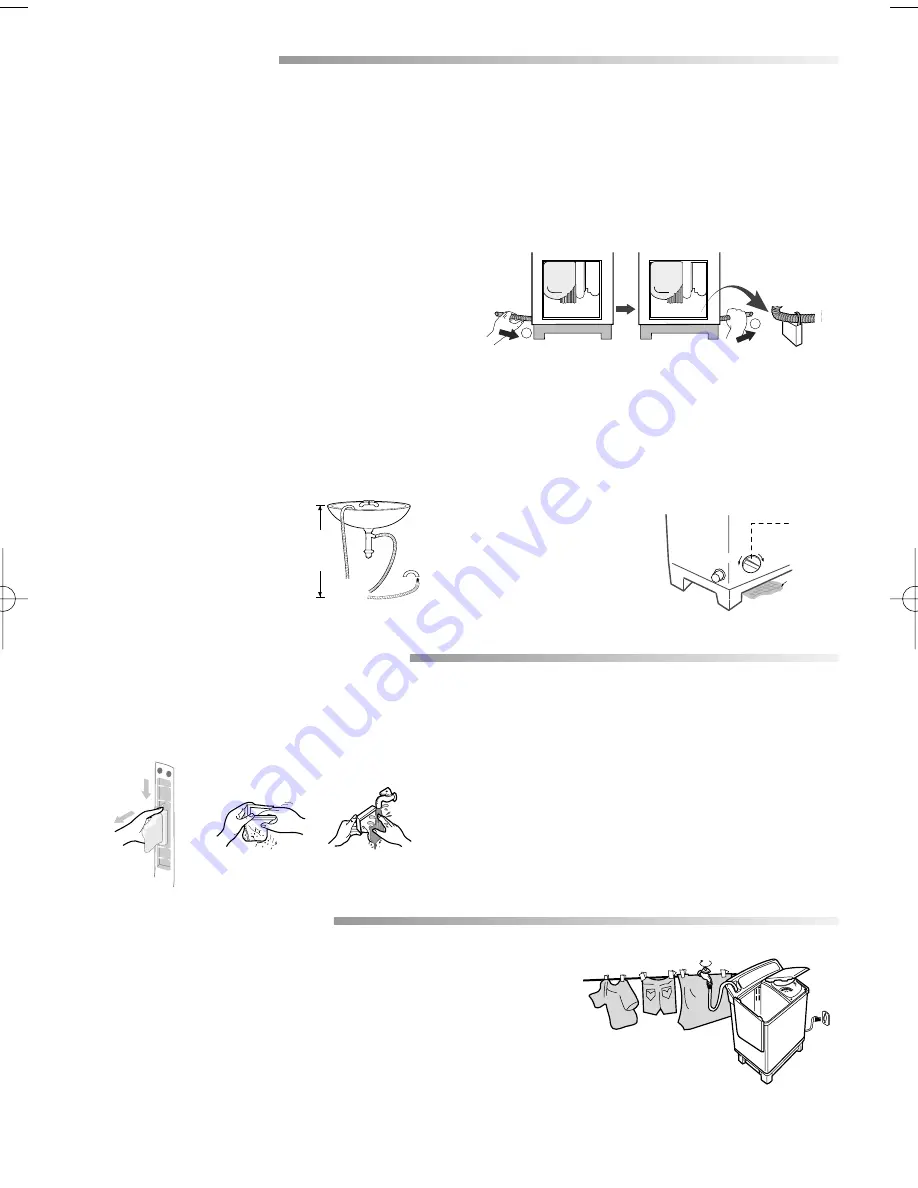
CHANGING THE POSITION OF THE DRAIN HOSE

Before attempting to change the position of the drain hose,

disconnect the plug from the outlet.

1. Route the drain hose inside the machine.
2.Take out the drain hose from the opposite hole and

insert the drain hose into the hose holder.

CLEANING THE MACHINE

5

ENVIRONMENT

CLENING THE LINT FILTER

-If the dregs are piled up in the lint filter after finishing 

the wash, push down and pull it out as shown in figure.

-Wash the filter net in water.

CLEANING THE WASH TUB

Wipe off strains on the cabinet and operation panel
with soft cloth.
Do not use benzene, thinners, cleanser, or wax, 
nor scrub the washer with a brush.
Painted surfaces or plastic parts will be damaged.

2

1

70~80cm

1. Place a rag under the washer filter

not to wet the floor.

2. Rotate the filter counterclockwise 

and pull out the filter.

3. Remove dirts and rotate 

the filter clockwise until it 
locks in position.

Rag

Close

Open

Filter

HOW TO CLEAN THE FILTER 

(In case drain pump)

Install the drain hose about 
70~80cm above the ground 
for pump model.

Hose holder

AFTER OPERATION

1. Remove the power cord from the outlet.
2. Take out the laundry.
3. Close the water tap and disconnect the water supply hose.
4. Clean the washing machine.

-Periodical cleaning will extend the life of your washing machine.
-Do not spray the unit water or use tinner, benzene, alcohol etc, for cleaning it.

Summary of Contents for SWT70A1

Page 1: ...AUTIONS 1 PRECAUTIONS WHEN OPERATING 1 DESCRIPTION OF PARTS 2 CONTROL PANEL 2 WASHING PROCEDURE 3 To wash 3 Spin dry 3 Rinsing 4 Over flow rinse 4 Additional rinse 4 INSTALLATION 5 Environment 5 Changing the position of the drain hose 5 How to clean the filter 5 CLEANING THE MACHINE 5 AFTER OPERATION 5 LAUNDRY GUIDE 6 MAINTENANCE 6 TROUBLESHOOTING 6 SPECIFICATIONS ...

Page 2: ...present using a moderate water supply pressure only Be sure to cover with the inner cover on laundry before spinning This prevents laundry from being tossed out and damaged Before washing check all pockets If nails or pins remain in pockets they may damage the washer or clothes Close the water tap a little if the water pressure is too high To avoid water splashes close the wash tub lid Never splas...

Page 3: ... SELECTOR Refer to the washing time and washing selection 3 CYCLE SELECTOR This is used to set the Washing Rinsing or draining 2 DESCRIPTION OF PARTS INNER LID When you open this lid while the spin basket is spinning the spinning will be stopped by breake system POWER CORD EARTH WIRE WATER DRAIN HOSE WITHOUT PUMP SPIN DRYER BASKET SPIN DRYER HATCH WASH TUB LID Be sure to keep the lid closed during...

Page 4: ...the L lower water level by carefully and add the detergent 6 Load laundry in the wash tub and fill water to proper water level 7 Set the WASH TIMER 1 15minutes 8 After washing set the CYCLE SELECTOR KNOB to DRAIN for drain 1 Transfer the clothes into the spin basket and arrange the clothes evenly 3 Close the spin dryer lid 4 Set the SPIN DRY TIMER 1 5minutes 2 Be sure to attach the safety cover an...

Page 5: ...l drain water is clean 2 3 cycle 2 Set the WASH TIMER 6 8minutes 4 Set the CYCLE SELECTOR KNOB to DRAIN 1 2 3 4 5 6 inner lid safety cover After rinsing you can select this course for more effective rinse Don t select only this course for rinse Load the laundry evenly into the spin basket Supply water for about 1minute Adjust the water flow to prevent overflow from the wash tub After stopping wate...

Page 6: ... holder CLEANING THE MACHINE 5 ENVIRONMENT CLENING THE LINT FILTER If the dregs are piled up in the lint filter after finishing the wash push down and pull it out as shown in figure Wash the filter net in water CLEANING THE WASH TUB Wipe off strains on the cabinet and operation panel with soft cloth Do not use benzene thinners cleanser or wax nor scrub the washer with a brush Painted surfaces or p...

Page 7: ...ALLEN BETWEEN THE BASKET AND TUB For safty pull the power supply plug out of the socket TYPE OF LAUNDRY Thin synthetic fiber wool cotton thick cotton SPIN DRY TIME DETERGENT TIME 1min 1 2min 3 5min 5min AMOUNT OF DETER GENT 32 g 40 g 50 g WATER LEVEL Low 32l Mid 40l High 50l The amount of detergent is average Follow the instruction detergent printed on the package for amount of detergent Choose th...

Page 8: ... x 995 0 05 0 78 MPa 0 5 8 0 kg f cm2 With out pump With pump SWT70A1 SWT70B1 SWT75A1 IF YOU NEED HELP Do not hesitate to call your local samsung service center They will be willing to help you Be sure to give them your name address telephone number and the purpose of the call SPECIFICATION DC68 00100A 29 kg 31 kg 50 50 l Washing 1Hour Spinning 15minutes ...

Reviews: