background image


Check List


Before calling for service, check the information in this section to see if you can remedy any 
problems yourself. If you do need assistance, please call 

the phone number on the 

Information section or contact your dealer

.


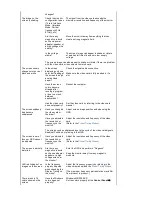
Symptom

Check List

Solutions

No images on the 
screen. I cannot turn 
on the monitor.

Is the power cord 
connected 
properly?

Check the power cord connection and supply.

Can you see "

No 

Connection, 
Check Signal 
Cable

" on the 

screen? 

Check the signal cable connection.

If the power is on, 
reboot the computer 

to see the initial 
screen(the login 
screen), which can 
be seen. 

If the initial screen (the login screen) appears, boot 
the computer in the applicable mode (the safe 

mode for Windows ME/XP/2000) and then change 
the frequency of the video card. 
(Refer to the 

Preset Timing Modes

Note: If the initial screen (the login screen) does 
not appear, 

contact a service center or your dealer


Can you see "

Sync. 

Out of Range, 
68.7kHz 168Hz PP

on the screen? 

You can see this message when the signal from 

the video card exceeds the maximum resolution 
and frequency that the monitor can properly 
handle.  
 
Adjust the maximum resolution and frequency that 
the monitor can handle properly. 

There is no image 
on the screen.  
Is the power 
indicator on the 
monitor blinking at 1 
second intervals?

The monitor is in PowerSaver mode. 
 
Press any key on the keyboard to activate the 
monitor and restore the image on the screen.

I cannot see the On 

Screen Display.

Have you locked 

the 

On Screen 

Display (OSD)


Menu to prevent 

Unlock the OSD by pressing the Menu button for at 

least 10 seconds. 

Summary of Contents for SyncMaster 1100MB

Page 1: ...Install drivers Install programs SyncMaster 1100MB...

Page 2: ...ted Important to read and understand at all times Do not disassemble Disconnect the plug from the outlet Do not touch Grounding to prevent an electric shock Power When not used for extended periods of...

Page 3: ...g and wire nor place heavy objects upon them which could cause damage z This may cause an electric shock or fire Do not connect too many extension cords or plugs to an outlet z This may cause fire Ins...

Page 4: ...may fall and cause harm to someone walking by specifically children Do not place the product on the floor z Someone specifically children could trip over it Keep any flammable objects such as candles...

Page 5: ...with a slightly moistened soft fabric Do not clean Flat monitor with water Use a water diluted mild detergent Some detergents contain significant amounts of alcohol based solvents which can damage col...

Page 6: ...his may cause an electric shock or fire z Refer servicing to qualified service personnel If your monitor does not operate normally in particular if there are any unusual sounds or smells coming from i...

Page 7: ...mage to the cable Do not cover the vents on the monitor cabinet z Bad ventilation may cause a breakdown or fire Do not place water containers chemical products or small metal objects on the monitor z...

Page 8: ...he power cord Make sure that all cables including the antenna cable and cables connected to other devices are disconnected before moving the monitor z Failure to disconnect a cable may damage it and l...

Page 9: ...make sure the following items are included with your monitor If any items are missing contact your dealer Unpacking Monitor and Stand Some models include a stand attached Manual Warranty Card User s...

Page 10: ...er Natural Color software MagicTune software Cable Power Cord D sub Cable BNC Cable Sold separately Stand Stand Front 1 MagicBright button MagicBright is a new feature providing optimum viewing enviro...

Page 11: ...owerSaver described in the manual for further information regarding power saving functions For energy conservation turn your monitor OFF when it is not needed or when leaving it unattended for long pe...

Page 12: ...Bottom 1 Tilt Swivel Base You can separate the base from the monitor...

Page 13: ...r computer 2 2 Connecting to a new Macintosh Connect the monitor to the Macintosh computer using the D SUB connection cable 2 3 Connecting to an old Macintosh Connect your monitor to the Macintosh usi...

Page 14: ...Removing the Base Attaching the Base 1 Place the monitor upside down on a flat work surface 2 Align the tabs on the base with the corresponding slots on the bottom of the monitor 3 Press the base ont...

Page 15: ...o another Follow the directions appropriate for the operating system you have Prepare a blank disk and download the driver program file at the Internet web site shown here z Internet web site http www...

Page 16: ...s 2000 Windows Me Windows NT Linux When prompted by the operating system for the monitor driver insert the CD ROM included with this monitor Driver installation is slightly different from one operatin...

Page 17: ...tab then click Advanced 4 Click the Properties button on the Monitor tab and select Driver tab 5 Click Update Driver and select Install from a list or then click Next button 6 Select Don t search I w...

Page 18: ...can see following message window then click the Continue Anyway button Then click OK button 9 Click the Close button then click OK button continually This monitor driver is under certified MS logo an...

Page 19: ...ion Case2 If the Properties button is active click the Properties button then follow next steps continually Microsoft Windows Millennium Operating System 1 Click Start Setting Control Panel 2 Double c...

Page 20: ...lor of the images printed out by a printer or other images scanned by a scanner or a digital camera are not the same as those shown on the monitor The Natural Color S W is the very solution for this p...

Page 21: ...Select Setting Control Panel on the Start menu and then double click Add Delete a program Select Natural Color from the list and then click the Add Delete button...

Page 22: ...nding on the contents of the image you are watching 2 Exit Use this button to Exit the active menu or the OSD 3 These buttons allow you to highlight and adjust items in the menu Adjust Brightness and...

Page 23: ...ext Internet Entertain and Custom Each mode has its own pre configured brightness value You can easily select one of four settings by simply pressing the MagicBright control button Normal Brightness F...

Page 24: ...Menu Description Adjust Brightness and Contrast OSD Lock Unlock Menu Description OSD Lock Unlock After pushing the MENU button more than 10 seconds OSD function is locked unlocked...

Page 25: ...t icon Menu Description Play Stop Position Follow these instructions to change the position of the monitor s entire display Size Follow these instructions to change the size of the monitor s entire di...

Page 26: ...display is too large or small Pinbalance Adjust the pinbalance setting when the sides of the display are bowed towards the left or right Sidepin Corner Adjust the sidepin corner correction when the si...

Page 27: ...just the image according to your preferences The original setting for the color temperature is 5000K Follow these steps to change the color temperature and adjust individual R G B color balance Standa...

Page 28: ...e clear moir adjustments Linearity Adjust the linearity setting when the display image is compressed at the top or bottom Focus Use the focus control when the image displayed on the screen is not shar...

Page 29: ...nals higher than 1 0V which causes the display to be very bright For those video cards use this feature to select the 1 0 V Level Sync Input Type Use this menu to set your monitor to the correct type...

Page 30: ...where the OSD menu appears on your monitor Menu Duration The menu will automatically turn off if no adjustments are made for a certain time period You can set the amount of time the menu will wait be...

Page 31: ...ning process with easy to understand instructions and back ground patterns designed for each monitor control The display settings for each user can be saved providing an easy way to select display cha...

Page 32: ...sert the installation CD into the CD ROM drive 2 Click the MagicTune installation file 3 Select installation Language Click Next 4 When the InstallationShield Wizard window appears click Next 5 Select...

Page 33: ...6 Choose a folder to install the MagicTune program 7 Click Install 8 The Installation Status window appears...

Page 34: ...Installation Problems The installation of MagicTune can be affected by such factors as the video card motherboard and the network environment See Troubleshooting if you have trouble during installati...

Page 35: ...z Windows 2000 z Windows XP Home Edition z Windows XP Professional Hardware z 32MB Memory above z 25MB Hard disk space above For more information visit the MagicTune website It is recommended using Ma...

Page 36: ...b Definition Picture Tab Definition MagicTune allows for quick accurate tuning of the display with the ability to easily save and use monitor configurations that are best suited for you z OSD mode may...

Page 37: ...ature providing the optimum viewing environment depending on the contents of the image you are watching Currently four different modes are available Text Internet Game Sport Movie and Custom Each mode...

Page 38: ...ation values Color Tone Color Control n m l k j i n m l k j Color Tone The tone of the color can be changed z 5000K 6500K 9300K z Reset Color Control Adjusts of the monitor image color You can change...

Page 39: ...n m l k j n m l k j n m l k j n m l k j n m l k j n m l k j n m l k j n m l k j n m l k j n m l k j Geometry 1 Adjusts the Position Size and Rotation values z Position z Size z Rotation Geometry 2 Adj...

Page 40: ...on on the task tray menu The menus are not displayed if the Enable System Tray is deselected in Options Basic Settings z Select Language The language chosen affects only the language of the OSD Help V...

Page 41: ...User ID Shows the user ID that is register in PC Server IP Write down the server IP Department Write down the department Location Write down the location Version Displays the version of MagicTune...

Page 42: ...u If the program runs on Windows XP go to Control Panel in the Start menu 2 Click the Add or Remove Programs icon in Control Panel 3 In the Add or Remove Programs screen scroll down to find MagicTune...

Page 43: ...e Check if your monitor is able to support MagicTune This feature is only supported by those monitors that are registered on our homepage Check for the monitor before purchasing it as out of date mode...

Page 44: ...homepage and download and install the latest driver For more information about the video card contact the card manufacturer As the Highlight program uses the communication lines please exit the Highli...

Page 45: ...wnload the installation software for MagicTune MAC the graphic card visit our website to check the compatible graphic card list provided http www samsung com monitor magictune MagicTune doesn t work p...

Page 46: ...mode for Windows ME XP 2000 and then change the frequency of the video card Refer to the Preset Timing Modes Note If the initial screen the login screen does not appear contact a service center or yo...

Page 47: ...rring to the video card manual The screen suddenly has become unbalanced Have you changed the video card or the driver Adjust screen image position and size using the OSD Have you adjusted the resolut...

Page 48: ...or video graphic card Download the latest program The program can be downloaded http www samsung com monitor magictune Visit the MagicTune website and download the installation software for MagicTune...

Page 49: ...r monitor is functioning properly Self Test Feature Check 1 Turn off both your computer and the monitor 2 Unplug the video cable from the back of the computer 3 Turn on the monitor If the monitor is f...

Page 50: ...puter or the video card this can cause the monitor to become blank have poor coloring noise Sync Out of Range 68 7kHz 168Hz PP etc In this case first check the source of the problem and then contact a...

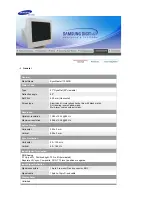
Page 51: ...lution Optimum resolution 1280 x 1024 85 Hz Maximum resolution 2048 x 1536 80 Hz Active Display Horizontal 393 3 mm Vertical 295 3 mm Synchronization Horizontal 30 130 kHz Vertical 50 160 Hz Input Sig...

Page 52: ...built in power management system called PowerSaver This system saves energy by switching your monitor into a low power mode when it has not been used for a certain amount of time The monitor automati...

Page 53: ...x 1440 112 500 75 000 297 00 VESA CVT 2048 x 1536 120 384 75 000 340 50 Horizontal Frequency The time to scan one line connecting the right edge to the left edge of the screen horizontally is called H...

Page 54: ...4B2 Canada Tel 1 800 SAMSUNG 7267864 Fax 905 542 1199 http www samsung ca MAXICO Tel 01 800 SAMSUNG 7267864 Fax 01 800 849 1743 http www samsung com mx U S A Samsung Electronics America Inc 105 Challe...

Page 55: ...sung com latin ECUADOR Tel 1 800 10 7267 http www samsung com latin EL SALVADOR Tel 800 6225 http www samsung com latin GUATEMALA Tel 1 800 299 0013 http www samsung com latin JAMAICA Tel 1 800 234 72...

Page 56: ...min http www www samsung fr GERMANY Samsung Electronics GmbH Samsung House Am Kronberger Hang 6 65824 Schwalbach Ts Deutschland Tel 01805 121213 0 12 Min Fax 01805 121214 0 12 Min http www samsung de...

Page 57: ...SAMSUNG ELECTRONICA PORTUGUESA S A Rua Cesario Verde no 5 4 Piso 2795 753 Queijas Portugal Tel 80 8 200 128 http www samsung pt SLOVAKIA Tel 0850 123 989 SPAIN Tel 902 10 11 30 http www samsung com es...

Page 58: ...samsung com hk INDIA 2nd fl CC 28 Nehru Enclave Kalkaji New Delhi India 110019 Tel 3030 8282 1600 1100 11 http www samsung com in INDONESIA Pusat Pelayanan Purna Jual PT SEIN Samsung Electronics Indon...

Page 59: ...8 http www samsung com th TAIWAN Tel 0800 329 999 http www samsung com tw VIETNAM Tel 1 800 588 889 Fax 084 08 8965566 http www samsung com vn SOUTH AFRICA Samsung Electronics South Africa PTY LTD Uni...

Page 60: ...image information can be shown on the screen Example If the resolution is 1024 X 768 this means the screen is composed of 1024 horizontal dots horizontal resolution and 768 vertical lines vertical res...

Page 61: ...Class B This device is a Class B digital apparatus For Safety and EMC compliance guide you may refer to Regulatory Guide...

Page 62: ...ment or human health from uncontrolled waste disposal please separate this from other types of wastes and recycle it responsibly to promote the sustainable reuse of material resources Household users...

Reviews: