background image


Model 


Self-Test Feature Check


Check the following items yourself before calling for assistance. Contact a Service Center for 
problems that you cannot solve by yourself.  
 

Self-Test Feature Check

 | 

Not Optimum Mode

 | 

Maintenance and Cleaning

 | 

Symptoms & Recommended Actions


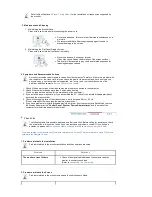
1. Self-Test Feature Check

Your monitor provides a self test feature that allows you to check whether your monitor is functioning 
properly. 

1. Turn off both your computer and the monitor.  
2. Unplug the video cable from the back of the computer.  
3. Turn on the monitor.  

 
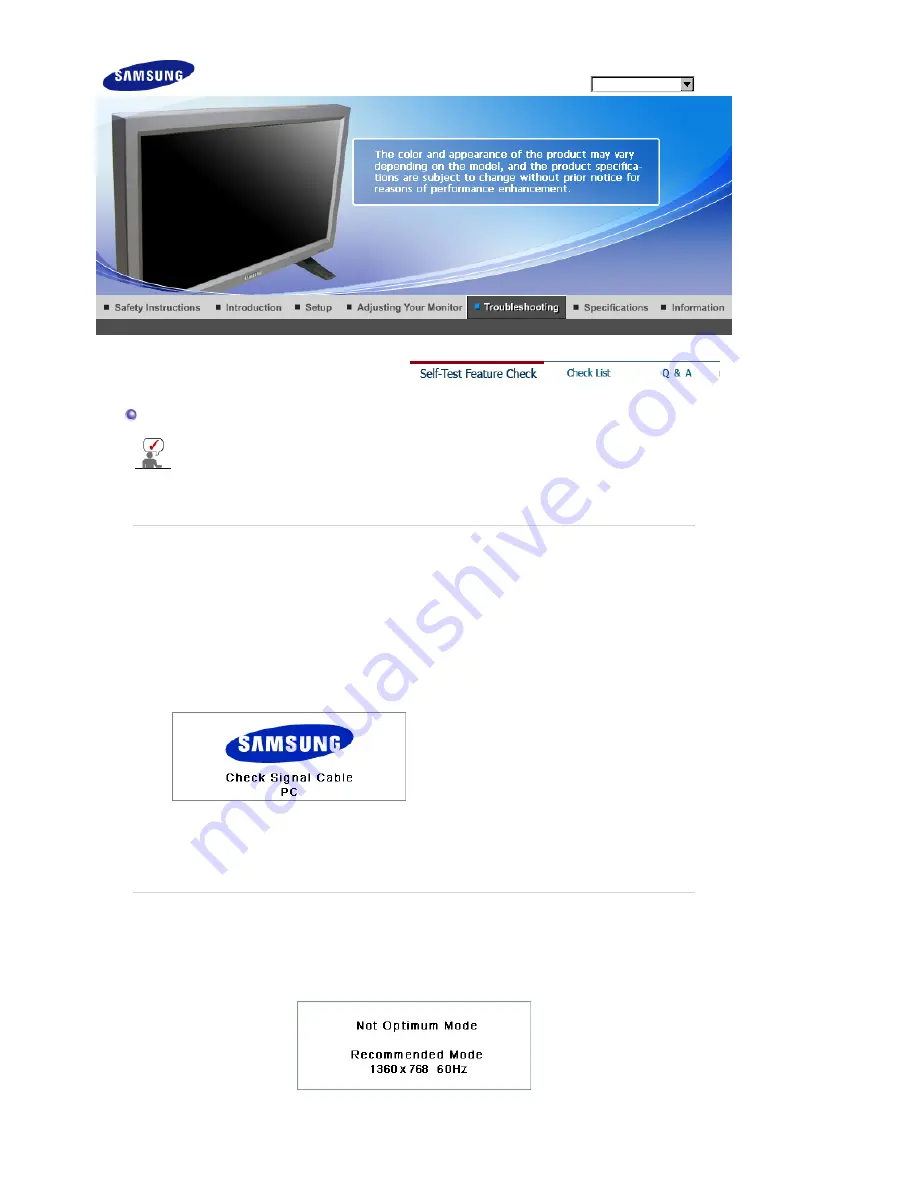
The figure shown below ("Check Signal Cable") appears on a black background when the monitor is 
working normally even though no video signal is detected: While in the Self-Test mode, the LED 
power indicator remains green and the figure moves around on the screen. 


4. Turn off your monitor and reconnect the video cable; then turn on both your computer and the 

monitor.  

If your monitor screen remains blank after using the previous procedure, check your video controller and 
computer system; 

your monitor is functioning properly


2. Not Optimum Mode 

You can even view the screen at a resolution of 1360X768. However, you will receive the following 
message for a minute; You can choose to change the screen resolution or stay in the current mode during 
that time. And if the resolution is more than 85Hz, you will see the black screen because the monitor does 
not support over 85Hz.  


Summary of Contents for SyncMaster 320P

Page 1: ...SyncMaster 320P...

Page 2: ...ohibited Important to read and understand at all times Do not disassemble Disconnect the plug from the outlet Do not touch Ground to prevent an electric shock Power When not used for an extended perio...

Page 3: ...jects upon them which could cause damage z This may cause electric shock or fire Do not connect too many extension cords or plugs to one outlet z This may cause fire Do not disconnect the power cord w...

Page 4: ...or shelf z Dropping the product may cause damage to the product or the person carrying it Do not place the product on an unstable or small surface area z Place the product on an even and stable surfac...

Page 5: ...or ventilation may cause an increase in the internal temperature of the product resulting in a shortened component life and degraded performance Keep the plastic packaging bag out of children s reach...

Page 6: ...Do not remove the cover or back z This may cause electric shock or fire z Refer to a qualified servicing company If your monitor does not operate normally in particular if there is any unusual sound o...

Page 7: ...r fire z If a foreign substance enters the monitor unplug the power cord and contact the Service Center Keep the product away from combustible chemical sprays or inflammable substances z This may caus...

Page 8: ...cable and cables connected to other devices are disconnected before moving the monitor z Failure to disconnect cables may damage it and cause fire or electric shock Make sure there are more than two p...

Page 9: ...ly specified standard batteries Do not use new and used batteries together z This may cause a battery to break or leak and may cause fire injury or contamination damage The batteries and rechargeable...

Page 10: ...any items are missing contact your dealer Contact a local dealer to buy optional items This stand is not for the Floor Standing Type Unpacking Monitor Manual Quick Setup Guide Warranty Card Not avail...

Page 11: ...D Sub Cable Power Cord Speaker Wire Cable Sold separately Wall Mount KIT Speaker Set Stand KIT DVI Cable Other Remote Control Batteries AAA X 2 Cover Hole BNC to RCA Adapter Jack Semi Stand...

Page 12: ...he source is only allowed for external devices that are connected to the monitor at the time To switch Screen modes PC BNC DVI AV S VIDEO Component Click here to see an animation clip 6 PIP Push the P...

Page 13: ...ghtly depending on the monitor model 1 RS232C OUT IN RS232C Serial PORT MDC Multiple Display Control Program Port 2 DVI IN HDCP PC Video Connection Terminal Using a DVI Cable DVI D to DVI D DVI mode D...

Page 14: ...nnection Terminal Input 11 AV OUT S VIDEO S Video Connection Terminal S Video mode Output 12 AV IN S VIDEO S Video Connection Terminal Input 13 EXT SPEAKER 8 EXT Speaker Connection Terminal 14 MONITOR...

Page 15: ...garding cable connections Remote Control The performance of the remote control may be affected by a TV or other electronic device operating near the monitor causing a malfunction due to interference w...

Page 16: ...ess 100 then press 2 and 1 This fuction does not work for this monitor 7 VOL Adjusts the audio volume Click here to see an animation clip 8 MUTE Pauses mutes the audio output temporarily This is displ...

Page 17: ...rtain Internet Text Custom 19 STILL When pressing this button STILL is displayed at the bottom center of the screen Press the button once to freeze the screen Press it again to unfreeze 20 BBE Recreat...

Page 18: ...Mechanical Layout Monitor Head Stand Speaker Installation VESA Bracket Wall Bracket Installation 1 Mechanical Layout 2 Monitor Head...

Page 19: ...tion Information Please contact your nearest Samsung Distributor to place an order After your order is placed installation professionals will visit you and install the bracket z At least 2 persons are...

Page 20: ...ipped with the product A Wall Bracket B Set Bracket C Screw 8 EA D Screw 3 EA E Wood Screw 7 EA F Anchor 7 EA G Installation Guide How to assemble the Wall Mount Bracket 1 1 Mark the location of hole...

Page 21: ...sert three Hangers of the set bracket B into the grooves of the wall bracket A 2 Fix set bracket B and wall bracket A with screws D Before installing the set on the wall connect the cables to the set...

Page 22: ...Right stand Make sure to install the stand with the Caution label folded backwards 1 A Cover Protector is used to protect the hole at the bottom of the monitor where the stand is inserted Be sure to r...

Page 23: ...separately and cover the hole using the Cover Hole when attaching the wall mount kit 2 Ensure that the parts are inserted in the right direction and in the right place M4 L15 3 Insert the stand into t...

Page 24: ...e are 3 ways to connect the signal cable to your monitor Choose one of the following 2 1 Using the D sub Analog connector on the video card Connect the signal cable to the 15 pin RGB port on the back...

Page 25: ...h as VCRs or Camcorders are connected via the AV IN VIDEO or AV IN S VIDEO of the monitor using an S VHS or BNC cable 2 Connect the Audio L and Audio R terminals of a VCR or Camcorders to the monitor...

Page 26: ...the A V output jacks on the camcorder They are usually found on the side or back of the camcorder Connect a set of audio cables between the AUDIO OUTPUT jacks on the camcorder and the AV AUDIO IN L AU...

Page 27: ...n on the front of the monitor or on the remote control For an explanation of Component video see your Set Top Box owner s manual 6 Connecting Speakers 1 Fasten the SET and the speaker using the screws...

Page 28: ...ction 3 Power Control 4 Input Source Control 5 Image Size Control PC BNC DVI AV S Video Component DVI HDCP 6 Time Control 7 PIP Control PIP Size PIP Source 8 Settings Control Picture Picture PC Audio...

Page 29: ...ard of serial communication is used for communicating between a PC and a display Therefore a serial cable should be connected between the serial port on a PC and the serial port on a display 2 Main Sc...

Page 30: ...ct all or Clear to select or clear all displays 6 Use Grid to view brief information on the selected display 7 Select a display in Display Selection 8 Use the Control Tools to control the displays The...

Page 31: ...mmunication will not be unavailable 4 The selected port is stored in the program and is used for the next program as well 3 Power Control 1 Click on Power Control from the main icons and the Power Con...

Page 32: ...tion is enabled for the selected set The Mute function is disabled automatically when adjusting the volume level The values return to the default settings when undoing the selections or choosing Selec...

Page 33: ...the Image Size Control 1 Power Shows the power status of the current display 2 Image Size Shows the current Image Size of the display in use 3 Input Source Shows the current Input Source of the displ...

Page 34: ...l feature is only available for displays where the power is ON The Input source of MagicNet works only for the MagicNet model 6 Time Control 1 Click on Time from the main icons and the Time Control sc...

Page 35: ...e PIP of the selected display and changes the size to Large 4 Small Turns on the PIP of the selected display and changes the size to Small 5 Double1 Turns on the PIP of the selected display and change...

Page 36: ...IP of the selected display to AV 6 S Video Changes the source of the PIP of the selected display to S Video 7 Component Changes the source of the PIP of the selected display to Component Some of the P...

Page 37: ...of the selected display 3 Brightness Adjusts the Brightness of the selected display 4 Sharpness Adjusts the Sharpness of the selected display 5 Color Adjusts the Color of the selected display 6 Tint A...

Page 38: ...selected display 4 Red Adjusts the red color of the selected display 5 Green Adjusts the green color of the selected display 6 Blue Adjusts the blue color of the selected display This feature is only...

Page 39: ...is made the factory default is displayed The Input source of MagicNet works only for the MagicNet model 8 Settings Control Image Lock 1 Click on Settings from the main icons and the Settings Control s...

Page 40: ...the Manual Lamp Control function The Maintenance Control feature is only available for displays where the power is ON The Input source of MagicNet works only for the MagicNet model 10 Maintenance Cont...

Page 41: ...h screen 2 Screen Divider The screen can be divided into several images A number of screens can be selected with a different layout when dividing z Select a mode in Screen Divider z Select a display i...

Page 42: ...the display 3 The dialogue box appears repeatedly Check to see if the display you wish to control is selected 4 Both On Timer and Off Timer have been set but a different time is shown Apply the curren...

Page 43: ...formation refer to Help F1 in the software program Installing the Natural Color Software Insert the CD included with the Samsung monitor into the CD ROM Drive The initial Natural Color screen will app...

Page 44: ...o select the screen of your choice The direct button on the remote control is the SOURCE button PIP turns off when the monitor is switched to an external source 1 PC 2 BNC 3 DVI 4 AV 5 S Video 6 Compo...

Page 45: ...contents of the PIP and main image The image in the PIP window will appear on the main screen and the main screen image will appear in the PIP window 4 Size The direct button on the remote control is...

Page 46: ...ixture of images such as the text with graphics added 3 Text Normal brightness For documentations or work involving a lot of text 4 Custom Although the values are carefully chosen by our engineers the...

Page 47: ...osition Auto Adjustment The values of Fine Coarse Position are adjusted automatically By changing the resolution in the control panel the auto function is performed The direct button on the remote con...

Page 48: ...Adjusts the Contrast 2 Brightness Adjusts the Brightness 3 Sharpness Adjusts the picture sharpness 4 Color Adjusts the picture color 5 Tint Available in AV S Video Mode Only Adds a natural tone to th...

Page 49: ...ogy will match every signal to your eyes You can compare a screen with DNle to that without DNle The left half will show an image with DNle while the right half will display the image without DNle Thi...

Page 50: ...Balance Allows you to adjust the sound balance between the left and right speakers You can hear the sound even when sound value is set to 0 Dolby Virtual Dolby Virtual Sound Off On Dolby Virtual simul...

Page 51: ...ing Yes for the On Timer or Off Timer when the Clock is not set up a guiding message pops up Set the clock first 1 Clock Set 2 Sleep Timer 3 On Timer 4 Off Timer Lamp Control Adjusts the inverter lamp...

Page 52: ...t When the picture is not displayed properly on the screen when setting the graphics card resolution of the computer to 1024 x 768 60Hz 1280 x 768 60Hz 1360 x 768 60Hz or 1366 x768 60Hz by using this...

Page 53: ...omponent OSD Description Play Multi Control Assigns an individual ID to the SET 1 ID Setup Assigns distinctive IDs to the SET 2 ID Input Use to select the transmitter functions of the individual SET O...

Page 54: ...lti Control OSD screen LOCK Sets the Safety Lock function 1 Lock On It will be locked 2 Lock Off It wil be unlocked When setting the Lock function you can only operate the power and lock buttons on th...

Page 55: ...nd when the monitor is working normally even though no video signal is detected While in the Self Test mode the LED power indicator remains green and the figure moves around on the screen 4 Turn off y...

Page 56: ...f it does request an a service for the main board of the computer 3 If you installed a new video card or if you assembled the PC check if you installed the adapter video driver and the monitor driver...

Page 57: ...under the monitor menu and Preset Timing Modes Ghost images are shown in the picture The image is too light or too dark z adjust the brightness and contrast Refer to the Brightness Contrast The The s...

Page 58: ...vary depending on the version of the driver used Refer to the computer or the video card manual for details How can I adjust the resolution z Windows XP Set the resolution at the Control Panel Appear...

Page 59: ...Hz depends on graphics card used Maximum resolution 1366 x 768 60 Hz Input Signal Terminated RGB Analog DVI Digital Visual Interface Compliant Digital RGB 0 7 Vp p 5 Positive bright 75 10 Terminated S...

Page 60: ...the pixels of RED GREEN BLUE and WHITE color seem to be bright sometimes or some of black pixels could be seen This is not from bad quality and you can use it without any problems z For example the n...

Page 61: ...72 809 31 500 VESA 640 x 480 43 269 85 008 36 000 VESA 800 x 600 35 156 56 250 36 000 VESA 800 x 600 37 879 60 317 40 000 VESA 800 x 600 48 077 72 188 50 000 VESA 800 x600 46 875 75 000 49 500 VESA 8...

Page 62: ...MSUNG http www samsung com cl COLOMBIA 01 8000112112 http www samsung com co COSTA RICA 0 800 507 7267 http www samsung com latin ECUADOR 1 800 10 7267 http www samsung com latin EL SALVADOR 800 6225...

Page 63: ...87 http www samsung com se SWITZERLAND 1 800 SAMSUNG 7267864 http www samsung com ch U K 0870 SAMSUNG 7267864 http www samsung com uk CIS ESTONIA 800 7267 http www samsung ee LATVIA 800 7267 http www...

Page 64: ...s 60 Hz Horizontal Frequency The time to scan one line connecting the right edge to the left edge of the screen horizontally is called the Horizontal Cycle The inverse number of the Horizontal Cycle i...

Page 65: ...re by performing the auto adjustment function in display screen that is appeared as window termination button is pressed If there s still noise after the automatic adjustment use the FINE COARSE adjus...

Page 66: ...CS M XICO S A de C V V a Lopez Portillo No 6 Col San Fco Chilpan Tultitl n Estado de M xico C P 54940 Tel 01 55 5747 5100 01 800 726 7864 EXPORTADO POR Samsung Electronics CO LTD 416 Mae tan 3dong Yeo...

Page 67: ...vent this the accumulated voltage difference must be decreased Power Off Screen Saver or Power Save Mode z Turn the power off for 4 hours after 20 hours in use z Turn the power off for 2 hours after 1...

Page 68: ...he Screen Scroll function Symptom Horizontal Bar with Black Color move up and down Select method Instruction Guide OSD Menu Set Up Safety Screen Screen Scroll Time Interval 1 10 hours Recommend 1 Time...

Page 69: ...duct z Apply the Screen Erasing function Symptom 2 Vertical blocks move with erasing the display Select method Instruction Guide OSD Menu Set Up Safety Screen Eraser Time Interval 1 10 hours Recommend...

Page 70: ...ment or human health from uncontrolled waste disposal please separate this from other types of wastes and recycle it responsibly to promote the sustainable reuse of material resources Household users...

Reviews: