English 11
Automatic Save
Whenever you open the OSD and allow an adjustment window to remain active for about 3
seconds without pressing another button, the monitor automatically saves any adjustments
you have made. These changes are saved into a user area in the monitor. User areas are
reserved according to the signal frequency from your computer. The monitor can save
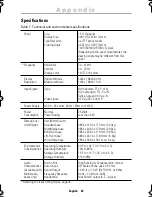
adjustments for up to 5 user modes. It has 12 factory preset or preload modes, one for each
signal frequency as listed in "Display Modes" on page 26.
If you have made no adjustments, the OSD disappears and the monitor does not save
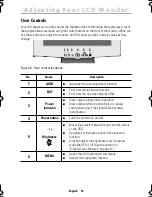
anything. To exit without saving the changes you have made, press the
EXIT
button before
the 3 seconds elapse.
Direct-Access Features
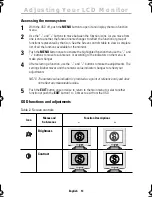
The features described in this section can be accessed quickly, at the touch of one button.
Once you finish making adjustments to a feature, push the
EXIT
button to turn off the menu
or allow the OSD to time-out and disappear automatically
Auto Adjustment
Even though your computer system can recognize your new LCD monitor, the auto adjustment
function will optimize the display settings for use with your computer.
Follow these instructions to activate the automatic
screen adjustments for your monitor.
1
Push the
AUTO
button. The automatic
adjustment display appears and the slidebar
moves to indicate progress during the auto
adjustment procedure.
* NOTE: 1. For Auto Adjustment to function correctly, the monitor must display a full
screen, colored image such as the Windows desktop.
2. Even though Auto Adjustment sets most image adjustments automatically,
distortions may remain depending on the video board performance. After using
Auto Adjustment, we recommend that you perfect the image by using the OSD
functions.
Auto Adjustment
75
Adjusting Your LCD Monitor
4_E570B580Bbody.fm Page 11 Friday, June 8, 2001 12:27 PM


