background image

Microsoft

®

 Windows

®

 Millennium Operating System

1. Click "

Start

" , "

Setting

" , "

Control Panel

". 

2. Double click "

Display

" icon. 

3. Select the "

Settings

" tab and click "

Advanced Properties

" button. 

4. Select the "

Monitor

" tab. 

5. Click the "

Change

" button in the "

Monitor Type

" area. 

6. Choose "

Specify the location of the driver

". 

7. Choose "

Display a list of all the driver in a specific location..

" then click "

Next

" button. 

8. Click the "

Have Disk

" button 

9. Specify A:\(D:\driver) then click "

OK

" button. 

10. Select "

Show all devices

" and choose the monitor that corresponds to the one you 

connected to your computer and click "

OK

". 

11. Continue choosing "

Close

" button and "

OK

" button until you close the Display Properties 

dialogue box. 
(You can get some other screen for warning message or others, then click the appreciate 
option for your monitor.) 

Microsoft

®

 Windows

®

 98 Operating System

1. Click "

Start

" , "

Setting

" , "

Control Panel

". 

2. Double click "

Display

" icon. 

3. Select the "

Settings

" tab and click "

Advanced Properties

" button. 

4. Select the "

Monitor

" tab. 

5. Click the "

Change

" button in the "

Monitor Type

" area then click "

Next

" button. 

6. Choose "

Display a list of all the driver..

" then click "

Next

" button. 

7. Click the "

Have Disk

" button, then click "

browse..

" button. 

8. Specify A:\(D:\driver) then click "

OK

" button. 

9. The "

Select Device

" dialogue box will appear. Select "

Show all devices

" then choose the 

monitor that corresponds to the one you connected to your computer and click OK. 

10. Continue choosing "

Close

" button and "

O.K

" button until you close the Display Properties 

dialogue box. 

Microsoft

®

 Windows

®

 95 Operating System

First determine the Windows 95 version installed on your computer by right-clicking the My 
Computer icon on PC and selecting Properties. The version number is listed under System. 
Perform the steps for the appropriate version. 

Version 4.00.950A 

1. Click 

Start

Settings

Control Panel

, and then double-click "

Display

" icon. 

2. In the "

Display Properties

" window, click the "

Settings

" tab and click "

Change Display 

Type

". 

3. In the "

Change Display Type

" window, click "

Change

" and then click "

Have Disk

". 

4. Click "

browse..

" button and specify A:\(D:\driver) and click "

OK

". 

5. In the Select Device window, click the appropriate monitor model and then click OK. 
6. Continue choosing "

Close

" button and "

OK

" button until you close the "

Display 

Properties

" dialogue box. 

Version 4.00.950B 

1. Click 

Start

Settings

Control Panel

, and then double-click "

Display

" icon. 

2. In the "

Display Properties

" window, click the Settings tab and then click "

Advanced 

Properties

" button. 

3. In the "

Advanced Display Properties

" window, click the "

Monitor

" tab and then click 

"

Change

" button. 

4. In the "

Select Device

" window, click "

Have Disk

" button. 

5. Click "

browse..

" button and specify A:\(D:\driver) and click "

OK

". 

6. In the "

Select Device

" window, click the appropriate monitor model and then click "

OK

". 

Setup

Summary of Contents for SyncMaster 750s

Page 1: ...SyncMaster 750s 753s 753v 753Ms 750Ms...

Page 2: ...Test Feature Check Cleaning Other Introduction Specifications Unpacking General Specifications Front Preset Display Modes Rear PowerSaver Bottom Setup Information Connecting Your Monitor Service Insta...

Page 3: ...ions Failure to follow directions noted by this symbol could result in bodily harm or damage to equipment Prohibited Do not disassemble Do not touch Important to read and understand at all times Disco...

Page 4: ...for long periods of time you may see afterimages due to damage to the flourescent substance on the inside of the CDT Do not pull the plug out by the wire nor touch the plug with wet hands This may cau...

Page 5: ...nect the plug from the outlet during storms or lightening or if it is not used for a long period of time Failure to do so may cause an electric shock or fire Do not connect too many extension cords or...

Page 6: ...table surface The monitor can cause injury by falling Set down the monitor carefully It could be damaged or broken Do not place the monitor face down The CRT surface may be damaged Do not use the moni...

Page 7: ...e damage electric shock or a fire If a foreign substance gets into the monitor disconnect the plug and then contact a service center When cleaning the monitor case or the surface of the CDT wipe with...

Page 8: ...an authorized dealer or service This may cause an electric shock or a fire Do not place any heavy objects on the monitor This may cause an electric shock or a fire For each hour of looking at the mon...

Page 9: ...e signal cable This may cause a breakdown electric shock or a fire due to damage to the cable Never insert anything metallic into the monitor openings This may cause an electric shock fire or injury K...

Page 10: ...any items are missing contact your dealer Some models include a stand attached Multimedia Speaker Stand Power Cord Stand Quick Setup Guide Warranty card Not available in all locations User s Guide an...

Page 11: ...D and activate a highlighted menu item 5 Power indicator This light glows green during normal operation and grows amber when you are making adjustments 6 Power button Use this button to turn the monit...

Page 12: ...ignal cable Connect the end of the signal cable to your computer s video port video board video card or graphics card 2 Power port Connect the power cord for your monitor to the power port on the back...

Page 13: ...he end of the signal cable to your computer s video port video board video card or graphics card 3 If you are using a Macintosh computer connect the cable to a Macintosh adapter and set the pins on yo...

Page 14: ...nitor until it clicks 9 Execute a sound program music or sound effect in your computer and then adjust the volume by turning up or down until the sound volume is appropriate 10 Adjust the treble and b...

Page 15: ...nd download the driver program file at the Internet web site shown here z Internet web site http www samsung monitor com Worldwide http www samsungmonitor com USA http www sec co kr Korea http www sam...

Page 16: ...ll button in the Warning window 5 If you can see following Message window then click the Continue Anyway button Then click OK button This monitor driver is under certifying MS logo and this installati...

Page 17: ...driver program file at the Internet web site shown here z Internet web site http www samsung monitor com Europe http www samsungmonitor com USA http www sec co kr Korea http www samsungmonitor com cn...

Page 18: ...on t search I will then click Next and then click Have disk 7 Click the Browse button then choose A D Driver and choose your monitor model in the model list and click the Next button 8 If you can see...

Page 19: ...tab and then click Advanced 4 Choose Monitor 5 Click Driver and then click on Update Driver then click on the Next button 6 Choose Display a list of the known drivers for this device so that I can cho...

Page 20: ...ct Show all devices then choose the monitor that corresponds to the one you connected to your computer and click OK 10 Continue choosing Close button and O K button until you close the Display Propert...

Page 21: ...referring to the Preset Display Modes in the user guide Linux Operating System To execute X Window you need to make the X86Config file which is a type of system setting file 1 Press Enter at the firs...

Page 22: ...Setup User s Manual 1 Tilt Swivel Base With the built in pedestal you can tilt and or swivel the monitor for the most comfortable viewing angle Tilt Swivel Base Installation Note The base is detachab...

Page 23: ...rresponding slots on the bottom of the monitor 3 Press the base onto the monitor until the tabs are fully engaged in the slots 4 Push the base toward the front of the monitor until the release latch c...

Page 24: ...to remove the base Note The Base will align with the monitor slots in only one position 3 Disconncecting Speaker Cables 1 Turn off your speakers monitor and computer before removing or connecting cab...

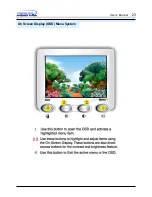
Page 25: ...23 On Screen Display OSD Menu System User s Manual...

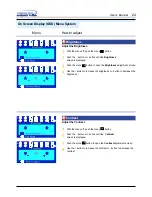
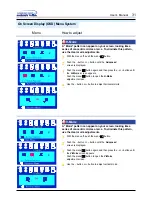
Page 26: ...nt screen Use the button to increase the brightness or button to decrease the brightness Menu How to adjust Brightness Contrast With the menu off push the menu button Push the button or button until t...

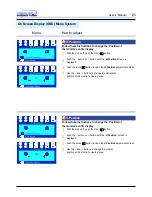
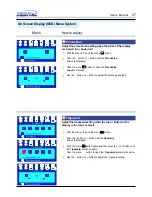
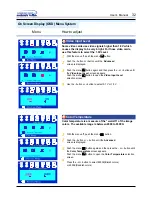
Page 27: ...screen Use the and buttons to change the Horizontal position of the monitor s viewing area Menu How to adjust H Position V Position With the menu off push the menu button Push the button or button un...

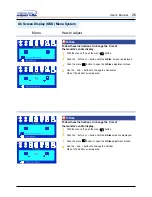
Page 28: ...tton Push the button or button until the H Size screen is displayed Push the menu button to open the H Size adjustment screen Use the and buttons to change the Horizontal Size of the monitor s viewing...

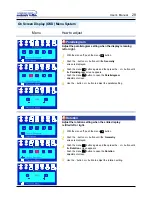
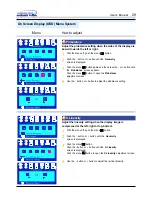
Page 29: ...the Pincushion adjustment screen Use the button or button to adjust the pincushion setting Adjust the trapezoid setting when the top or bottom of the display is too large or small Trapezoid With the m...

Page 30: ...displayed Push the menu button again and then press the or button until the Parallelogram screen appears Push the menu button to open the Parallelogram adjustment screen Use the button or button to a...

Page 31: ...the Geometry screen is displayed Push the menu button Push the button or button until the V Linearity screen is displayed Push the menu button to open the V Linearity adjustment screen Use the button...

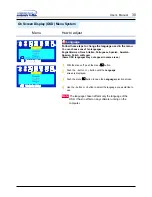
Page 32: ...ection screen Use the button or button to select the language you would like to use Note The language chosen affects only the language of the OSD It has no effect on any software running on the comput...

Page 33: ...he H Moire screen appears Push the menu button to open the H Moire adjustment screen Use the button or button to adjust horizontal moir A Moir pattern can appear on your screen looking like a series o...

Page 34: ...eo Input Level screen appears Push the menu button to open the Video Input Level selection screen Use the button or button to select 0 7 V or 1 0 V Color temperature is a measure of the warmth of the...

Page 35: ...p or a longshot view of the monitor s viewing area Zoom With the menu off push the menu button Push the button or button until the Zoom screen is displayed Push the menu button to open the Zoom adjust...

Page 36: ...ss screen is displayed Push the menu button to execute the degauss function The degaussing screen will appear Note If you have selected Yes all settings listed above will be reset All other settings w...

Page 37: ...ng adjustment screen Use the button to see user control mode and thedefault mode Push and hold in the menu button for 10 seconds or more to Lock the OSD In this case even if you click the menu button...

Page 38: ...gnal from the video card exceeds the maximum resolution and frequency that the monitor can properly handle Adjust the maximum resolution and frequency applicable to the monitor The monitor is in Power...

Page 39: ...en applications Has the video card been set properly Have you changed the video card or the driver Have you adjusted the resolution or frequency to the monitor Have you adjusted the resolution or freq...

Page 40: ...been set properly For Windows 98 95 Set the colors properly at the Control Panel Display Settings Have you installed the monitor driver Install the monitor driver according to the Driver Installation...

Page 41: ...the monitor Note If problems repeatedly occur contact an authorized service center There is no sound The sound is too weak The sound is too sharp The microphone is not working The sound is distorted T...

Page 42: ...nge the resolution and the colors using the VGA Utility provided by the video card Contact the video card manufacturer for details Windows 95 98 Set the function at BIOS SETUP of the computer or the s...

Page 43: ...and reconnect the video cable then turn on both your computer and the monitor If your monitor is functioning properly you will see a box with a blue border and red text inside as shown in the followin...

Page 44: ...the monitor 3 Degauss the monitor if any devices were removed from the area A monitor recreates visual signals received from the PC Therefore if there is trouble with the PC or the video card this can...

Page 45: ...c Signal Separate H V sync TTL level Positive or Negative Display Color Unlimited Maximum Pixel Clock 110MHz Power Supply 90 264VAC rms 60 50 Hz 3Hz Power Consumption 90 W Max 80 W Nom Dimensions WxDx...

Page 46: ...c Signal Separate H V sync TTL level Positive or Negative Display Color Unlimited Maximum Pixel Clock 110MHz Power Supply 90 264VAC rms 60 50 Hz 3Hz Power Consumption 90 W Max 80 W Nom Dimensions WxDx...

Page 47: ...te H V sync TTL level Positive or Negative Display Color Unlimited Maximum Pixel Clock 110MHz Power Supply 90 264VAC rms 60 50 Hz 3Hz Power Consumption 90 W Max 80 W Nom Dimensions WxDxH 398x 412 x 40...

Page 48: ...Separate H V sync TTL level Positive or Negative Display Color Unlimited Maximum Pixel Clock 110MHz Power Supply 90 264VAC rms 60 50 Hz 3Hz Power Consumption 100 W Maximum Speaker on 80 W Nominal Dime...

Page 49: ...Multimedia Speaker Stand Out Power Continuous RMS 3 0 Watt at 10 THD S N Signal to Noise Ratio 55dB Input Level 500mV Frequency Response 180 Hz 20 000Hz Power Supply DC Adapter 12V 1A Design and spec...

Page 50: ...Separate H V sync TTL level Positive or Negative Display Color Unlimited Maximum Pixel Clock 110MHz Power Supply 90 264VAC rms 60 50 Hz 3Hz Power Consumption 100 W Maximum Speaker on 80 W Nominal Dime...

Page 51: ...Multimedia Speaker Stand Out Power Continuous RMS 3 0 Watt at 10 THD S N Signal to Noise Ratio 55dB Input Level 500mV Frequency Response 180 Hz 20 000Hz Power Supply DC Adapter 12V 1A Design and spec...

Page 52: ...wing Preset Display Modes the screen will be adjusted automatically However if the signal differs the screen may go blank while the power LED is on Refer to the video card manual and adjust the screen...

Page 53: ...eaving it unattended for long periods The PowerSaver system operates with a VESA DPMS compliant video card installed in your computer Use a software utility installed on your computer to set up this f...

Page 54: ...g it unattended for long periods The PowerSaver system operates with a VESA DPMS compliant video card installed in your computer Use a software utility installed on your computer to set up this featur...

Page 55: ...er National Service Stafford Park 12 Telford Shropshire TF3 3BJ Tel 0870 242 0303 Fax 01952 292 033 http samsungservice co uk THAILAND HAI SAMSUNG SERVICE CENTER MPA COMPLEX BUILDING 1st 2nd Floor 175...

Page 56: ...Horizontal Frequency Unit kHz Interlace and Non Interlace Methods Showing the horizontal lines of the screen from the top to the bottom in order is called the Non Interlace method while showing odd li...

Page 57: ...Reorient or relocate the receiving antenna Increase the separation between the equipment and receiver Connect the equipment into an outlet on a circuit different from that to which the receiver is co...

Page 58: ...implies conformity to the following European Norms EN55022 1998 Radio Frequency Interference EN55024 1998 Electromagnetic Immunity EN61000 3 2 1995 A1 A2 Power Line Harmonics EN61000 3 3 1995 Voltage...

Page 59: ...hich provides for international environmental labelling of monitors The labelling scheme was developed as a joint effort by the TCO The Swedish Confederation of Professional Employees Naturskyddsforen...

Page 60: ...tteries relays and switches Mercury damages the nervous system and is toxic in high doses TCO 95 requirement states that batteries may not contain more than 25 ppm parts per million of mercury It also...

Page 61: ...complete environmental criteria document may be ordered from TCO Development SE 114 94 Stockholm Sweden Fax 46 8 782 92 07 Email Internet development tco se Current information regarding TCO 99 appro...

Page 62: ...ed reception on earth of ultraviolet light with e g increased risks of skin cancer malignant melanoma as a consequence Lead Lead can be found in picture tubes display screens solders and capacitors Le...

Page 63: ...e or use of this material Samsung is the registered trademark of Samsung Electronics Co Ltd Microfoft Windows and Windows NT are registered trademark of Microsoft Corporation VESA DPMS and DDC are reg...

Page 64: ...Installing the Video Driver http www samsung monitor com http www samsungmonitor com USA only...

Reviews: