background image

EN-6

Setting up your camera

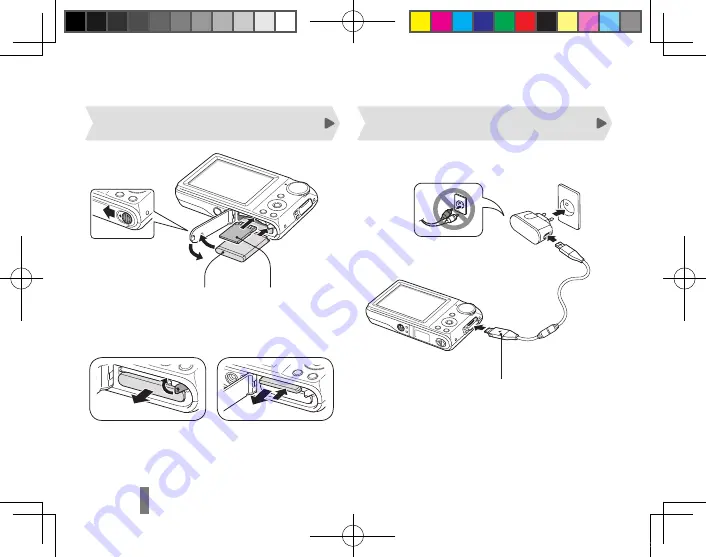
Inserting the battery and memory card

Charging the battery

With the Samsung logo 

facing up

With the gold-

colored contacts 
facing up

Indicator light

Red


: Charging

Green


: Fully charged

Before using the camera for the first time, you must 
charge the battery.


 Removing the battery

  Removing the memory card

Push gently until the card 
disengages from the camera 
and then pull it out of the slot.

TL205_QSM_SEA.indb   6

2010-01-27   오후 3:26:49

Summary of Contents for TL205

Page 1: ...Start Manual and User Manual carefully to ensure safe and correct use Quick Start Manual TL205 For more information refer to the User Manual included on the supplied CD ROM ENG SPA FOR TECHNICAL SUPP...

Page 2: ...ause choking or serious injury if swallowed Moving parts and accessories may present physical dangers as well Prevent damage to subjects eyesight Do not use the flash in close proximity closer than 1...

Page 3: ...cards from making contact with liquids dirt or foreign substances If dirty wipe the memory card clean with a soft cloth before inserting in your camera Handle and dispose of batteries and chargers wit...

Page 4: ...F assist light timer lamp 10 Zoom button 11 Speaker 12 Status lamp 13 Mode dial 14 USB and A V port Accepts USB cable or A V cable 15 Function button 16 Playback button 17 Navigation button OK button...

Page 5: ...AD39 00165A Rechargeable battery AD43 00194A Strap Silver AD63 02596A Software CD ROM User manual included AD46 00320A Quick Start Manual AD68 04787A Optional accessories Camera case Memory card A V...
Page 6: ...gold 2 colored contacts facing up Indicator light Red Charging Green Fully charged Before using the camera for the first time you must charge the battery 1 4 Removing the battery Removing the memory c...

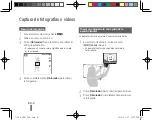
Page 7: ...a time zone In Shooting mode press 1 m Use the navigation buttons to scroll to an 2 option or menu Back EV Move To move left or right press F or t To move up or down press D or M Press 3 o to confirm...

Page 8: ...r all the way down to take the photo Taking a photo of yourself using the front display The front display will help you take self portraits In Shooting mode press 1 Front LCD once The front display tu...

Page 9: ...7 2560 X 1920 339 566 792 2048 X 1536 510 802 1 065 1920 X 1080 735 1 144 1 437 1024 X 768 1 287 1 670 1 872 These gures are measured under Samsung s standard conditions and may vary depending on shoo...

Page 10: ...t a folder on your computer to save new 3 files If your camera has no new files the pop up window for saving new files will not appear Select 4 Yes New files will be transferred to your computer You c...

Page 11: ...Detection AF Tracking AF Shutter speed Auto 1 8 1 1 500 sec Program 1 1 1 500 sec Night 8 1 1 500 sec Fireworks 2 sec Storage Internal memory approx 5 MB External memory Optional SD card up to 4 GB gu...

Page 12: ...como consecuencia se asfixien o sufran graves lesiones Los accesorios y las piezas m viles tambi n pueden causar da os f sicos Evite da ar la vista del sujeto No utilice el flash si est a una proximid...

Page 13: ...ren en contacto con l quidos suciedad o sustancias extra as Si la tarjeta de memoria se ensucia l mpiela con un pa o suave antes de insertarla en la c mara Utilice y deseche las bater as y los cargado...

Page 14: ...y luz de temporizador 10 Bot n de zoom 11 Altavoz 12 Luz indicadora de estado 13 Selector de modos 14 Puerto USB y A V Admite cable USB y cable A V 15 Bot n de funciones 16 Bot n de reproducci n 17 Bo...

Page 15: ...Cable A V AD39 00146A Cargador de la bater a AD44 00164A C mara Fuente de alimentaci n Cable USB AD44 00143A AD39 00165A Bater a recargable AD43 00194A Correa Plateado AD63 02596A CD ROM del software...

Page 16: ...mente cargada Cargue la pila antes de utilizar la c mara Quitar la bater a Quitar la tarjeta de memoria Ejerza una leve presi n hasta que la tarjeta se desprenda de la c mara y luego ret rela de la ra...

Page 17: ...el modo de disparo pulse 1 m Utilice los botones de navegaci n para 2 desplazarse hacia una opci n o hacia un men Atr s EV Mover Para desplazarse hacia la izquierda o hacia la derecha pulse F o t Par...

Page 18: ...ente 4 Obturador para tomar la fotograf a Tomar un autorretrato con ayuda de la pantalla frontal La pantalla frontal lo ayudar a realizar autorretratos En el modo de disparo pulse el bot n 1 LCD front...

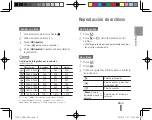
Page 19: ...1065 1920 X 1080 735 1144 1437 1024 X 768 1287 1670 1872 Estas son medidas tomadas en condiciones est ndar establecidas por Samsung y pueden variar seg n las condiciones de disparo y la configuraci n...

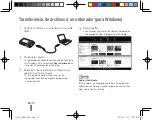
Page 20: ...Tube Transferencia de archivos a un ordenador para Windows Conecte la c mara a su ordenador con el cable 1 USB Encienda la c mara 2 El ordenador reconoce la c mara autom ticamente En Windows Vista sel...

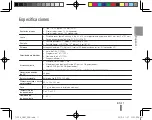
Page 21: ...i n AF Velocidad del obturador Auto de 1 8 a 1 1500 s Programa de 1 a 1 1500 s Nocturno de 8 a 1 1500 s Fuegos Artificiales 2 s Almacenamiento Memoria interna aprox 5 MB Memoria externa opcional tarje...

Page 22: ...QSM 140x105 _Note indd 1 2009 07 09 8 42 05...

Page 23: ...QSM 140x105 _Note indd 2 2009 07 09 8 42 05...

Page 24: ...Please refer to the warranty that came with your product or visit our website http www samsung com for after sales service or inquiries AD68 04787A 1 0 TL205_QSM_SEA indb 2 2010 01 27 3 26 46...

Reviews: