Alignments and Adjustments (Mechanical)
4-22
Samsung Electronics
4-5-1(e) A/C HEAD POSITION (X-POINT). ADJUSTMENT (PAL SYSTEM ONLY)
1. Play back the mono scope alignment tape.
2. Connect Ch1 scope probe to ÒCTRLÓ and Ch-2 scope probe to ÒHÕD SWÓ.
Trigger on the head-switching pulse.
3. Set the tracking preset to 7 msec using the ÒFineÓ tracking buttons
▲
/
▼
on the remote control.
4. Connect Ch1 scope probe to ÒENVÓ; connect Ch-2 to ÒHÕD SWÓ and trigger on Ch-1.
5. Insert the adjusting driver (+) into the X-position adjusting gear. Adjust the driver in either direction
for maximum envelope waveform.
6. Note: Since the adjusting gear unit may be damaged, do not adjust the X-point by using force. After
turning the X-point adjusting screw (D) slightly counter-clockwise, perform the adjustment and then
tighten the screw.
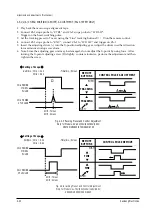
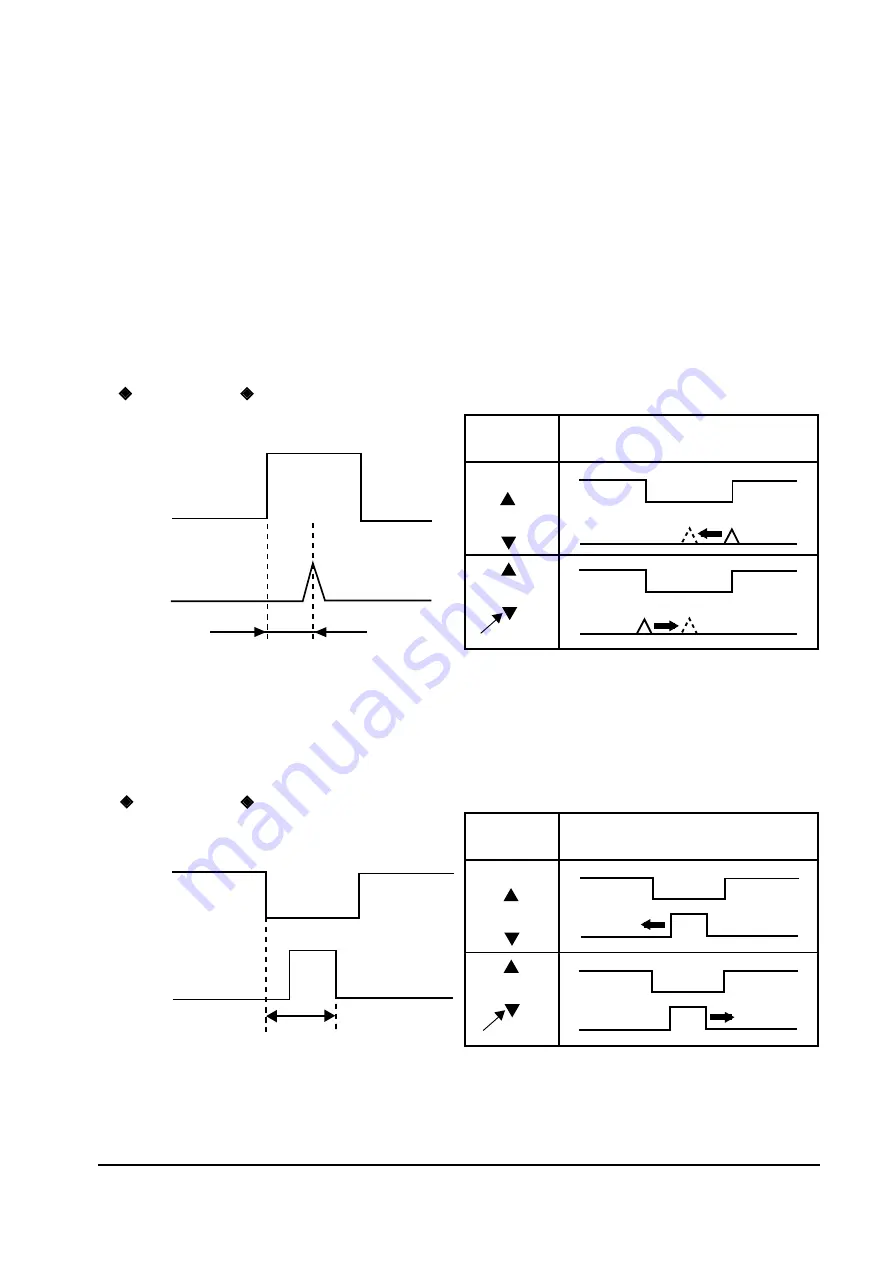
Fig. 4-5-5 Tracking Preset and Control Adjustment
Only for Models. SV-20U/30U/40U/60U/100U
VR3705/VR3805/5705/5805/8705
CH-2 PROBE
H'D SW
PULSE
CH-1 PROBE
CTL PULSE
Setting of Scope
-Volt/div. ; CH-1 = 0.1V
CH-2 = 0.2V
-Time/div. ; 5msec
4H'd : 7msec
2H'd : 2mesc
Fig. 4-5-6 racking Preset and Control Adjustment
Only for Models: sv-70U/90U/120U/140U/160U
VR5805/VR5855/5905/8905
4H'd : 7msec
2H'd : 2mesc
CH-2 PROBE
H'D SW
PULSE
CH-1 PROBE
CTL PULSE
Setting of Scope
-Volt/div. ; CH-1 = 0.1V
CH-2 = 0.2V
-Time/div. ; 5msec
CONTROL PULSE ADJUSTMENT
REMOTE
BUTTONS
PUSH
TRACKING
TRACKING
PUSH
CONTROL PULSE REMOVE
REMOTE
BUTTONS
PUSH
FINE
FINE
PUSH
Summary of Contents for TW14C52S/BWT
Page 89: ...11 Wiring Diagram 11 1 C15A Wiring Diagram Wiring Diagram Samsung Electronics 11 1 ...
Page 90: ...Wiring Diagram 11 2 Samsung Electronics 11 2 C15A Wiring Diagram ...
Page 94: ...Schematic Diagrams 12 4 Samsung Electronics 12 4 VCR POWER BLOCK ...
Page 97: ...Schematic Diagrams 12 7 Samsung Electronics 12 7 TV 3 4 RED POWER LINE BLUE SIGNAL LINE ...

