Alignment and Adjustments
Samsung Electronics
4-3
4-6 E
2
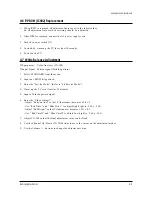
PROM (IC902) Replacement
1. When IC902 is replaced, all adjustment data revert to the initial values.
So, all adjustment values when servicing should be readjusted.
2. After IC902 is replaced, connect the AC power supply cord.
3. Turn the power switch ON.
4. In stand-by, warm up the TV for at least 10 seconds.
5. Power on the TV.
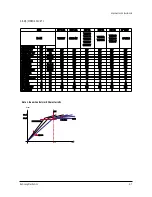
4-7 White Balance Adjustment
■
Equipment : Color-Analyzer (CA-100)
■
Input Signal : Pattern signal (Toshiba pattern)
1. Select STANDARD from the menu.
2. Input an 100% White pattern.
3. Enter the “Service Mode”. (Refer to “4-8 Service Mode”)
4. Warm up the TV set at least for 30 minutes.
5. Input a Toshiba pattern signal.
6. Enter the “Video Adjust1”.
- Adjust “Sub Contrast” so that Y (luminance) becomes 65 ft ± 3.
- Use “Red Drive” and “ Blue Drive” to adjust High-Light (x : 265, y : 265)
- Adjust “Sub Bright” so that Y (luminance) becomes 1.2ft ± 0.3.
- Use “Red Cutoff” and “Blue Cutoff” to adjust Low-Light (x : 265, y : 265).
7. Adjust CA-100 so that the final adjustment value can be fixed.
8. Use the Channel Up/Down (
▲
/
▼
) buttons to move the cursor on the adjustment modes.
9. Use the /- buttons to change the adjustment value.
Summary of Contents for TXK2554
Page 2: ...ELECTRONICS Samsung Electronics Co Ltd OCT 2000 Printed in Korea 3KS2A N 2507 ...
Page 12: ...3 2 Samsung Electronics MEMO ...
Page 28: ...4 16 Samsung Electronics MEMO ...
Page 46: ...8 Block Diagrams Samsung Electronics Schematic Diagrams 8 1 8 1 Power Diagram ...
Page 47: ...8 2 Block Diagram Schematic Diagrams 8 2 Samsung Electronics ...
Page 49: ...9 2 Samsung Electronics MEMO ...
Page 54: ...10 5 POWER W O EW Samsung Electronics Schematic Diagrams 10 5 ...
Page 55: ...10 6 PIP Schematic Diagrams 10 6 Samsung Electronics ...
Page 56: ...Samsung Electronics 10 7 VIDEO SWITCH Schematic Diagrams 10 7 ...

