background image

55

English

05

Other Information

Issues

Solutions and Explanations

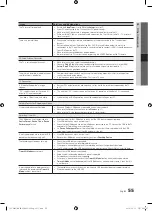
The TV turns off automatically.

•  Ensure the 

Sleep Timer

 is set to 

Off

 in the 

Setup

 menu (p. 20). 

•  If your PC is connected to the TV, check your PC power settings.
•  Make sure the AC power cord is plugged in securely to the wall outlet and the TV.
•  When watching TV from an antenna or cable connection, the TV will turn off after 10 ~ 15 minutes if 

there is no signal.

There is no picture/Video.

•  Check cable connections (remove and reconnect all cables connected to the TV and external 

devices).

•  Set your external devices’ (Cable/Set top Box, DVD, Blu-ray etc) video outputs to match the 

connections to the TV input. For example, if an external device’s output is HDMI, it should be connect 
to an HDMI input on the TV.

•  Make sure your connected devices are powered on.
•  Be sure to select the TV’s correct source by pressing the 

SOURCE 

button on the TV remote.

RF(Cable/Antenna) Connection

The TV is not receiving all channels.

•  Make sure the Antenna cable is connected securely.
•  Please try 

Plug & Play

 (Initial setup) to add available channels to the channel list. Go to 

MENU

 - 

Setup - Plug & Play

 (Initial setup) and wait for all available channels to be stored (p. 7).

•  Verify the Antenna is positioned correctly.

The picture is distorted: macro block error 
small block, dots, pixelization

•  Compression of video contents may cause picture distortion, especially with fast moving pictures 

such as sports and action movies.

•  A low signal can cause picture distortion. This is not a TV issue.

PC Connection

A “Mode Not Supported” message 
appears.

•  Set your PC’s output resolution and frequency so they match the resolutions supported by the TV  

(p. 24). 

“PC” is always shown on the source list, 
even if a PC is not connected.

•  This is normal; “PC” is always shown on the source list, regardless of whether a PC is connected.

The video is OK but there is no audio.

•  If you are using a HDMI connection, check the audio output setting on your PC.

Network Connection (Depending on Models)

Wireless network connection failed.

•  Samsung Wireless USB dongle is required to use a wireless network.
•  Make sure the Network Connection is set to 

Wireless

 (p. 27).

•  Make sure the TV is be connected to a wireless IP sharer (router).

Recording / Timeshift

The USB device is not recognized or a 

Device Format

Device Test

 or 

Device 

Performance

 Test fails.

•  See the manual for the USB device to check that the USB device supports recording.
•  If the USB device has a lock, ensure it is off.
•  Check that the USB device can be formatted when connected to the PC. Connect the USB to the TV 

and format it. (Formatting may fail intermittently.)

•  If a 

Device Performance Test

 or formatting failed, it means that there is a problem with the USB 

hardware or the performance of the USB hardware is too low.

A message prompts me to format a USB 
device that has been working well.

•  If the USB device has a lock, ensure it is off.
•  Recover the USB device using the recovery function in 

Checking Device

.

The recording function does not work.

•  Check that a USB device is connected. 
•  Check that the channel is a recordable digital channel. 
•  If the signal is weak or does not exist, the recording function will automatically be closed. 
•  The TV will not record if the USB device has no free memory space. Check that this is not the case.

Timeshift Mode

 does not work.

•  Check that a USB device is connected. 
•  Radio channels and analog broadcasts are not supported. 
•  Data broadcast channels are not supported. 
•  If the signal is weak or does not exist, the 

Timeshift Mode

 function will automatically be closed. 

• 

Timeshift Mode

 cannot be performed if the USB device has no free memory space. Check that this 

is not the case.

A message indicates a performance test 
failure, and the recording and 

Timeshift 

Mode

 functions do not work.

•  These problems may occur if you use a low-capacity USB device that does not support recording. 
•  We recommend using the USB HDD.

[UC6600]BN68-02840F-00Eng-0311.indb   55

2010-03-11   오후 9:25:37

Summary of Contents for UE32C6620UK

Page 1: ...sung com ie U K 0845 SAMSUNG 7267864 www samsung com uk 2010 Samsung Electronics Co Ltd All rights reserved BN68 02840F 00 LED TV user manual imagine the possibilities Thank you for purchasing this Sa...

Page 2: ...ch will affect image quality To reduce risk of this effect please follow below recommendations Avoid displaying the same TV channel for long periods Always try do display any image on full screen use...

Page 3: ...enu 23 Support Menu Advanced Features 24 24 Connecting to a PC 25 Network Connection 32 Media Play 41 Anynet 44 Internet TV 47 AllShare Other Information 49 49 Analogue Channel Teletext Feature 50 Ass...

Page 4: ...older Wire stand y y Cable Tie y y Holder Wire 3EA y y Power Cord Clamp y y Component Adapter y y AV Adapter y y SCART Adapter UE32C6600 UE37C6600 UE40C6600 UE46C6600 See separate guide for installing...

Page 5: ...reen menu the OSD on screen display of your TV s features Y Adjusts the volume In the OSD use the Y buttons as you would use the and buttons on the remote control z Changes the channels In the OSD use...

Page 6: ...sound temporarily Changes channels Displays channel lists on the screen p 13 Displays the EPG Electronic Programme Guide p 11 Displays information on the TV screen Exits the menu Have direct access to...

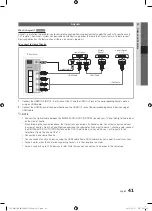
Page 7: ...propriate country 4 Selecting an antenna Press the or button then press the ENTERE button Select Air or Cable 5 Selecting a channel Press the or button then press the ENTERE button Select the channel...

Page 8: ...x If there is no sound after connecting an HDMI cable check the HDMI version of the external device If you suspect the version is older than 1 3 contact the provider of the device to confirm the HDMI...

Page 9: ...und to the home theatre receiver When the source is a digital component such as a DVD Blu ray player cable box STB Set Top Box satellite receiver and is connected to the TV via HDMI only 2 CH audio wi...

Page 10: ...channels will display the message Scrambled Signal The pairing information containing a telephone number the CI or CI CARD ID the Host ID and other information will be displayed in about 2 3 minutes I...

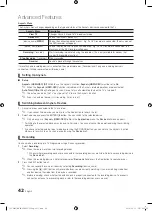
Page 11: ...e Now Next guide shows daily TV programme information for each channel according to the broadcasting time y y Scroll to view information for a desired programme while watching the current channel y y...

Page 12: ...the Channel Manager x x Red Antenna Toggle among Air or Cable x x Green Zoom Enlarges or shrinks a channel number x x Yellow Select Select desired channels and press the Yellow button to set all the s...

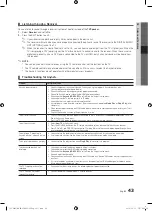
Page 13: ...e Scans for a channel automatically and stores in the TV Automatically allocated programme numbers may not correspond to actual or desired programme numbers If a channel is locked using the Child Lock...

Page 14: ...start or stop frequency differs in each country Modulation Displays available modulation values Symbol Rate Displays available symbol rates Channel Manager Channel Manager Option Menu Set each channel...

Page 15: ...room Adjusting Picture Settings Backlight Contrast Brightness Sharpness Colour Tint G R Your television has several setting options for picture quality control NOTE x x In analogue TV Ext AV modes of...

Page 16: ...lour Space to Custom White Balance Adjust the colour temperature for a more natural picture R Offset G Offset B Offset Adjust each colour s red green blue darkness R Gain G Gain B Gain Adjust each col...

Page 17: ...n Fit function with HDMI 720p input 1 line will be cut at the top bottom left and right as in the overscan function Screen Mode 16 9 Wide Zoom Zoom 4 3 Available only when picture size is set to Auto...

Page 18: ...u 2 Click on Appearance and Themes in the Control Panel window and a display dialog box will appear 3 Click on Display and a display dialog box will appear 4 Navigate to the Settings tab on the displa...

Page 19: ...rnal Speaker On If there is no video signal both speakers will be mute Additional Setting digital channels only DTV Audio Level MPEG HE AAC This function allows you to reduce the disparity of a voice...

Page 20: ...y available when the Clock Mode is set to Auto Using the Sleep Timer Sleep Timer t Automatically shuts off the TV after a preset period of time 30 60 90 120 150 and 180 minutes To cancel Sleep Timer s...

Page 21: ...ge Set a desired language for teletext English is the default in cases where the selected language is unavailable in the broadcast Preference Primary Audio Language Secondary Audio Language Primary Su...

Page 22: ...on the CAM inserted into the CI slot and on the CI or CI CARD which is inserted into the CAM You can install the CAM anytime whether the TV is on or off 1 Purchase a CI CAM module at your nearest deal...

Page 23: ...will return to their default settings We advise you to to write down your settings so that you can easily reset them after the upgrade By Online Upgrade the software using the Internet First configure...

Page 24: ...1280 x 960 1360 x 768 1440 x 900 1440 x 900 1600 x 1200 1680 x 1050 31 469 37 861 37 500 37 879 48 077 46 875 48 363 56 476 60 023 67 500 63 981 79 976 45 000 49 702 62 795 60 000 47 712 55 935 70 635...

Page 25: ...ter that supports Dynamic Host Configuration Protocol DHCP Modems and routers that support DHCP automatically provide the IP address subnet mask gateway and DNS values your TV needs to access the Inte...

Page 26: ...network that requires a Static IP address Getting the Network Connection Values To get the Network connection values on most Windows computers follow these steps 1 Right click the Network icon on the...

Page 27: ...is currently being used by another device nearby this will result in interference and communication failure x x If you apply a security system other than the systems listed below it will not work with...

Page 28: ...een notifying you of the failure Reset the AP and then try again If the connection fails again choose one of the other connection setup methods PBC WPS auto or manual 5 After the connection is establi...

Page 29: ...he AP is set to Hidden Invisible you have to select Add Network and enter the correct Network Name SSID and Security Key to establish the connection 5 If the Security PIN pop up appears go to Step 6 I...

Page 30: ...t work you need to enter the Network setting values manually Getting the Network Connection Values To get the Network connection values on most Windows computers follow these steps 1 Right click the N...

Page 31: ...ore information refer to the wireless network setup manual of the device to be connected 5 If the device is connected properly to the TV after starting count on message box then message box will be di...

Page 32: ...mmended to locate both TV and PC in same subnet The first 3 parts of the subnet address of the TV and the PC IP addresses should be the same and only the last part the host address should be changed e...

Page 33: ...dicated port USB 1 HDD port x x Do not disconnect the USB device while it is loading x x The higher the resolution of the image the longer it takes to display on the screen x x The maximum supported J...

Page 34: ...an 10 2010 Jan 10 2010 Jan 10 2010 Jan 10 2010 Jan 10 2010 Jan 10 2010 Jan 10 2010 Jan 10 2010 Jan 10 2010 Jan 10 2010 Movie 01 avi 1 1 Movie 01 avi SUM Movie 03 avi Movie 05 avi Movie 07 avi Movie 09...

Page 35: ...change the input source during recording the screen will go blank until the change is completed x x An application which supports neither the recording nor the Timeshift Mode function will close auto...

Page 36: ...mkv AVI MKV Divx 3 11 4 x 5 1 6 0 1920x1080 6 30 8 MP3 AC3 LPCM ADPCM DTS Core XviD 1920x1080 6 30 8 H 264 BP MP HP 1920x1080 6 30 25 MPEG4 SP ASP 1920x1080 6 30 8 Motion JPEG 800x600 6 30 8 asf ASF...

Page 37: ...ss multi channel or lossless audio WMA sampling rate 22050Hz mono is not supported Playing recorded TV or movie file continuously Resume Play If you exit the playing Recorded TV or Videos function it...

Page 38: ...ress the or button to select Photos then press the ENTERE button in the Media Play menu 2 Press the button to select the desired file in the file list 3 Press the ENTERE button or Play button While a...

Page 39: ...e It sorts and displays the file title in Symbol Number Alphabet Special order Preference It sorts and displays the file by preference You can change the file preference in the file list section using...

Page 40: ...ide show effect Background Music You can set and select background music when watching a slide show Zoom You can zoom into images in full screen mode Rotate You can rotate images in full screen mode H...

Page 41: ...r TV and the Digital Audio Input on the Home Theatre x x When following the connection above the Optical jack only outputs 2 channel audio You will only hear sound from the Home Theatre s Front Left a...

Page 42: ...t may turn off Switching between Anynet Devices 1 Anynet devices connected to the TV are listed If you cannot find a device you want press the Red button to refresh the list 2 Select a device and pres...

Page 43: ...Initial setup etc When connecting or removing the HDMI cable please make sure to search devices again or turn your TV off and on again Check if the Anynet Function of Anynet device is set on I want to...

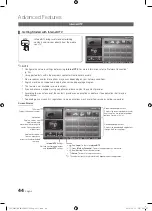
Page 44: ...services directly from the web to your TV Recommended Samsung Apps Settings My Applications Login Mark as Favourite Sort by R Return by Date 1 1 Recommended Applications Displays the recommended servi...

Page 45: ...ching TV Only available if supported by the broadcaster Change the Service Lock password The default password set is 0 0 0 0 If you forget the password press the following sequence of remote control b...

Page 46: ...TV shows and short length videos y y Sports Displays various sports media such as match information images and short length video y y Game Displays various games such as sudoku and chess y y Lifestyl...

Page 47: ...ScreenShare function The Media function is available in all mobile devices which support AllShare Allowed Denied Allows Blocks the mobile phone Delete Deletes the mobile phone from the list This func...

Page 48: ...share displays the same web page as provide in mobile Using ScreenShare you can open the various contents saved in a mobile phone For example the image below displays an access page for contents from...

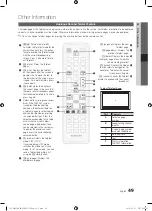
Page 49: ...opics on a Teletext page are colour coded and can be selected by pressing the coloured buttons Press the colour corresponding to the topic of your choice A new colour coded page is displayed Items can...

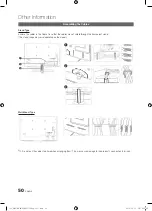
Page 50: ...t the cables are not visible through the transparent stand The stand shape may vary depending on the model 3 1 2 1 2 3 Wall Mount Type Do not pull the cables too hard when arranging them This may caus...

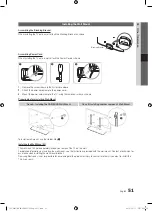
Page 51: ...l Mount Case A Installing the SAMSUNG Wall Mount Case B Installing another company s Wall Mount 1 1 To install a wall mount use the Holder Ring 1 Installing the Wall Mount Kit The wall mount kit sold...

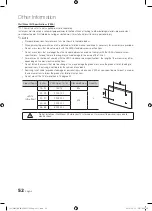
Page 52: ...too long may cause damage to the inside of the TV set x x For wall mounts that do not comply with the VESA standard screw specifications the length of the screws may differ depending on the wall moun...

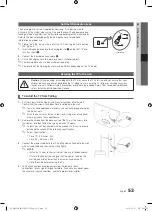
Page 53: ...l the anti fall device as follows To Avoid the TV from Falling 1 Put the screws into the clamps and firmly fasten them onto the wall Confirm that the screws have been firmly installed onto the wall Yo...

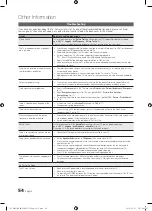
Page 54: ...ting the picture to view the default picture settings go to MENU Picture Picture Reset p 18 There is a dotted line on the edge of the screen If the picture size is set to Screen Fit change it to 16 9...

Page 55: ...f you are using a HDMI connection check the audio output setting on your PC Network Connection Depending on Models Wireless network connection failed Samsung Wireless USB dongle is required to use a w...

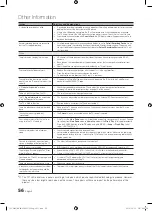
Page 56: ...n Antenna RF Coax connection p 23 The TV is tilted to the side Remove the base stand from the TV and reassemble it There are difficulties assembling the stand base Make sure the TV is placed on a flat...

Page 57: ...D 1080p including premium content ABOUT DIVX VIDEO DivX is a digital video format created by DivX Inc This is an official DivX Certified device that plays DivX video Visit www divx com for more inform...

Page 58: ...1080p 1080i 720p 576p 576i 480p 480i Audio 2Ch Linear PCM 32 44 1 48kHz 16 20 24bits Analogue audio input HDMI IN1 only PC input HDMI IN1 only Stand Swivel Left Right 20 20 Model Name UE32C6600 UE37C6...

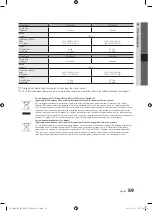
Page 59: ...m uncontrolled waste disposal please separate these items from other types of waste and recycle them responsibly to promote the sustainable reuse of material resources Household users should contact e...

Page 60: ...tion Space 2 L Language 21 Licence 57 Lock 14 M Media Play 32 Melody 22 Menu Transparency 22 Music 38 My Channels 13 N Navigate 11 Network Connection 25 Network Setup 26 Now Next guide 11 O ON OFF but...

Page 61: ...at plug end adaptors and the point where they exit from the appliance To protect this apparatus from a lightning storm or when it is left unattended and unused for long periods of time unplug it from...

Page 62: ...Kingdom This Samsung product is warranted for a period of twelve 12 months from the original date of purchase against defective materials and workmanship In the event that warranty service is required...

Page 63: ...This page is intentionally left blank UC6600 BN68 02840F 00Eng 0311 indb 63 2010 03 11 9 25 41...

Reviews: