background image

English - 31

Support through Remote Management

Samsung Remote Support service offers you one-on-one support with a Samsung Technician 
who can remotely.


Diagnose

 your TV


Adjust

 the TV settings for you


Perform a factory reset

 your TV


Install recommended 

firmware updates

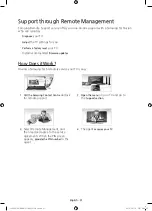
How Does it Work?

Having a Samsung Tech remotely service your TV is easy.

1.  Call the Samsung Contact Centre

 and ask 

for remote support.

2.  Open the menu

 on your TV and go to 

the 

Support section

.

3. 

Select Remote Management, and 
then read and agree to the service 
agreements. When the PIN screen 
appears, 

provide the PIN number

 to the 

agent.

4. 

The agent 

accesses your TV

.

[JS9500-XU]BN68-07183G-01ENG.indb   31

2015-03-16   오후 6:46:25

Summary of Contents for UE88JS9500

Page 1: ...hasing this Samsung product To receive more complete service please register your product at www samsung com register Model_______ Serial No ___________ user manual JS9500 XU BN68 07183G 01ENG indb 1...

Page 2: ...c shock To avoid electric shock never touch the inside of this apparatus Only a qualified technician should open this apparatus Be sure to plug in the power cord until it is firmly seated When unplugg...

Page 3: ...lt into your TV Voice Control Access and control menu options and functions using voice commands Refer to the e Manual chapter Smart Features Controlling the TV with Your Voice UHD Evolution Kit You c...

Page 4: ...ra angle 04 Connections 12 Connecting devices to your TV 13 Connecting to the Internet 15 TV Upgrade using UHD Evolution Kit sold separately 16 Connecting to a COMMON INTERFACE slot Your TV viewing Ca...

Page 5: ...cifications and other information 33 TV Specifications 34 Licences 36 Warranty Card The figures and illustrations in this User Manual are provided for reference only and may differ from the actual pro...

Page 6: ...purchased separately Check for any accessories hidden behind or in the packing materials when opening the box An administration fee may be charged if either a an engineer is called out at your reques...

Page 7: ...on the wall detach the stand from the TV However make sure not to remove the Styrofoam with the stand Before you install the screws for the wall mount put the Styrofoam that came with the TV s packagi...

Page 8: ...too long may cause damage to the inside of the TV set For wall mounts that do not comply with the VESA standard screw specifications the length of the screws may differ depending on the wall mount spe...

Page 9: ...l mount we strongly recommend you use parts provided by Samsung Electronics only Using parts provided by another manufacturer may cause difficulties with the product or result in injury caused by the...

Page 10: ...ecessary clamps screws and string are not supplied please purchase these additionally 2 Remove the screws from the centre back of the TV put the screws into the clamps and then fasten the screws into...

Page 11: ...ting the TV camera To use the TV camera you must first extend it Gently push the camera in without touching the lens until you hear a click The camera pops up If you are not using the TV camera keep i...

Page 12: ...ions on supported external devices For more information about connections see the e Manual chapter Connections Make sure you have the correct cable before plugging it in Illustrations of common plugs...

Page 13: ...rmation about Smart Hub see the e Manual chapter Smart Features Smart Hub The shape of the rear panel differs among the models Network Connection Wireless Connect the TV to the Internet using a standa...

Page 14: ...xternal Modem ADSL VDSL Cable TV The Modem Port on the Wall Modem Cable Not Supplied LAN Cable Not Supplied LAN Cable Not Supplied External Modem ADSL VDSL Cable TV IP Router with a DHCP Server The Mo...

Page 15: ...Electronics via UHD Evolution Kit UHD Evolution Kit is sold separately Purchasing UHD Evolution Kit will allow you to upgrade the software to the version from the year in which your UHD Evolution Kit...

Page 16: ...out 2 3 minutes If an error message is displayed please contact your service provider When the configuration of channel information has finished the message Updating Completed is displayed indicating...

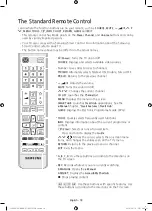
Page 17: ...l joystick like button at the right back of the TV lets you control the TV without the remote control Control Stick The Control Stick is located on the lower left corner of the back of the TV Remote c...

Page 18: ...EPG Number Gives direct access to channels TTX MIX Alternately selects Teletext ON Double Mix or OFF PRE CH Returns to the previous channel A B C D Use these buttons according to the directions on th...

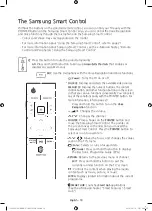
Page 19: ...and other function buttons on the screen so that you can run functions conveniently You can select any of these buttons easily with the POINTER button For more information refer to page 23 Press and...

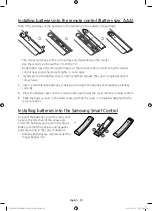
Page 20: ...it comes loose 2 Insert 2 AAA alkaline batteries making sure to align the positive and negative polarities correctly 3 Place the battery cover on the remote control and insert the cover into the remo...

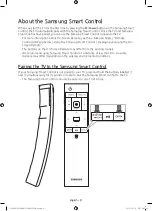
Page 21: ...ng Smart Control Displaying and using the On Screen Remote The buttons on the On Screen Remote may differ from the existing models We recommend using Samsung Smart Control at a distance of less than 6...

Page 22: ...n the direction you moved the Samsung Smart Control Press the POINTER to select or run a focused item Displays the On Screen Remote Allows you to adjust the volume or select speakers Displays the chan...

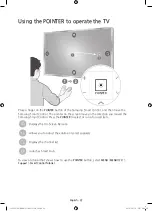
Page 23: ...lace a finger on the POINTER button of the Samsung Smart Control and then move the Samsung Smart Control The pointer on the screen moves in the direction you moved the Samsung Smart Control Press the...

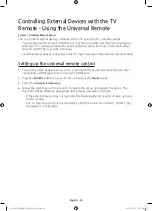
Page 24: ...e universal remote control 1 Turn on the external device you want to control with the universal remote function after connecting a HDMI cable to One Connect s HDMI port 2 Press the SOURCE button on yo...

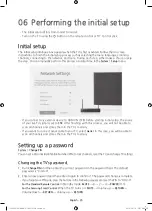
Page 25: ...ot be able to scan all channels and stores them in the TV s memory If you want to connect aerial cable to your TV select Aerial In this case you will be able to scan all channels and stores them in th...

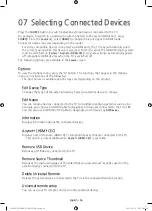
Page 26: ...ay vary depending on the product Edit Device Type Changes the types of the external devices Select an external device to change Edit Name You can rename devices connected to the TV to facilitate ident...

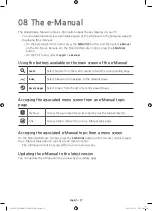
Page 27: ...ding page Index Select a keyword to navigate to the relevant page Recent pages Select a topic from the list of recently viewed topics Accessing the associated menu screen from an e Manual topic page T...

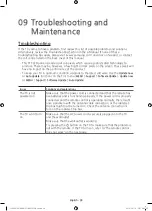
Page 28: ...unctions on the TV s menu MENU Support Software Update Update now or MENU Support Software Update Auto Update Issues Solutions and explanations The TV is not powered on Make sure that the power cord i...

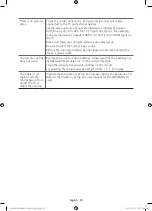
Page 29: ...Reboot the connected device by unplugging it and reconnecting the device s power cable The remote control does not work Replace the remote control batteries Make sure that the batteries are installed...

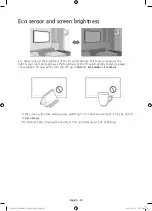
Page 30: ...rightness of the TV automatically to reduce power consumption If you want to turn this off go to System Eco Solution Eco Sensor If the screen is too dark while you are watching TV in a dark environmen...

Page 31: ...ommended firmware updates How Does it Work Having a Samsung Tech remotely service your TV is easy 1 Call the Samsung Contact Centre and ask for remote support 2 Open the menu on your TV and go to the...

Page 32: ...ter or any liquid directly onto the TV Any liquid that goes into the product may cause a failure fire or electric shock Turn off the TV then gently wipe away smudges and fingerprints on the screen wit...

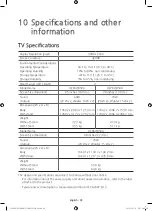
Page 33: ...H x D Body With stand 1450 2 x 838 3 x 125 3 mm 1450 2 x 917 2 x 379 2 mm 1744 2 x 1006 7 x 153 8 mm 1744 2 x 1086 0 x 386 2 mm Weight Without Stand With Stand 32 3 kg 35 5 kg 47 3 kg 51 1 kg Model Na...

Page 34: ...l image elements such as TV channel logos stock or news bars at the bottom of the screen etc or programmes in panorama or 4 3 image format Constantly displaying still pictures can cause image burn in...

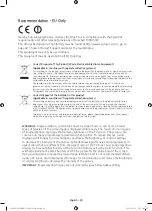
Page 35: ...g on battery manual or packaging indicates that the batteries in this product should not be disposed of with other household waste at the end of their working life Where marked the chemical symbols Hg...

Page 36: ...considered to be defective in materials nor workmanship by reason that it requires adaptation in order to conform to national or local technical or safety standards in force in any country other than...

Page 37: ...This page is intentionally left blank JS9500 XU BN68 07183G 01ENG indb 37 2015 03 16 6 46 27...

Page 38: ...This page is intentionally left blank JS9500 XU BN68 07183G 01ENG indb 38 2015 03 16 6 46 27...

Page 39: ...This page is intentionally left blank JS9500 XU BN68 07183G 01ENG indb 39 2015 03 16 6 46 27...

Page 40: ...ing to Samsung products please contact the SAMSUNG customer care centre Country Customer Care Centre Web Site EIRE 0818 717100 www samsung com ie support UK 0330 SAMSUNG 7267864 www samsung com uk sup...

Reviews: