background image

E-

18

E-

18

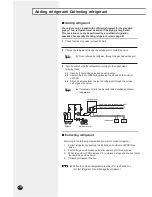
Insulation

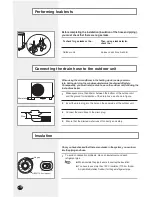
Before completing the installation (insulation of the hose and piping), 

you must check that there are no gas leaks.

To check for gas leaks on the...

Then, using a leak detector, 

check the...

Outdoor unit

Valves on sections A and B.

A

B

A

B

A

B

A

B

Performing leak tests

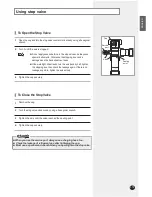
Connecting the drain hose to the outdoor unit

Once you have checked that there are no leaks in the system, you can insu-

late the piping and hose.

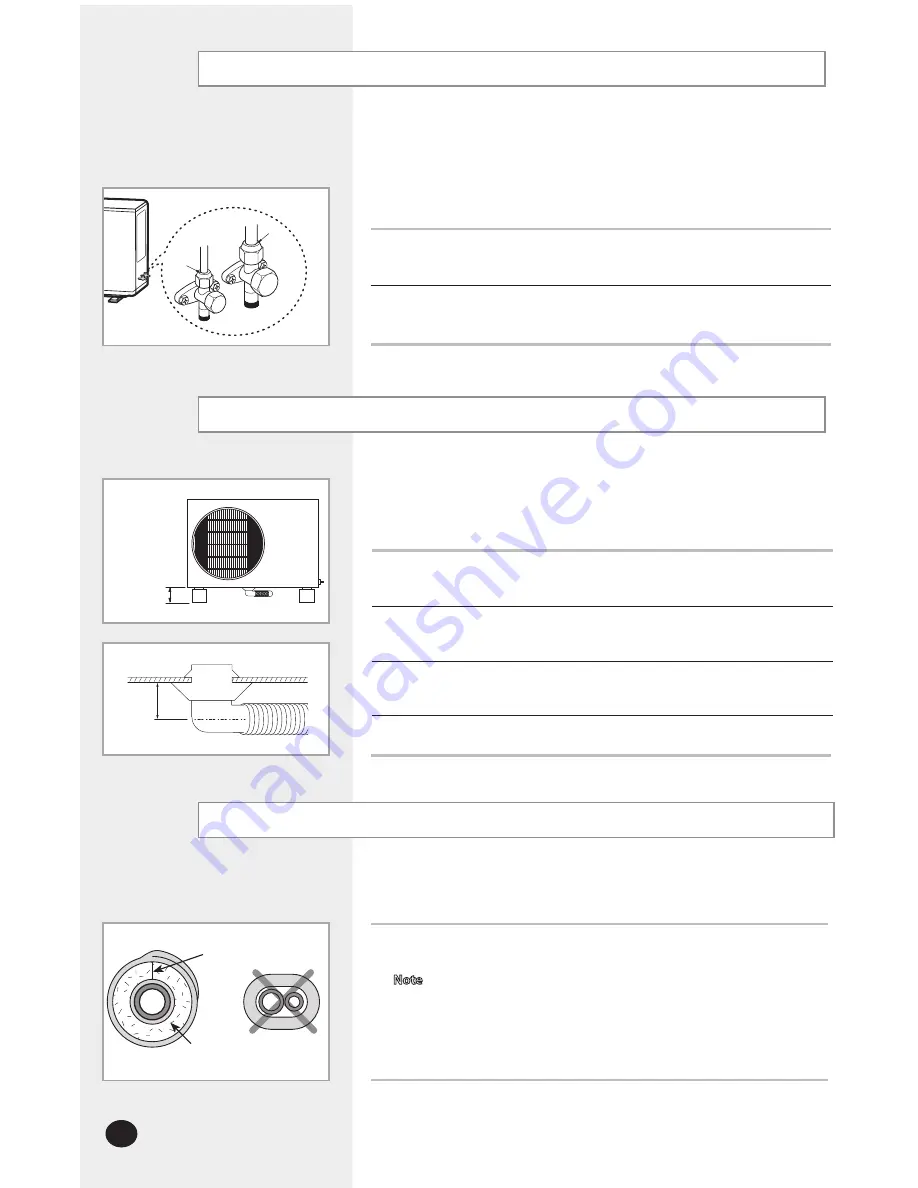
To avoid condensation problems, place an insulator around each 

refrigerant pipe.

1

 When insulate the pipe, be sure to overlap the insulation.


  You have to use more than 120°C insulation(T13.0 or thicker 

Acrylonitrile Butadien Rubber) for the gas refrigerant pipe.

Note

No gap

NBR(T13.0 or thicker)

When using the air conditioner in the heating mode, ice may accumu-

late. During de-icing, the condensed water must be drained off safely. 

Consequently, you must install a drain hose on the outdoor unit, following the 

instructions below.

Make space more than 50mm between the bottom of the outdoor unit 

and the ground for installation of the drain hose, as shown in figure.

1

Insert the drain plug into the hole on the underside of the outdoor unit.

2

Connect the drain hose to the drain plug.

3

Ensure that the drained water runs off correctly and safely.

4

50mm min.

50mm min.

30mm

Summary of Contents for UH105GAMC

Page 1: ...ENGLISH INSTALLATION MANUAL System Air Conditioner Cooling and Heating E S F I P D G R DB98 26328A 2 ESPAÑOL FRANÇAIS ITALIANO PORTUGUÊS DEUTSCH EΛΛHNIKA RUSSIAN UH140GAMC UH105GAMC ...

Page 2: ...ds outside impacts and so on INSTALLING THE UNIT If the power cord of this air conditioner is damaged it must be replaced by the manufacturer its service agent or similarly qualified persons in order to avoid a hazard The unit must be plugged into an independent circuit if applicable or connect the power cable to the auxiliary circuit breaker An all pole disconnection from the power supply must be...

Page 3: ...Connecting the refrigerant pipe 15 Connecting up and removing air in the circuit 16 Cutting Flaring the pipes 17 Performing leak tests 18 Connecting the drain hose to the outdoor unit 18 Insulation 18 Using stop valve 19 Adding refrigerant collecting refrigerant 20 Checking correct grounding 22 Setting up option switches 23 Testing operations 25 Troubleshooting 27 Parts list 28 Contents ...

Page 4: ...E 4 E 4 Type of outdoor unit Design Model A Type of outdoor unit A UH140GAMC B UH105GAMC ...

Page 5: ...th between the outdoor unit and rope then move the unit Plate protection cloth Wire rope Air Conditioner and Accessories The following accessories are supplied with the air conditioner The type and quantity may differ depending on the specifications Refrigeration pipes and their insulating materials power cables are not supplied Note Flare Nuts 3 8 Rubber Bracket Wire Drain Plug Cap Drain A Instal...

Page 6: ...ily connected to the indoor unit Install the outdoor unit on a flat stable surface that can support its weight and does not generate any unnecessary noise and vibration Position the outdoor unit so that the air flow is directed towards the open area Maintain sufficient clearance around the outdoor unit especially from a radio computer stereo system etc Fuse Outdoor Unit 1 5m or more Indoor Unit Re...

Page 7: ...it are blocked by the wall 1500 or more 2000 or more The upper part of the outdoor unit and the air outlet is towards the wall 500 or more 300 or more The upper part of the outdoor unit and the air outlet is opposite the wall 1500 or more 300 or more When front and rear side of the outdoor unit is towards the wall Unit mm Space Requirements for Outdoor Unit Wheninstalling1outdoorunit ...

Page 8: ... 600 or more 3000 or more 200 or more 3000 or more 600 or more 600 or more 200 or more 1500 or more 600 or more 600 or more 600 or more When 3 sides of the outdoor unit are blocked by the wall When front and rear side of the outdoor unit is towards the wall When front and rear side of the outdoor unit is towards the wall When installing more than 1 outdoor unit ...

Page 9: ...n appropriate support wall or ground Piping To prevent the unit against a wild animal or something cover part after connecting the pipe Outdoor Unit Support 20mm Anchor bolt Outdoor Unit Base Surface Outdoor Unit Support Make a drain outlet around the base for outdoor unit drainage If the outdoor unit is installed on the roof you have to check the ceiling strength and waterproof the unit Make a dr...

Page 10: ...ng ELB for 1 phase 3 æ 380 415V 50Hz ELB Outdoor Unit When using ELB for 3 phase 4 wires If an outdoor unit is installed in a place in danger of an electric leak or submergence you must install the ELB Two electronic cables must be connected to the outdoor unit The connection cord between indoor unit and outdoor unit The power cable between outdoor unit and auxiliary circuit breaker Specially for ...

Page 11: ...hase Single Phase Power Supply Max Min V MCCB ELB Power Cable Length Power Supply Max Min V MCCB ELB Power Cable Length A 380 415V 50HZ 10 Frame 30A Trip 20A 20A 2 5mm2 4 Wires 10m or less Ø1 6mm 1 Wire 3 0mm2 4 Wires 20m or less B 380 415V 50HZ 10 Frame 30A Trip 20A 20A 2 0mm2 4 Wires 10m or less 2 5mm2 4 Wires 20m or less Power Supply Single Phase Earth Cable Communication Cable Home server Powe...

Page 12: ...nit Single Phase 3 Phase 3 Wires Communication Cable Connection cord 3 Phase Power Cable AC 380V Single Phase AC220V Cable clamp A B Main PCB The diagram of 3 phases and 3 wires changed Communication Cable Connection cord 3 Phase Power Cable AC 380V Single Phase AC220V Cable clamp A Main PCB The product is originally manufactured as 3 phases and 4 wires To change it into 3 phases and 3 wires you m...

Page 13: ... over 4 of supply rating the indoor unit is protect ed stopped and the error mode indicates To protect the product from water and possible shock you should keep the power cable and the connection core of the indoor and outdoor units in the iron pipe Connet the power cable to the auxiliary circuit breaker An all pole disconnection from the power supply must be incorporated in the fixed wiring 3mm Wh...

Page 14: ...ontinued Wiring Diagram of Connection Cord 3 4 Indoor Unit Outdoor Unit Note 1 Max length of communication cable 120m 2 Whole length of cable 240m 3 Connect the Connection Cord as seen in picture and the torque of screw is 40 70kgf cm ...

Page 15: ...rigerant pipe L1 H L0 Refrigerant Piping System Refrigerant piping system table Max allowable length Actual pipe length L0 H L1 Allowable height length Actual pipe length H 50m or less 30m or less Pipe length or height UH140 105GAMC ...

Page 16: ... pressure side of manifold gauge to the packed valve having a service port as shown at the figure 3 Open the valve of the low pressure side of manifold gauge counterclockwise 4 Purge the air from the system using vacuum pump for about 10 minutes Close the valve of the low pressure side of manifold gauge clockwise Make sure that pressure gauge show 0 1MPa 76cmHg after about 10 minutes This procedur...

Page 17: ... 6 35 mm 1 4 1 3mm 9 52 mm 3 8 1 8mm 12 70 mm 1 2 2 0mm 15 88 mm 5 8 2 2mm 19 05 mm 3 4 2 2mm 22 23 mm 7 8 2 2mm Slide a flare nut on to the pipe and modify the flare 4 Outer Diameter Torque kgf cm 6 35 mm 1 4 140 170 9 52 mm 3 8 250 280 12 70 mm 1 2 380 420 15 88 mm 5 8 440 480 19 05 mm 3 4 990 1210 22 23 mm 7 8 990 1210 Align the pipes and tighten the flare nuts first manually and then with a to...

Page 18: ...ap the insulation You have to use more than 120 C insulation T13 0 or thicker Acrylonitrile Butadien Rubber for the gas refrigerant pipe Note No gap NBR T13 0 or thicker When using the air conditioner in the heating mode ice may accumu late During de icing the condensed water must be drained off safely Consequently you must install a drain hose on the outdoor unit following the instructions below ...

Page 19: ... no leakage any more tighten the axis entirely Note Remove the cap 1 Turn the stop valve clockwise by using a hexagonal wrench 2 Tighten the cap securely 4 Tighten the axis until the valve reached the sealing point 3 When you use the service port always use a charging hose too Check the leakage of refrigerant gas after tightening the cap Must use a spanner and wrench when you open tighten the stop...

Page 20: ...ioner by pressing the K2 key on the outdoor unit PCB 3 3 About 30 minutes later charge the refrigerant through the service port of gas stop valve 3 If necessary refer to the pressure table classified by outdoor temperature Note 2 1 Ref Liquid side stop valve service port Outdoor unit Indoor unit Balance Vacuum pump Gas side stop valve service port Adding refrigerant Collecting refrigerant Accordin...

Page 21: ...t contains fluorinated greenhouse gases covered by the Kyoto Protocol Do not vent gases into the atmosphere Please fill in with indelible ink the factory refrigerant charge of the product the additional refrigerant amount charged in the field and the total refrigerant charge on the refrigerant charge label supplied with the product The filled out label must be adhered in the proximity of the produ...

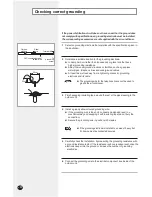
Page 22: ...ng tape around the rest of the pipes leading to the outdoor unit 3 Install a green yellow coloured grounding wire If the grounding wire is too short connect an extension lead in a mechanical way and wrapping it with insulating tape do not bury the connection Secure the grounding wire in position with staples 4 Carefully check the installation by measuring the grounding resistance with a ground res...

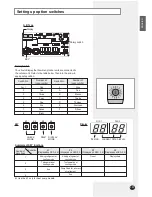
Page 23: ...s Switch No Number of indoor unit s Rotary switch Display A B Type KEY K1 K3 K2 CHECK MODE Use the K1 only for heat pump models DISPLAY MODE RESET K4 DIS 1 DIS 2 Function Number of press times 1 2 3 4 K1 Displayed on SEG 3 4 Adding refrigerant at heating mode Test operation at heating mode End K2 Displayed on SEG 3 4 Adding refrigerant at cooling mode Test operation at cooling mode Pump Down for r...

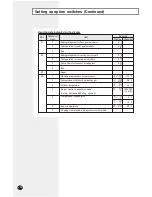
Page 24: ...models Pump Down for recovery of refrigerant End Reset Discharge temperature of compressor Temperature of outdoor heat exchanger Outdoor temperature Step of electronic expansion valve 0 step all closed 480 step all open Temperature of evaporator Indoor temperature Stopping view mode display communication data 110 C 38 C 34 C Reading data indicated on the display KEY Number of press Item Example Di...

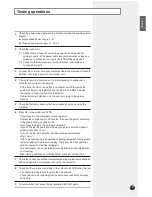
Page 25: ...d during the operation of adding refrigerant test operation is started without compressor stopping Therefore start test operation after the operation of adding refrigerant The compressor can be operated after completely 3 minute preparation and tracking When testing operations at Heating Mode press K1 instead of K2 At this time the SEG 1 and SEG 2 on outdoor unit PCB display the number of indoor u...

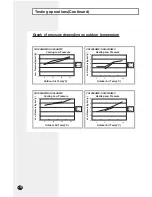
Page 26: ...mp C 2 4 0 6 8 10 5 2 7 24 7 5m 50m Outdoor Air Temp C m c g k e r u s s e r P w o L g Cooling Low Pressure 2 4 0 6 8 10 5 21 35 43 7 5m 50m Outdoor Air Temp C m c g k e r u s s e r P w o L g Heating Low Pressure 2 4 0 6 8 10 5 2 7 24 7 5m 50m Outdoor Air Temp C CH140EAMC UH140GAMC CH140EAMC UH140GAMC CH105EAMC UH105GAMC CH105EAMC UH105GAMC Graph of pressure depending on outdoor temperature ...

Page 27: ...of fan starting Open error of electronic expansion valve in outdoor unit Detected once or more times Close error of electronic expansion valve in outdoor unit Detected once or more times Below 5 C when cooling Outdoor temperature Over 30 C when heating Outdoor temperature Trouble shooting If an error occurs during the operation it is displayed on the outdoor unit PCB Outdoor unit Explanation Displ...

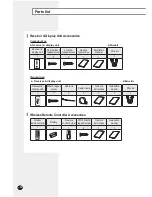
Page 28: ...ceiver display unit 1 STS 2S 2x10 tapped screw 2S 4x12 tapped screw Owner s instructions Installation manual 4 2 1 1 Wire kit 1 Receiver display unit 1 M4x16 tapped screw Cable tie Cable clamp Owner s instructions Installation manual 7 2 5 1 1 Wire kit 1 Wireless remote controller 1 Battery Remote control holder STS 2S 2x10 tapped screw Owner s instructions Installation manual 2 1 2 1 1 ...

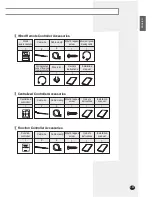
Page 29: ...e wired remote controller 1 Wire joint 1 Owner s instructions 1 Installation manual 1 Centralized Controller Accessories Cable tie 2 Cable clamp 5 M4x16 tapped screw 7 Owner s instructions 1 Installation manual 1 Centralized controller 1 Function Controller Accessories Cable tie 2 Cable clamp 6 M4x16 tapped screw 7 Owner s instructions 1 Installation manual 1 Function controller 1 ...

Page 30: ... clamp 2 M4x16 tapped screw 4 Owner s instructions 1 Installation manual 1 7 day Scheduler 1 Transmitter power cable 1 Transmitter communication cable 1 Installation manual 1 Transmitter 1 If you would like to install the centralized controller you must install the transmitter in the outdoor unit Note ...

Page 31: ...ENGLISH E 31 Memo E 31 ...

Page 32: ......

Reviews: