4
ASSEMBLING THE VACUUM CLEANER FOR USE
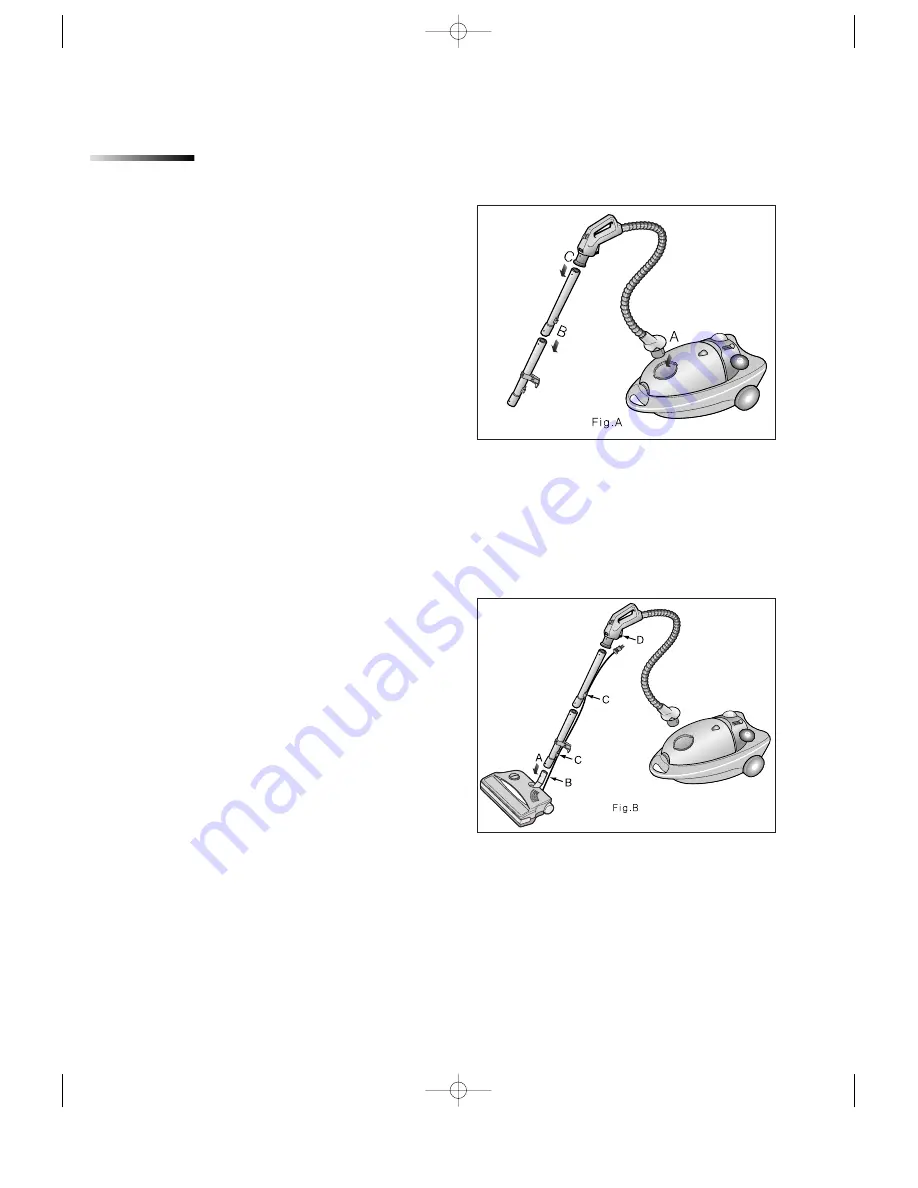
Attaching the Hose to the Canister
Slide the Hose Clamper into the Canister lnlet
until it “clicks” into place.(Fig. A-A)
Assembling the Extension Wand
Slide the narrow end of one Extension Wand
section into the other Wand Extension.(Fig. A-
B)Depress the locking button with your thumb
and continue sliding the Extensions
together.Turn the Wands in opposite directions
until the locking button snaps into the hole in
the other Wand. Make sure the locking button
snaps into place completely.
Attaching the Extension Wand to the
Hose
Slide the handle end of the Hose over the end
of the Wand with a locking button.(Fig A-C)
Turn the Hose and Wand in opposite directions
until the locking button on the Wand snaps into
the hole on the Hose. Make sure the locking
button snaps into place completely.
Attaching the Power Brush
Slide the free end of the Extension Wand onto
the Power Brush Wand until the locking button
“clicks” into place.(Fig. B-A) Hold Power Brush
Electrical Cord against the back of the
Extension Wand.(Fig. B-B) Press Power Brush
Cord into the grooves of the Cord Clips.(Fig. B-
C) Plug the Power Brush Cord into the Hose
Electrical Outlet.(Fig. B-D)Your vacuum cleaner
is ready for use.
DJ68-00079M(US) 7/28/01 2:06 PM Page 5


