1-10
Samsung Electronics
Disassembly and Reassembly
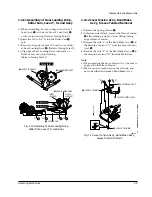
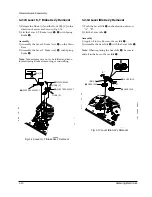
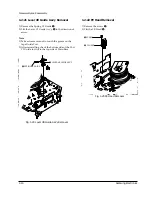
1-2-13 Lever S, T Brake Ass’y Removal
1) Release the Hook [A] and the Hook [B], [C] in the
direction of arrow as shown in Fig. 1-16.
2) Lift the Lever S, T Brake AssÕy
Œ
,
´
with Spring
Brake
ˇ
.
Assembly
:
1) Assembly the Lever S Brake AssÕy
Œ
on the Main
Base.
2) Assembly the Lever T Brake AssÕy
´
with Spring
Brake
ˇ
.
Note
: Take extreme care not to be folded and trans-
formed spring Brake at removing or reinstalling.
ˇ
SPRING BRAKE
´
LEVER T BRAKE ASS'Y
Œ
LEVER S BRAKE ASS'Y
HOOK [A]
HOOK [C]
HOOK [B]
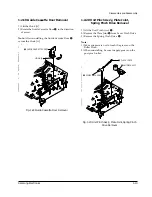
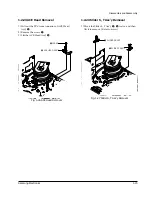
1-2-14 Lever Idle Ass’y Removal
1) Push the Lever Idle
Œ
in the direction of arrow
ÒAÓ, ÒBÓ.
2) Lift the Lever Idle
Œ
.
Assembly
:
1) Apply oil in two Bosses of Lever Idle
Œ
.
2) Assemble the Gear Idle
´
with the Lever Idle
Œ
.
Note
: When replacing the Gear Idle
´
, be sure to
add oil in the boss of Lever Idle
Œ
.
Œ
LEVER IDLE
´
GEAR IDLE
´
GEAR IDLE
HOOK [A]
"A"
"B"
Fig. 1-16 Lever S, T Brake Ass’y Removal
Fig. 1-17 Lever Idle Ass’y Removal
Summary of Contents for VR400PVR400PC
Page 16: ...Exploded View and Parts List 3 8 Samsung Electronics MEMO ...
Page 23: ...Schematic Diagrams Samsung Electronics 5 3 5 1 S M P S 120 Voltage ...
Page 24: ...Schematic Diagrams 5 4 Samsung Electronics 5 2 S M P S Free Voltage ...
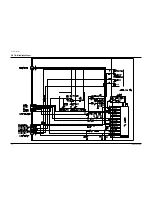
Page 25: ...Schematic Diagrams Samsung Electronics 5 5 5 3 Power ...
Page 26: ...Schematic Diagrams 5 6 Samsung Electronics 5 4 Logic ...
Page 27: ...Schematic Diagrams Samsung Electronics 5 7 5 5 Audio Video ...
Page 28: ...Schematic Diagrams 5 8 Samsung Electronics 5 6 TM Block Input Ouput ...
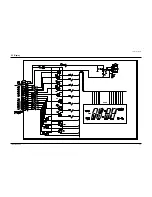
Page 29: ...Schematic Diagrams Samsung Electronics 5 9 5 7 Display ...
Page 30: ...Schematic Diagrams 5 10 Samsung Electronics MEMO ...
Page 55: ...2 6 Samsung Electronics Alignment and Adjustment MEMO ...


