background image

19

18

Recording

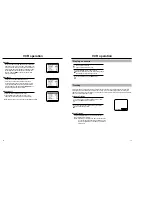
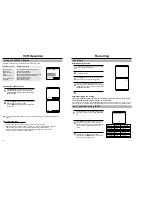
Changing or canceling a timer recording

TO CHANGE THE TIMER PROGRAM, repeat steps 1 to 4.

TO CANCEL THE TIMER PROGRAM, select the program you want to cancel in the timer recording list. 
Press the CLEAR button twice on the remote clear the Timer Program settings.
The contents are then cleared. 

Tape speeds

The VCR can record at two tape speeds. The slower speed (SLP) allows the VCR to record more program 
material on a tape. Tapes recorded at standard speed (SP) provide a clearer picture. Press the REC.SPEED
button on the remote control to set the tape speed. You can refer to the following table:

TAPE

SP (Standard Play)

SLP (Super Long Play)                         

T-120

2 hrs

6 hrs

T-160

2 hrs 40 minutes

8 hrs 

T-180

3 hrs

9 hrs 

Record protect tab

Before recording on any video cassette, make sure the record protect safety tab is in place. To prevent accidental-
ly recording over a program, remove the record protect safety tab on the cassette case. To record on a tape with
its tab removed, cover the hole with adhesive tape.

About Video Cassette Tapes

Recording

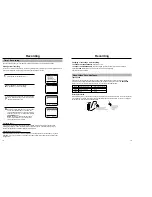
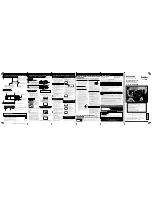
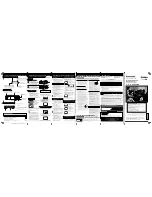
The Timer feature allows you to set the VCR to automatically record up to eight different programs.

Setting a timer recording

Your VCR can record on a specific day, or every day, Monday through Friday. Daily and weekly programs remain
in the timer until erased. A single program is erased after the program records.

To display a timer recording list, press the MENU

button and  

on the remote control.

2

Press 

and 

▲▼ 

to set the channel. 

Press 

to move to the next setting.  

3

Repeat step 2 to set start time, end time, date and 

record  speed. Date can be set for one time, daily

or 

weekly recording. See below.

4

Press the MENU button to complete programming

the timer recording. Stop the VCR or turn the power
off. The timer indicator comes on the VCR. The
VCR will automatically turn on and begin recording
at the time you have set.   To stop a timer recording,
press POWER button.
Note: When using a cable decoder box or DSS

®

,

make sure the decoder box is on and set to the 
correct channel for timer recording. 

CH START END   DATE

SPD

- -    - : - -       - : - -      - - -      

- - 

- -    - : - -       - : - -      - - -      

- -  

- -    - : - -       - : - -      - - -      

- -  

- -    - : - -       - : - -      - - -      

- -  

- -    - : - -       - : - -      - - -      

- -  

- -    - : - -       - : - -      - - -      

- -  

- -    - : - -       - : - -      - - -      

- -  

- -    - : - -       - : - -      - - -      

- -  

[

%

!

/

➛❿

]

[MENU/CLEAR

]

Auto Speed Select
If you are not sure the tape is long enough for timer program recording in the SP tape speed, set the
recording tape speed to “AUTO”. Recording starts in the SP tape speed. If the tape length is not long
enough, the tape speed automatically changes from SP to SLP.

Daily/Weekly Date Programming
Weekly [SUN’S~SAT’S]: You can record TV programs on the same channel at the same time every week.
Daily [MO ~ FR] : You can record TV programs on the same channel at the same time every day Monday
through Friday. 

Timer Recording

CH START END   DATE

SPD

03

- : - -       - : - -      - - -      

- - 

- -    - : - -       - : - -      - - -      

- -  

- -    - : - -       - : - -      - - -      

- -  

- -    - : - -       - : - -      - - -      

- -  

- -    - : - -       - : - -      - - -      

- -  

- -    - : - -       - : - -      - - -      

- -  

- -    - : - -       - : - -      - - -      

- -  

- -    - : - -       - : - -      - - -      

- -  

[

%

!

/

➛❿

]

[MENU/CLEAR

]

CH START END   DATE

SPD

03 7:24    9:24   5/10

AUTO

- -    - : - -       - : - -      - - -      

- -  

- -    - : - -       - : - -      - - -      

- -  

- -    - : - -       - : - -      - - -      

- -  

- -    - : - -       - : - -      - - -      

- -  

- -    - : - -       - : - -      - - -      

- -  

- -    - : - -       - : - -      - - -      

- -  

- -    - : - -       - : - -      - - -      

- -  

[

%

/

➛❿

]

[MENU/CLEAR

]

P

M

P

M

MAIN MENU

Timer recording

Clock set/adjust
Channel setup  
VCR function setup
Language/Lengua/Langue

[

%

/

]

[MENU/EXIT

]

Summary of Contents for VR5140C

Page 1: ...Video Cassette Recorder Owner s Manual VR8140C VR5140C ...

Page 2: ... to the operating instructions 12 Grounding or Polarization This product may be equipped with a polarized alternating current line plug a plug having one blade wider than the other This plug will fit into the power outlet only one way This is a safety feature If you are unable to insert the plug fully into the outlet try reversing the plug If the plug should still fail to fit contact your electric...

Page 3: ...te Tapes 19 Audio 20 Copying or Dubbing 21 Care and Maintenance 22 Troubleshooting 23 Specifications 24 Warranty 25 Hi Fi Stereo sound VR8140C 400x Rewind Rewinds a T 120 in about 1 minute Record File Recording information storage and display Auto Power off One Touch Recording OTR up to four hours Tri lingual on screen programming English Spanish French Digital Auto Tracking Special effects playba...

Page 4: ... dry place Batteries should last about a year When replacing batteries use all new batteries and never mix alka line and manganese batteries 1 Remove the battery compartment lid by lifting the cover 2 Insert two AA batteries as shown Match and ends of the batteries as indicated inside compartment 3 Replace the compartment cover POWER Press to turn your VCR on and off TV VCR Switch between TV or VC...

Page 5: ...nna lead with adapter Cable Antenna IN TO VCR VCR OUT TO TV Antenna Connection If your outside antenna cable is a 300 ohm flat feeder use an adapter to connect the antenna to the VCR input terminal You can purchase an adapter at an electronics store If your antenna already has a round lead simply connect it to the terminal on the rear panel of the VCR Once your antenna is connected to the VCR conn...

Page 6: ...1 To select the language for the on screen menu display press the MENU button on the remote control 2 Press on the remote control to select Language 3 Press to select the language you want for the on screen menus English Spanish French MAIN MENU Timer recording Clock set adjust Channel setup VCR function setup Language Lengua Langue MENU EXIT MAIN MENU Timer recording Clock set adjust Channel setu...

Page 7: ...Source Before the VCR can memorize available channels you must set the signal source for your VCR 1 With the VCR on press the MENU button Press and to select CHANNEL SETUP 2 If you have a cable system hooked up to your VCR leave CABLE TV displayed in the Ant Cable screen 3 If you have an antenna hooked up to your VCR press until ANTENNA appears Press the MENU button when you have selected the corr...

Page 8: ...cord speed SP or SLP See page 19 3 Press the MENU button when you are finished Input signal Access the VCR FUNCTION SETUP menu as described above Press and to select Input signal from the line input on the rear of VCR It is useful when you copy another tape See page 21 Audio output VR8140C Access the VCR FUNCTION SETUP menu as descibed above Press to select the audio mode See page 20 Tape length A...

Page 9: ... operation Auto play Access the VCR FUNCTION SETUP menu as described Press to set the cursor to Auto play then press to set ON or OFF When Auto play is ON the VCR will automat ically begin playing a video tape when it is inserted as long as the safety tab of the cassette has been removed see page 19 Press the MENU button on the remote control when you are finished Auto repeat Access the VCR FUNCTI...

Page 10: ... SEARCH EXIT button to display or exit the search screen When a program is recorded the starting point is given an Index mark for easy location However the VHS Index Search System VISS cannot recognize index marks made by old VCRs If the VCR has trouble finding a mark it is probably because the cassette was recorded on a VCR without VISS If you want to index two programs in a row set your VCR to s...

Page 11: ...ress once Record Not timed Press 2 times 0 30 30mins Press 3 times 1 00 1 hour Press 4 times 1 30 1 hour 30 mins Press 5 times 2 00 2 hours Press 6 times 3 00 3 hours Press 7 times 4 00 4 hours Press 8 times Record Not timed VCR Operation The display function gives you information about the status of your VCR Location on screen Display information Upper left corner The VCR functions Play Stop or R...

Page 12: ...ased A single program is erased after the program records 1 To display a timer recording list press the MENU button and on the remote control 2 Press and to set the channel Press to move to the next setting 3 Repeat step 2 to set start time end time date and record speed Date can be set for one time daily or weekly recording See below 4 Press the MENU button to complete programming the timer recor...

Page 13: ...ot Hi Fi this function will have no effect STEREO Choosing Audio VR8140C LEFT RIGHT MONO SAP MAIN MONO HI FI LEFT RIGHT MONO To make a copy or dub of a video you need two VCRs and two RCA type cables Warning One Federal Court has held that unauthorized recording of copyrighted TV programs may be an infringement of copyright laws 1 Attach one end of the Video cable to the Video OUT jack of the play...

Page 14: ... remote control Keep the remote with your VCR where it is unlikely to be lost or damaged Keep liquids away from your VCR including beverages and cleaning liquids Spilling any liquid on the VCR can damage the electronics resulting in an electric shock or fire Do not use liquid or aerosol cleaners that can accidentally get into the VCR causing damage or creating a fire hazard Do not allow any object...

Page 15: ...e e e e e e e e e e e e e e e e e e e e e e e e e e e e e e e e e e e e e e e e e e e e e e e e e e e e e e e e e e e e e e e e e e e e e e e e e e e e e e e e e e e e e e e e e e e e e e e e e e e f f f f f f f f f f f f f f f f f f f f f f f f f f f f f f f f f f f f f f f f f f f f f f f f f f f f f f f f f f f f f f f f f f f f f f f f f f f f f f f f f f f f f f f f f f f f f f f f f f f f f ...

Page 16: ...QUARTERS 7037 Financial Drive Mississauga Ontario Canada L5N 6R3 TEL 1 905 542 3535 www samsungcanada com SERVICE DIVISION 7037 Financial Drive Mississauga Ontario Canada L5N 6R3 1 800 SAMSUNG 1 800 726 7864 Printed in China AC68 01064A ...

Reviews: