background image

Recording

21

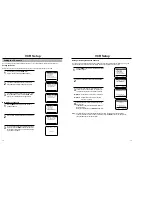
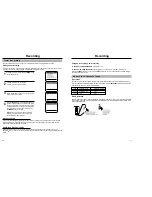
The Timer feature allows you to set the VCR to automatically record up to eight different programs.

Setting a timer recording

Your VCR can record on a specific day, or every day, Monday through Friday. Daily and weekly programs remain
in the timer until erased. A single program is erased after the program records.

To display a timer recording list, press MENU and  

on the remote control.

2

Press 

and 

▲▼ 

to set the channel. 

Press 

to move to the next setting.

3

Repeat step 2 to set start time, end time, date and

record  speed. Date can be set for one time, daily or 
weekly recording. See below.

4

Press the MENU button to complete programming of
the timer recording. Stop the VCR or turn the power
off. The timer indicator comes on the VCR. The VCR
will automatically turn on and begin recording at the
time you have set. To stop a timer recording, press
the POWER button on the VCR.

Note: When using a cable decoder box or DSS

®

,

make sure the decoder box is on and set to the
correct channel for timer recording.

CH START END   DATE

SPD

- -    - : - -       - : - -      - - -      

- - 

- -    - : - -       - : - -      - - -      

- -  

- -    - : - -       - : - -      - - -      

- -  

- -    - : - -       - : - -      - - -      

- -  

- -    - : - -       - : - -      - - -      

- -  

- -    - : - -       - : - -      - - -      

- -  

- -    - : - -       - : - -      - - -      

- -  

- -    - : - -       - : - -      - - -      

- -  

[

%

!

/

➛❿

]

[MENU/CLEAR

]

Auto Speed Select

If you are not sure the tape is long enough for timer program recording in the SP tape speed, set the recording 
tape speed to “AUTO”. Recording starts in the SP tape speed. If the tape length is not long enough, the tape 
speed automatically changes from SP to SLP.

Daily/Weekly Date Programming

Weekly [SUN’S~SAT’S]: You can record TV programs on the same channel at the same time every week.
Daily [MO 

FR] : You can record TV programs on the same channel at the same time every day Monday through 

Friday. 

Timer Recording

CH START END   DATE

SPD

03

- : - -       - : - -      - - -      

- - 

- -    - : - -       - : - -      - - -      

- -  

- -    - : - -       - : - -      - - -      

- -  

- -    - : - -       - : - -      - - -      

- -  

- -    - : - -       - : - -      - - -      

- -  

- -    - : - -       - : - -      - - -      

- -  

- -    - : - -       - : - -      - - -      

- -  

- -    - : - -       - : - -      - - -      

- -  

[

%

!

/

➛❿

]

[MENU/CLEAR

]

CH START END   DATE

SPD

03 7:24    9:24   5/10

AUTO

- -    - : - -       - : - -      - - -      

- -  

- -    - : - -       - : - -      - - -      

- -  

- -    - : - -       - : - -      - - -      

- -  

- -    - : - -       - : - -      - - -      

- -  

- -    - : - -       - : - -      - - -      

- -  

- -    - : - -       - : - -      - - -      

- -  

- -    - : - -       - : - -      - - -      

- -  

[

%

/

➛❿

]

[MENU/CLEAR

]

P

M

P

M

MAIN MENU

Timer recording

Clock set/adjust
Channel setup  
VCR function setup
Language/Lengua/Langue

[

%

/

]

[MENU/EXIT

]

Recording

20

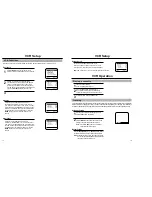
Changing or canceling a timer recording

TO CHANGE THE TIMER PROGRAM, repeat steps 1 to 4.

TO CANCEL THE TIMER PROGRAM, select the program you want to cancel in the timer recording list. 
Press the CLEAR button twice on the remote or EJECT button on the VCR to clear the Timer Program settings.
The contents are then cleared. 

Tape speeds

The VCR can record at two tape speeds. The slower speed (SLP) allows the VCR to record more program material on a
tape. Tapes recorded at standard speed (SP) provide a clearer picture. Press the REC.SPEED button on the remote control
to set the tape speed. You can refer to the following table:

TAPE

SP (Standard Play)

SLP (Super Long Play)                         

T-120

2 hrs

6 hrs

T-160

2 hrs 40 minutes

8 hrs 

T-180

3 hrs

9 hrs  

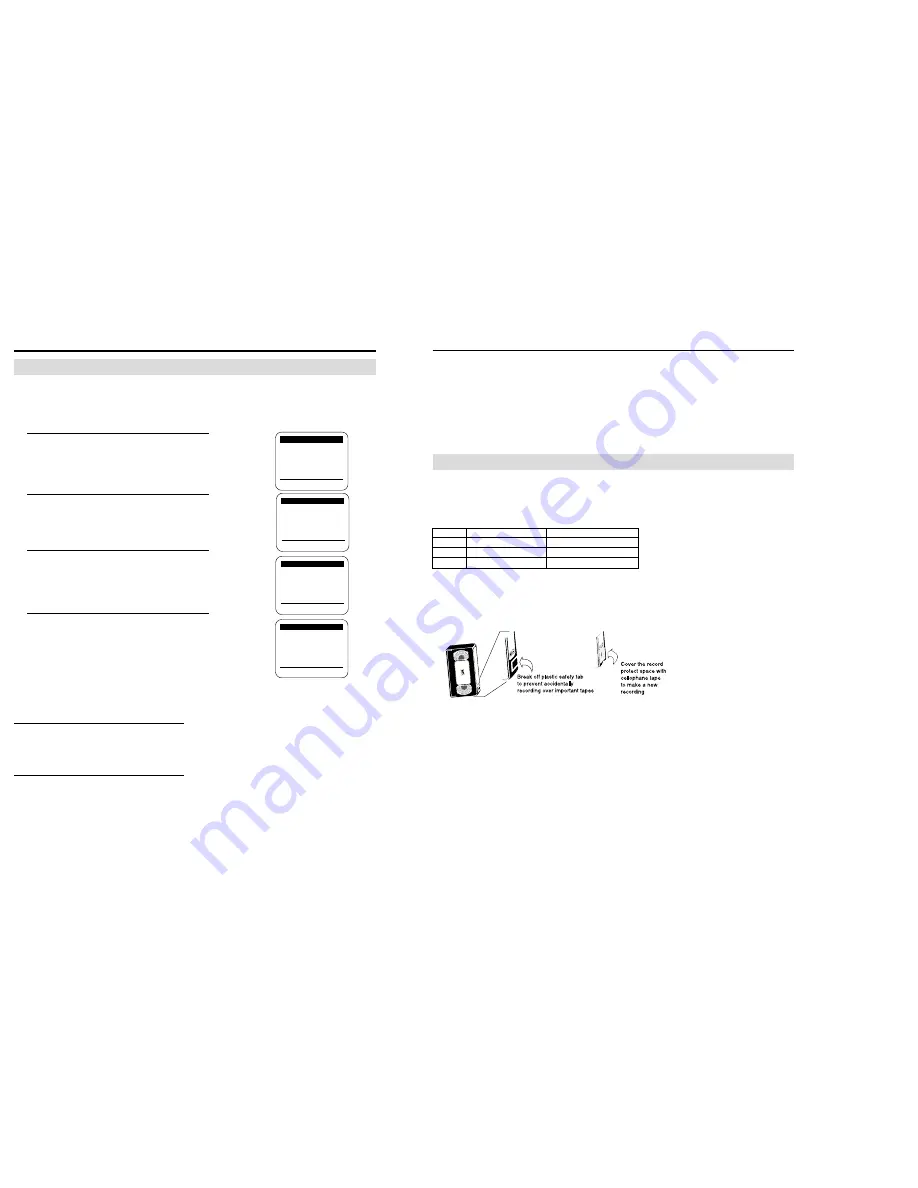
Record protect tab

Before recording on any video cassette, make sure the record protect safety tab is in place. To prevent accidentally recording
over a program, remove the record protect safety tab on the cassette case. To record on a tape with its tab removed, cover
the hole with adhesive tape.

About Video Cassette Tapes

Summary of Contents for VR9160

Page 1: ...Video Cassette Recorder Owner s Manual 4HEAD Hi Fi VR9180 VR9160 ...

Page 2: ... to the operating instructions 12 Grounding or Polarization This product may be equipped with a polarized alternating current line plug a plug having one blade wider than the other This plug will fit into the power outlet only one way This is a safety feature If you are unable to insert the plug fully into the outlet try reversing the plug If the plug should still fail to fit contact your electric...

Page 3: ...layback speeds VR9160 only Digital Auto Tracking Special effects playback including slow motion Built in HQ High Quality video circuitry One month eight event timer programming Key Lock disables all of the key functions Auto Clock Set Auto Power off Auto Line2 Input Detect SQPB S VHS Quasi Play Back makes it possible to play back S VHS recordings with regular VHS resolution Luminescent Universal R...

Page 4: ...racking auto matically TRACKING UP DOWN Press to adjust cassette tracking PREV CH Press to see the previous channel CH UP DOWN Press to change channels SEARCH EXIT Press to enter the variable search mode or to exit the on screen menu in stop mode P STILL Press to still playback or pause recording F ADV In still mode press to advance one frame 30 S SKIP In play mode press to skip ahead 30 seconds C...

Page 5: ...VCR PREV CH REC REC SPEED LINE IN AUDIO SEARCH EXIT CLEAR DISPLA Y POWER EJECT CH TRK VCR TV A TRK ENTER MENU SLOW VOL 100 POWER Press to turn your VCR TV on and off NUMBER BUTTONS Press to select channels by assigned numbers F ADV SKIP In play mode press to skip ahead 30 seconds In still mode press to advance one frame REPLAY Press to repeat last 5 seconds of tape during playback 100 Press to sel...

Page 6: ... 4 3 4 3 4 VCR Setup AUDIO OUT L R Used to output audio signals to connected equipment AUDIO IN L R Used to input audio signals from connected equipment IN FROM ANT Used to input cable or antenna signals OUT TO TV Used to output VCR signals to a TV VIDEO IN Used to input video signals from connected equipment VIDEO OUT Used to output video signals from VCR to connected equipment CH 3 4 Set to chan...

Page 7: ...ua Langue MENU EXIT MAIN MENU Timer recording Clock set adjust Channel setup VCR function setup Language Lengua Langue MENU EXIT MENU PRINCIPAL Programmation Réglage de l horloge Réglage des chaînes Réglage des fonctions Language Lengua Langue MENU EXIT MENU MENU Using Menus and the Remote Control Selecting the On Screen Language VCR Setup 9 External Stereo Connections Out to Audio System Connecti...

Page 8: ...ess and to select CLOCK SET ADJUST 2 Press to select AUTO 3 Clock Data CH If you select AUTO the VCR will automatically tune to a channel providing time data This may take the VCR up to 10 minutes You can also tune the VCR manually to a channel that you know carries time information PBS channel with the buttons Time ZONE If you select AUTO for your time zone the VCR sets the clock using the first ...

Page 9: ...to ADD press to DELETE MENU EXIT CHANNEL ADD DELETE Select channel 121 in memory and press to ADD press to DELETE MENU EXIT VCR Setup Once the VCR memorizes all the available channels you can use the CH buttons to select channels Setting the Source Before the VCR can memorize available channels you must set the signal source for your VCR 1 With the VCR on press the MENU button Press and to select ...

Page 10: ...mpletely eliminated especially when the tape was recorded on another VCR VCR Setup 15 To make all of the VCR s features available set the VCR functions before playing or recording a tape Tape length 1 Press the MENU button on the remote control Press to select VCR Function Setup then press 2 Press to select the video cassette length This information is usually printed on the tape box The menu cycl...

Page 11: ...a cassette While a cassette is stopped press button The VCR will rewind or fast forward searching for a blank position and then automatically stop at that position If the VCR reaches the end of the tape during end search the tape will be ejected Scan and play press or Go to 0 00 00 Press End search Press VCR 0 00 00 SP VCR Operation 17 Play and Pause Still Press the PLAY button on the remote contr...

Page 12: ... protect safety tab intact Check the tape speed If the VCR indicator on the front panel is not lit press the TV VCR button 2 Select a channel to record by pressing CH or the number buttons 3 Press the REC button on the remote control or the front of the VCR The REC indicator will light 4 If you want to edit out unwanted material during recording press the P STILL button while recording and the VCR...

Page 13: ...Daily Weekly Date Programming Weekly SUN S SAT S You can record TV programs on the same channel at the same time every week Daily MO FR You can record TV programs on the same channel at the same time every day Monday through Friday Timer Recording CH START END DATE SPD 03 MENU CLEAR CH START END DATE SPD 03 7 24 9 24 5 10 AUTO MENU CLEAR P M P M MAIN MENU Timer recording Clock set adjust Channel s...

Page 14: ...ng VCR Note Rental tapes with Copyguard protection cannot be copied Before you copy a rental tape check first Copying or Dubbing a Video LINE1 LINE2 Samsung Audio 22 The VCR can record a program in stereo It can also be set to record the Secondary Audio Program SAP of any broad cast with second language audio The VCR records the same audio on both the Hi Fi and linear tracks on the tape Stereo Pro...

Page 15: ... holes Take care of your remote control Keep the remote with your VCR where it is unlikely to be lost or damaged Keep liquids away from your VCR including beverages and cleaning liquids Spilling any liquid on the VCR can damage the electronics resulting in an electric shock or fire Do not use liquid or aerosol cleaners that can accidentally get into the VCR causing damage or creating a fire hazard...

Page 16: ...one para adjustar automática mente el seguimiento de casete TV Presione para alternar entre la fuente de TV CLEAR Presione para reajustar el contador de cinta MENU Presione para seleccionar el pro grama en pantala OSP del Menú Principal SLOW Usado para la reproduccion en cámara lenta AUDIO Presione para seleccionar VCR sonido VR8160 Presione para encendor o apagar VCR sonido VR5160 PREV CH Presion...

Page 17: ... antena exterior es un cable plano de alimentación de 300 ohms un transformador de acople se debe conectar antes de la terminal ed entrada del VCR Usted puede comprar este transformador en cualquier tienda que venda productos electrónicos Reproducción de cintas de videocasete 1 Encienda el TV e inserte un casete en el VCR Presione PLAY si es necesario Si el indicador de VCR en el panel frontal no ...

Page 18: ...e e g g e e g g e e g g e e g g e e g g e e g g e e g g e e g g e e g g e e g g e e g g e e g g e e g g e e g g e e g g e e g g e e g g e e g g e e g g e e g g e e g g e e g g e e g g e e g g e e g g e e g g e e g g e e g g e e g g e e g g e e g g e e g g e e g g e e g g e e g g e e g g e e g g e e g g e e g g e e g g e e g g e e g g e e g g e e g g e e g g e e g g e e g g e e g g e e g g e e g g ...

Page 19: ... AMERICA INC HEADQUARTERS 105 Challenger Road Ridgefield Park N J 07660 0511 TEL 1 800 SAMSUNG SERVICE DIVISION 400 Valley Road Suite 201 Mount Arlington NJ 07856 1 800 SAMSUNG 1 800 726 7864 Printed in China AC68 01060A ...

Reviews: