background image

12

ENG

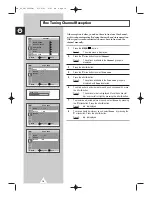
You can scan for the frequency ranges available to you (and
availability depends on your country). Automatically allocated
programme numbers may not correspond to actual or desired
programme numbers. However you can sort numbers manually and
clear any channels you do not wish to watch.

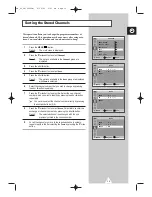
1

Press the 

MENU 

(

)

button.

Result:

The main menu is displayed.

2

Press the 

or 

▲ 

button to select 

Channel

.

Result:

The options available in the 

Channel

group are

displayed.

3

Press the 

œ 

or 

button.

Result:

The 

Auto store

is selected.

4

Press the 

œ 

or 

button again.

Result:

The options available in the 

Auto store

group are

displayed with 

Country

is selected.

5

Select your country by pressing the 

œ 

or 

button. The countries

are displayed in the following order:  

Others

-

Belgie

-

Deutschland

-

España

-

France

-

Italia

-

Nederland

-

Schweiz

-

Sverige

-

UK

-

East Europe

6

Press the 

or 

▲ 

button to select 

Search

.

7

Press the 

œ 

or 

button to start the search.

Result:

The horizontal bar is displayed, and then channels are
stored in an order which reflects their positions in the
frequency range. Finally, the search will end
automatically.

To stop the search before it has finished, press the

MENU

(

) button.

8

When searching and storing are complete, the 

Sort

menu is

displayed.

To sort the stored channels into the desired numerical order,
go to Step 

6

of the “Sorting the Stored Channels” procedure

on page 13.

To exit from the channel store function without sorting the
channels, press the 

MENU 

(

) button repeatedly until the

menus disappear.

9

When the channels have been stored, you can:

Sort them in the order required (refer to page 13)

Clear a channel (refer to page 16)

Assign a name to the stored channels (refer to page 17)

Fine tune channel reception if necessary (refer to page 18)

Activate the Digital Noise Reduction feature (refer to page 21)

Storing Channels Automatically

Exit

P 1 C -- -----
106 MHz

%

Move

œ

œ  √

√    

Enter

Exit

Channel

Auto store

Manual store

Add/Erase

Sort

Name

Fine tune

TV

Move

œ

œ  √

√    

Adjust

Exit

Auto store

Country

: Others

Search

: -/+

TV

Move

œ

œ  √

√  

Search

Exit

Auto store

Country

: Others

Search

: -/+

TV

Move

œ

œ  √

√    

Adjust

Exit

Sort

From

: P 1 -----

To

: P-- -----

Store

: ?

TV

SM_UI_UK(02859B)  9/30/03  2:41 PM  Page 12

Summary of Contents for WS-32M066V

Page 1: ...COLOUR TELEVISION Owner s Instructions Before operating the unit please read this manual thoroughly and retain it for future reference ON SCREEN MENUS TELETEXT SM_UI_UK 02859B 9 30 03 2 41 PM Page 1 ...

Page 2: ...repair it yourself Contact qualified service personnel If the remote control is not used for a long period of time remove the batteries and store it in a cool dry place Do not drop the remote control This device is not for use in industrial environments Caution WARNING TO PREVENT DAMAGE WHICH MAY RESULT IN FIRE OR SHOCK HAZARD DO NOT EXPOSE THIS APPLIANCE TO RAIN OR MOISTURE CAUTION TO PREVENT ELE...

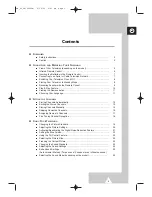
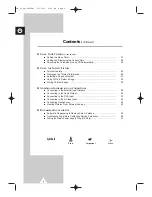
Page 3: ...oring Channels Automatically 12 Sorting the Stored Channels 13 Storing Channels Manually 14 Skipping Unwanted Channels 16 Assigning Names to Channels 17 Fine Tuning Channel Reception 18 USING YOUR TELEVISION Changing the Picture Standard 19 Adjusting the Picture Settings 20 Activating Deactivating the Digital Noise Reduction Feature 21 Setting the Blue Screen 22 Using the Tilt Control Feature 22 S...

Page 4: ...ge 32 Storing Teletext Pages 32 ADDITIONAL INFORMATION ON CONNECTIONS Connecting to the External Input Outputs 33 Connecting to the Audio Output 33 Connecting to the RCA Input 34 Connecting to the S Video Input 34 Connecting Headphones 35 Viewing Pictures From External Sources 35 RECOMMENDATIONS FOR USE Automatic Degaussing to Remove Colour Patches 36 Troubleshooting Before Contacting Service Pers...

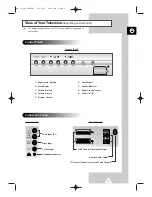
Page 5: ... Audio Video Input Output Monitor Audio Output 75Ω Coaxial Connector for Aerial Cable Network Rear of the TV Side of the TV Control Panels Connection Panels 4 5 6 7 1 2 3 8 9 Front of the TV 1 Input source selection 2 Menu display 3 Volume decrease 4 Volume increase 5 Previous channel 6 Next channel 7 Standby indicator 8 Remote control sensor 9 Power On Off SM_UI_UK 02859B 9 30 03 2 41 PM Page 5 ...

Page 6: ... AUTOMATIC SWITCH OFF TELETEXT STORE PICTURE SIZE TELETEXT SIZE SELECTION EXIT FROM ANY DISPLAY PREVIOUS CHANNEL TELETEXT PREVIOUS PAGE CHANGE CONFIRMATION INFORMATION DISPLAY TELETEXT REVEAL PICTURE EFFECT SELECTION STILL PICTURE ONE TWO DIGIT CHANNEL SELECTION TELETEXT PAGE HOLD TUNER CABLE NETWORK SELECTION SWITCH REPEATEDLY BETWEEN THE LAST TWO CHANNELS DISPLAYED SOUND EFFECT SELECTION VOLUME ...

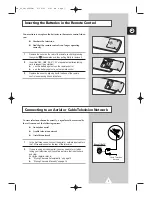
Page 7: ...ng it back into place Inserting the Batteries in the Remote Control To view television channels correctly a signal must be received by the set from one of the following sources An outdoor aerial A cable television network A satellite network 1 In the first three cases connect the aerial or network input cable to the 75Ω coaxial socket on the rear of the television 2 If you are using an indoor aeri...

Page 8: ...Manually on page 14 4 To switch your television off press the button On Off again Placing Your Television in Standby Mode Your television can be placed in Standby mode in order to reduce Power consumption Wear of the cathode ray tube The Standby mode can be useful when you wish to interrupt viewing temporarily during a meal for example 1 Press the POWER button on the remote control Result The scre...

Page 9: ...itch between two channels that are far apart tune to one channel then use the number button to select second channel Then use the PRE CH button to quickly alternate between them Used to increase the volume Used to decrease the volume MUTE Used to switch the sound off temporarily To turn the sound back on press this button again or press the or button MENU Used to display the Used to return to the ...

Page 10: ... button and then press the œ or button Press the MENU button to stop the search Result The Time menu is displayed with Clock is selected Refer to Storing Channels Automatically on page 12 5 Press the œ or button to move to the hour or minute Set the hour or minute by pressing the or button Refer to Setting and Displaying the Current Time on page 28 6 When you have finished press the MENU button Re...

Page 11: ... control When you start using your television for the first time you must select the language which will be used for displaying menus and indications 1 Press the MENU button Result The main menu is displayed 2 Press the or button to select Setup Result The options available in the Setup group are displayed 3 Press the œ or button 4 Press the or button to select Language 5 Select the appropriate la...

Page 12: ...nnels are stored in an order which reflects their positions in the frequency range Finally the search will end automatically To stop the search before it has finished press the MENU button 8 When searching and storing are complete the Sort menu is displayed To sort the stored channels into the desired numerical order go to Step 6 of the Sorting the Stored Channels procedure on page 13 To exit from...

Page 13: ...lect To Select the new channel number which you wish to identify by pressing the œ or button repeatedly You can also select the channel number directly by pressing the numeric buttons 0 9 8 Press the or button to select Store Select OK to confirm the exchange of channel numbers by pressing the œ or button Result The selected channel is exchanged with the one previously stored to the chosen number ...

Page 14: ...or button to select Colour system Indicate the broadcasting standard required by pressing the œ or button repeatedly Result The colour standards are displayed in the following order Auto PAL SECAM NT4 43 8 Press the or button to select Sound system Select the sound standard required by pressing the œ or button repeatedly Result The sound standards are displayed in the following order BG DK I L Sto...

Page 15: ...ton Press the œ or button to select OK 12 Repeat Steps 9 to 11 for each channel to be stored Channel mode P Programme mode When completing tuning the broadcasting stations in your area have been assigned to position numbers from P00 to max P99 You can select a channel by entering the position number in this mode C Real channel mode You can select a channel by entering the assigned number to each a...

Page 16: ...played 3 Press the œ or button 4 Press the or button to select Add Erase 5 Press the œ or button Result The stored channels are displayed 6 Press the or button to select the channel to add or erase If necessary select Added or Erased by pressing the œ or button 7 Repeat Step 6 for each channel to be added or erased Skipping Unwanted Channels Move œ œ Enter Exit Channel Auto store Manual store Add ...

Page 17: ...lt The current channels are displayed 6 If necessary select the channel to be assigned to a new name by pressing the or button 7 Press the œ or button 8 Press the or button to select a letter A Z a number 0 9 or a symbol space Move on the previous or next letter by pressing the œ or button 9 Repeat Steps 6 to 8 for each channel to be assigned to a new name Assigning Names to Channels Move œ œ Ente...

Page 18: ...6 To obtain a sharp and clear picture and good sound quality press the œ or button Result The horizontal bar is displayed Move the horizontal bar s cursor left or right by pressing the œ or button 7 To memorise adjusted picture or sound select Store by pressing the or button Press the œ or button Result OK is displayed 8 To erase adjusted picture or sound select Erase by pressing the or button Pre...

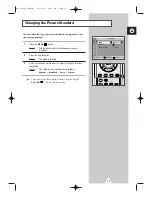
Page 19: ... Result The Mode is selected 3 Select the required picture effect by pressing the œ or button repeatedly Result The following picture effects are available Dynamic Standard Movie Custom You can also set these options simply by pressing the P MODE Picture Mode button Changing the Picture Standard Move œ œ Adjust Exit Picture Mode œ œ Dynamic Adjust Digital NR Off TV SM_UI_UK 02859B 9 30 03 2 41 PM ...

Page 20: ...Move the horizontal bar s cursor left or right by pressing the œ or button If you make any changes to these settings the picture standard is automatically switched to Custom The television has an automatic degaussing system that is activated if magnetic interference is present To degauss the television screen switch power off by pressing the On Off button on the front panel Refer to Automatic Dega...

Page 21: ...button Result The options available in the Picture group are displayed 2 Press the or button 3 Press the or button to select Digital NR 4 To activate this feature select On by pressing the or button Activating Deactivating the Digital Noise Reduction Feature Picture Mode œ œ Dynamic Adjust Digital NR Off TV Move œ œ Adjust Exit SM_UI_UK 02859B 9 30 03 2 41 PM Page 21 ...

Page 22: ...ct On by pressing the œ or button Setting the Blue Screen If you find that the picture received is slightly tilted to one side you can adjust the tilt setting 1 Press the MENU button Result The main menu is displayed 2 Press the or button to select Setup Result The options available in the Setup group are displayed 3 Press the œ or button 4 Press the or button to select Tilt 5 Press the œ or butto...

Page 23: ...nic You can also set these options simply by pressing the S MODE Sound Mode button Changing the Sound Standard You can select the picture size which best corresponds to your viewing requirements simply by pressing the P SIZE button Depending on the model the following picture sizes are available Normal Zoom1 Zoom2 16 9 16 9 Panorama Zoom1 Zoom2 4 3 Auto Wide Selecting the Picture Size You can free...

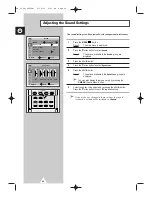
Page 24: ...ble in the Equalizer group are displayed You can also display this group simply by pressing the S MENU Sound Menu button 6 Select the option to be adjusted by pressing the œ or button Press the or button to reach the required setting If you make any changes to these settings the sound standard is automatically switched to Custom Adjusting the Sound Settings Move œ œ Enter Exit Sound Mode œ œ Stand...

Page 25: ...u is displayed 2 Press the or button to select Sound Result The options available in the Sound group are displayed 3 Press the or button 4 Select the required option Auto volume Melody Turbo sound Pseudo stereo or Virtual surround by pressing the or button To select Turbo sound Pseudo stereo and Virtual surround select Sound effect by pressing the or button and press the or button You can select t...

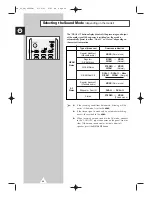
Page 26: ...no sound in the AV mode connect to the AUDIO L input connector on the panel front or side If the mono sound comes out only from left speaker press the DUAL I II button Selecting the Sound Mode depending on the model Type of broadcast Regular broadcast Standard audio Regular NICAM Mono NICAM Stereo NICAM Dual I II Regular broadcast Standard audio Bilingual or Dual I II Stereo On screen indication M...

Page 27: ... sleep timer is already set the screen displays the remaining time and then before the television will be placed in standby mode 2 Press the SLEEP button repeatedly and cycle through the preset time intervals 30 60 90 120 150 180 Off Result The television automatically switches to standby mode when the timer reaches 0 3 To cancel the sleep timer feature press the SLEEP button repeatedly and select...

Page 28: ...available in the Time group are displayed 3 Press the œ or button Result The Clock is selected 4 Press the œ or button to move to the hour or minute Set the hour or minute by pressing the or button 5 When you have finished press the TV button to exit 6 To Press the INFO button display the channel information Once display the current time Twice remove the display Three times Setting and Displaying ...

Page 29: ...to select Timer 5 Press the œ or button to set On Result The On Time and Off Time are displayed 6 Press the or button to select On Time Set the time at which you wish the television to be switched on automatically Press the œ or button to move to the hour or minute Set these by pressing the or button 7 Press the or button to select Off Time In the same above set the time at which you wish the tele...

Page 30: ...ring the page number Selecting a title in a list Selecting a coloured heading FASTEXT system Teletext Feature You can display Teletext information at any time on your television For Teletext information to be displayed correctly channel reception must be stable otherwise Information may be missing Some pages may not be displayed 1 Select the channel providing the Teletext service using the or butt...

Page 31: ...ence To freeze the display on a given page press the hold Press the hold again to resume Using the various display options To display Press the Both teletext information and TTX MIX the normal broadcast twice Hidden text reveal answers to quiz games for example The normal screen reveal again A secondary page sub page by entering its 4 digit number The next page page up The previous page page down ...

Page 32: ...ics included in the teletext pages are color coded and can be selected by pressing the colored buttons on the remote control 1 Display the teletext contents page by pressing the TTX MIX button 2 Press the coloured button corresponding to the topic that you wish to select the available topics are given on the status line Result The page is displayed with other coloured information that can be selec...

Page 33: ...ttes tape connect the source VCR to and the target VCR to so that you can redirect the signal from to If you have a decoder connect the decoder to the VCR and the VCR to the television When you wish to record a programme connect the receiver to and the VCR to so that you can redirect the signal from to 2 1 2 1 2 1 2 1 or DVD Connecting to the Audio Output The MONITOR AUDIO OUT RCA connectors are u...

Page 34: ...Video output such as a camcorder or VCR Camcorder VCR To play pictures and sound both the S VIDEO and RCA connectors must be used and When both the side AV and rear connectors are connected to external equipments the side AV receives priority Whenever you connect an audio or video system to your television ensure that all elements are switched off Refer to the documentation supplied with your equi...

Page 35: ...hearing Connecting Headphones Once you have connected up your various audio and video systems you can view different sources by selecting the appropriate input 1 Check that all the necessary connections have been made 2 Switch your television on then press the VIDEO button repeatedly Result The input sources are displayed in the following order AV1 AV2 S Video Option Depending on the source select...

Page 36: ...trical appliance that is affecting the television then move it further away Plug your television into a different mains socket Check the direction location and connections of your aerial This interference often occurs due to the use of an indoor aerial Replace the remote control batteries Clean the upper edge of the remote control transmission window Check the battery terminals Automatic Degaussin...

Page 37: ...nsion lead or consult your dealer for assistance However if there is no alternative to cut off the plug remove the fuse and then safely dispose of the plug Do NOT connect the plug to a mains socket as there is a risk of shock hazard from the bared flexible cord IMPORTANT The wires in the mains lead are coloured in accordance with the following code BLUE NEUTRAL BROWN LIVE As these colours may not ...

Page 38: ...38 MEMO ENG SM_UI_UK 02859B 9 30 03 2 42 PM Page 38 ...

Page 39: ...39 MEMO ENG SM_UI_UK 02859B 9 30 03 2 42 PM Page 39 ...

Page 40: ...859B 00 AFTER SALES SERVICE Do not hesitate to contact your retailer or service agent if a change in the performance of your product indicates that a faulty condition may be present SM_UI_UK 02859B 9 30 03 2 42 PM Page 40 ...

Reviews: