47
1
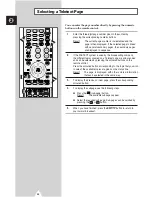
Press the
DVR
button.
Result:
The message
DVR Initializing
is displayed and
change to the DVR mode.
2
Press the
DVR MENU
button.
Result:
The
DVR SETUP
menu is displayed.
3
Select the required option by pressing the
†
or
…
button.
Press the
ENTER
button. Change the setting. When you have
finished, press the
ENTER
button to confirm.
◆
Program List
Displays the record list saved on HDD. You can edit the list by
using the
INFO
button (Play/Delete/Rename/Cancel) after
selecting an item.
➢
A warning notice will be displayed if the HDD is full...
➠
HDD capacity is not enough.
At this time, please
delete some items from
the program
list.
◆
Live Video
Change to live video mode.
➢
◆
You can also change simply by pressing the
LIVE
button.
◆
You can time shift a maximum of 30 minutes by
pressing the
REW
(
œœ
) button in live video mode. In
time shift mode, press the
LIVE
button and you can
change to a live picture.
◆
DVR Control
-
Recording Mode :
Set to record quality.
-
XP
(10 hours)
-
SP
(13 hours)
-
LP
(20 hours)
-
EP
(40 hours)
◆
Disk Tools
-
Repair Disk :
HDD Disk scanning for HDD optimization.
-
Format Disk :
Formatting HDD. (All recorded programs
are erased)
4
When you have finished DVR function setup, press the
EXIT/TV
(DVR mode “ON”) or
DVR
(DVR mode "OFF") button to return to
the TV mode.
☛
◆
During live recording, other functions related to DVR
(QUICK REPLAY/REW/PLAY/PAUSE/FF) are not
available except for the STOP function. At this time, the
●
REC
will flash 3 times.
◆
If the DVR hardware is On, the Standby indicator on the
front of the television lights yellow. If the DVR hardware is
Off, you need more time (13 seconds) for changing to
DVR mode from TV mode.
◆
When the HDD becomes full during recording mode, the
system will automatically stop the recording.
◆
Buttons not available in DVR mode:
PIP
,
SWAP
,
VIDEO
,
TTX/MIX
,
TELEWEB
,
HOME
,
ASPECT
.
Setting up the DVR
ENG
DVR Initializing
DVR SETUP
Enter
Program List
Live Video
Disk Tools
DVR Control


