background image

Media and tray

42

2. Menu Overview and Basic Setup

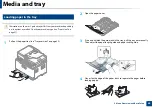
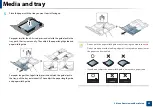
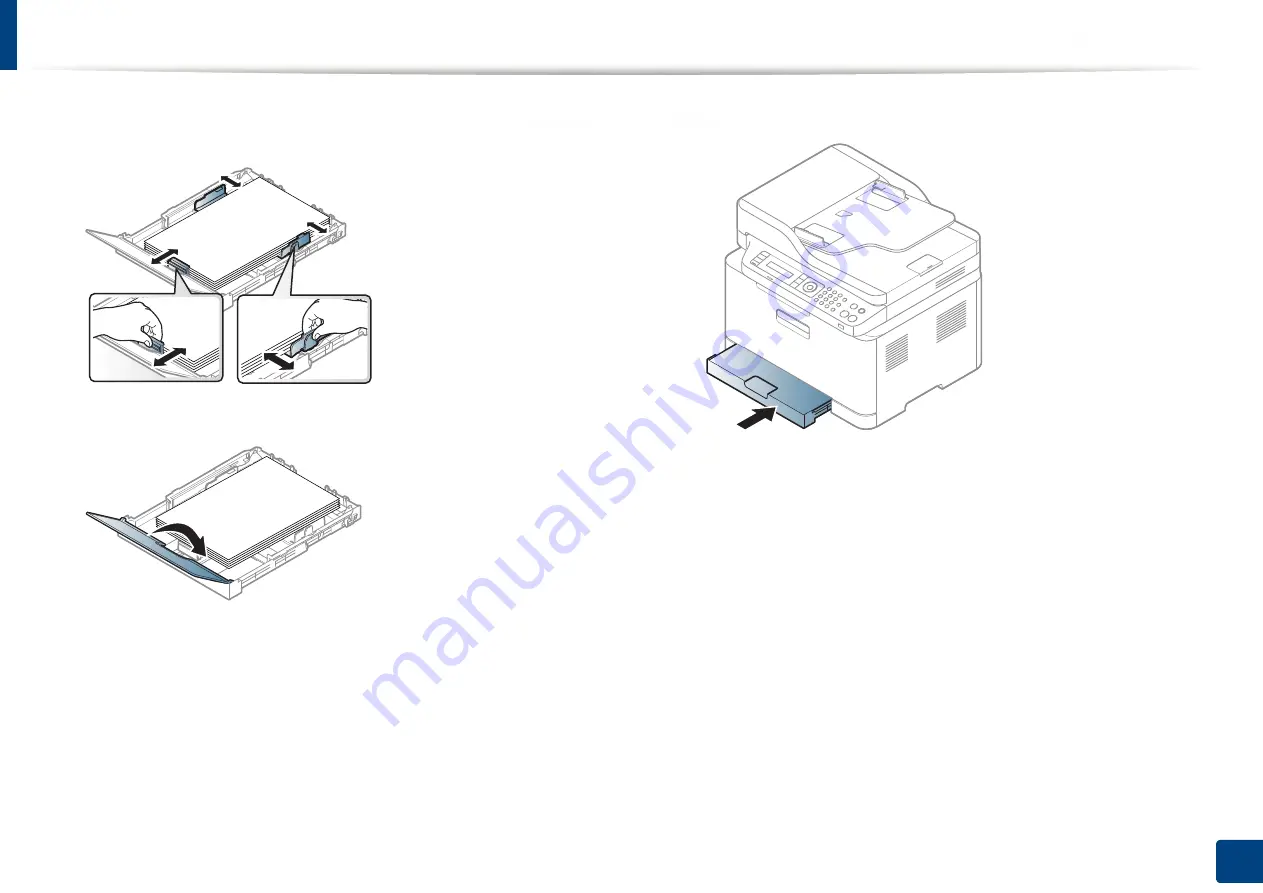
Squeeze the paper width guide and slide it to the edge of the paper stack 
without causing it to buckle.

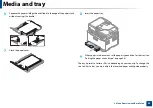
Close the paper cover.

Insert the paper tray.

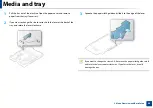
When you print a document, set the paper type and size for the tray (see 
"Setting the paper size and type" on page 46).

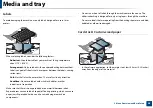
The tray is preset to Letter or A4 size, depending on your country. To change the 

size to A4 or Letter, you must adjust the lever and paper width guide properly.

Summary of Contents for Xpress C48 W Series

Page 1: ...guide provides information concerning the installation basic operation and troubleshooting on windows ADVANCED This guide provides information about the installation advanced configuration operation and troubleshooting on various OS environments Some features may not be available depending on models or countries ...

Page 2: ...Basic scanning 63 Basic faxing 64 Using USB memory device 68 3 Maintenance Ordering supplies and accessories 74 Available supplies 75 Available maintenance parts 76 Storing the toner cartridge 77 Redistributing toner 78 Replacing the toner cartridge 80 Replacing the imaging unit 82 Replacing the waste toner container 84 Monitoring the supplies life 86 Setting the toner low alert 87 Cleaning the ma...

Page 3: ...3 BASIC 5 Appendix Specifications 111 Regulatory information 120 Copyright 133 ...

Page 4: ...know before using the machine Key benefits 5 Features by model 7 Useful to know 12 About this user s guide 13 Safety information 14 Machine overview 20 Control panel overview 24 Turning on the machine 28 Installing the driver locally 29 Reinstalling the driver 31 ...

Page 5: ...ing Samsung Cloud Print apps see Samsung Cloud Print on page 182 You can print on the go from your smartphone or computer using Google Cloud Print enabled apps see Google Cloud Print on page 185 Easy Capture Manager allows you to easily edit and print whatever you captured using the Print Screen key on the keyboard see Easy Capture Manager on page 243 Samsung Easy Printer Manager and Printing Stat...

Page 6: ...on page 214 You can print in various operating systems see System requirements on page 116 Your machine is equipped with a USB interface and or a network interface Supports various wireless network setting method Using the WPS Wi Fi Protected Setup button You can easily connect to a wireless network using the WPS button on the machine and the access point a wireless router Using the USB cable or a...

Page 7: ... Some features and optional goods may not be available depending on model or country Operating System Supported Blank Not supported Operating System C48x series C48xW series C48xFN series C48xFW series Windows Mac Linux ...

Page 8: ...he Select Software to Install window Software C48x series C48xW series C48xFN series C48xFW series SPL printer driver PCL printer driver PS printer drivera XPS printer drivera Samsung Easy Printer Manager Scan to PC settings Fax to PC settings Advanced Settings Samsung Easy Document Creator Samsung Easy Color Managera Samsung Printer Status Samsung Printer Center SyncThru Web Service ...

Page 9: ... find your product Support or Downloads Before installing check whether your computer s OS support the software b To use the Easy Eco Driver features the Eco Driver Pack must be installed c The printer driver includes a user interface that is optimized for touchscreens To use this UI click Samsung Printer Center Device Options and then select Stylish User Interface see Using Samsung Printer Center...

Page 10: ... n wireless LANa a Depending on your country wireless LAN card may not be available For some countries only 802 11 b g can be applied Contact your local Samsung dealer or the retailer where you bought your machine NFC Near Field Communication Mopria Samsung Cloud Print Google Cloud Print AirPrint Eco printing Control panel Duplex 2 sided printing Manual b b Windows only USB memory interface Automa...

Page 11: ...Features C48x series C48xW series C48xFN series C48xFW series Fax Multi send Delay send Priority send Secure receive Send Receive forward fax email Scan Scan to PC Copy ID card copying Reduced or enlarged copying Collation 2 up 4 up Adjust background ...

Page 12: ...n Check the meanings of LED indications in this manual and troubleshoot accordingly see Understanding the status LED on page 102 A paper jam has occurred Open and close the cover see Front view on page 21 Check the instructions on removing jammed paper in this manual and troubleshoot accordingly see Clearing paper jams on page 95 Printouts are blurry The toner level might be low or uneven Shake th...

Page 13: ...ts options or model you purchased The screenshots in this administrator s guide may differ from your machine depending on the machine s firmware driver version The procedures in this user s guide are mainly based on Windows 7 1 Conventions Some terms in this guide are used interchangeably as below Document is synonymous with original Paper is synonymous with media or print media Machine refers to ...

Page 14: ...d is damaged or if the electrical outlet is not grounded This could result in electric shock or fire Do not place anything on top of the machine water small metal or heavy objects candles lit cigarettes etc This could result in electric shock or fire If the machine gets overheated it releases smoke makes strange noises or generates an odd odor immediately turn off the power switch and unplug the m...

Page 15: ...ectric shock or fire If the plug does not easily enter the electrical outlet do not attempt to force it in Call an electrician to change the electrical outlet or this could result in electric shock Do not allow pets to chew on the AC power telephone or PC interface cords This could result in electric shock or fire and or injury to your pet Do not forcefully pull the paper out during printing It ca...

Page 16: ...rd from the electrical outlet Do not place the machine in an area with dust humidity or water leaks This could result in electric shock or fire Place the machine in the environment where it meets the operating temperature and humidity specification Do not use the machine when it is below freezing temperature or has recently been moved from a location below freezing temperature Doing so may damage ...

Page 17: ...mful to your health Place the machine in a well ventilated space or open a window to circulate the air periodically Do not place the machine on an unstable surface The machine could fall causing injury or machine damage Use only No 26 AWGa or larger telephone line cord if necessary Otherwise it can cause damage to the machine Make sure you plug the power cord into a grounded electrical outlet Othe...

Page 18: ...l a certified technician when the machine needs repairing To clean and operate the machine strictly follow the user s guide provided with the machine Otherwise you could damage the machine Keep the power cable and the contact surface of the plug clean from dust or water Otherwise this could result in electric shock or fire Do not remove any covers or guards that are fastened with screws Fuser unit...

Page 19: ...le do not reuse it after emptying the bottle If you do not follow the instructions above it may cause machine malfunctionandenvironmentalpollution Thewarrantydoesnot cover damages caused by a user s carelessness Using recycled supplies such as toner can cause damage to the machine In case of damage due to the use of recycled supplies a service fee will be charged When toner gets on your clothing d...

Page 20: ...me components may change depending on the configuration Power cord Quick installation guide Software CDa a The software CD contains the print drivers user s guide and software applications Misc accessoriesb b Miscellaneous accessories included with your machine may vary by country of purchase and specific model ...

Page 21: ...g on model or country see Features by model on page 7 C48x C48xW series 1 Scanner lid 8 Toner cartridges 2 Front handle 9 Waste toner container 3 Tray 10 Imaging unit 9 8 10 13 11 12 3 2 4 5 1 6 7 4 Front door 11 Scan unita b 5 Output support 12 USB memory portc 6 Control panel 13 Scanner glass 7 NFC tagc a Close the scanner lid before opening the scan unit b Be careful not to pinch your fingers c...

Page 22: ...ray 12 Waste toner container 4 Document feeder output support 13 Imaging unit 5 Front handle 14 Scan unitb c 6 Tray 15 USB memory port 7 Front cover 16 Scanner lid 8 Output support 17 Scanner glass 9 Control panel 13 6 5 7 11 8 12 1 3 9 16 17 2 4 14 15 10 a C48xFW series only b Close the scanner lid before opening the scan unit c Be careful not to pinch your fingers ...

Page 23: ...ures and optional goods may not be available depending on model or country see Features by model on page 7 C48x C48xW series C48xFN C48xFW series 1 Rear cover 3 USB port 2 Power receptacle 4 Network porta a C48xW series only 1 4 3 2 1 Rear cover 4 Network port 2 Power receptacle 5 Telephone line socket LINE 3 USB port 6 Extension telephone socket EXT 1 4 3 2 6 5 ...

Page 24: ...e 7 12 C48x C48xW series 1 WPSa Configures the wireless network connection easily without a computer see Using the WPS Settings menu on page 156 2 Scan toa Switches between scan and copy mode The Scan to LED turns on scan mode and turns off on copy mode 3 Display screen Shows the current status and displays prompts during an operation 4 Arrows Scrolls through the options available in the selected ...

Page 25: ...ff press this button for more than three seconds when the machine is in ready mode 9 Start Starts a job 10 Back Sends you back to the upper menu level 11 Status LED Indicates the status of your machine see Understanding the status LED on page 102 12 Ecoa Turn into eco mode to reduce toner consumption and paper usage when pc printing and copying only see Eco printing on page 55 13 Direct USBa Allow...

Page 26: ...r s license on a single side of paper see ID card copying on page 61 3 Display screen Shows the current status and displays prompts during an operation 4 Copy Switches to Copy mode 5 Fax Switches to Fax mode 6 Arrows Scrolls through the options available in the selected menu and increases or decreases values 7 Menu Opens Menu mode and scrolls through the available menus see Menu overview on page 3...

Page 27: ...ine from the power save mode If you need to turn the machine off press this button for more than three seconds when the machine is in ready mode 14 Start Starts a job 15 On Hook Dial When you press this button you can hear a dial tone Then enter a fax number It is similar to making a call using speaker phone see Receiving manually in Tel mode on page 238 16 Back Sends you back to the upper menu le...

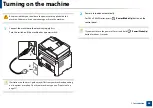
Page 28: ...upply first Turn the switch on if the machine has a power switch Illustrations on this user s guide may differ from your machine depending on its options or models Check your machine type see Front view on page 21 2 Power is turned on automatically For C48x C48xW series press Power Wake Up button on the control panel If you want to turn the power off press and hold Power Wake Up button for about 3...

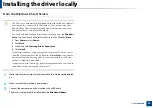
Page 29: ...ted to your computer and powered on 2 Insert the supplied software CD into your CD ROM drive If the installation window does not appear click Start All programs Accessories Run X Setup exe replacing X with the letter which represents your CD ROM drive and click OK For Windows 8 If the installation window does not appear from Charms select Search Apps and search for Run Type in X Setup exe replacin...

Page 30: ...Search 2 Click Store 3 Search and click Samsung Printer Experience 4 Click Install If you install the driver using the supplied software CD V4 driver is not installed If you want to use the V4 driver in the Desktop screen you can download from the Samsung website www samsung com find your product Support or downloads If you want to install Samsung s printer management tools you need to install the...

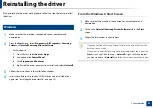
Page 31: ...stall 3 Follow the instructions in the installation window 4 Insert the software CD into your CD ROM drive and install the driver again see Installing the driver locally on page 29 From the Windows 8 Start Screen 1 Make sure that the machine is connected to your computer and powered on 2 Click on the Uninstall Samsung Printer Software tile in the Start screen 3 Follow the instructions in the windo...

Page 32: ...er provides information about the overall menu structure and the basic setup options Menu overview 33 Machine s basic settings 37 Media and tray 39 Basic printing 52 Basic copying 58 Basic scanning 63 Basic faxing 64 Using USB memory device 68 ...

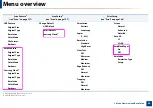
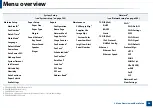
Page 33: ...fer from your machine depending on its options or the models The menus are described in the Advanced Guide see Useful Setting Menus on page 187 1 Accessing the menu 1 Select the Copy Fax or Scan button on the control panel depending on the feature to be used 2 Select Menu until the menu you want appears on the bottom line of the display and press OK 3 Presstheleft rightarrowsuntiltheneededmenuitem...

Page 34: ...nal Type Collation Darkness Light 5 Light 1 Normal Dark 1 Dark 5 Resolution Standard Fine Super Fine Photo Fax Original Size Multi Send Delay Send Priority Send Send Forward Forward to Fax Fwd to Email Rcv Forward Forward to Fax Forward to PC Fwd to Email Forward Print Secure Receive Off On Print Add Page Cancel Job Sending Redial Times Redial Term Prefix Dial ECM Mode Modem Speed Fax Confirm Imag...

Page 35: ...inal Size Original Type Resolution Color Mode Darkness Samsung Cloudb Original Size Original Type Resolution Color Mode Darkness b C48xFN C48xFW series only Change Default USB Default Email Defaultb Samsung Cloudb Orientation Portrait Landscape Copies 1 999 Resolution Standard High Resol Clear Text Off Minimum Medium Maximum Edge Enhance Off Normal Maximum Trapping Off Normal Maximum Screen Normal...

Page 36: ... Alarm Sound Speaker Ringer Report Configuration Demo Page Network Conf Supplies Info Usage Counter Fax Receivedb Fax Sentb Scheduled Jobsb Fax Confirm b Email Sentb Junk Faxb PCL Font PS Font Address Bookb Maintenance CLR Empty Msgd Supplies Life Image Mgr Custom Color TonerLow Alert ImgU Low Alert Serial Number d This option only appears when small amount of toner is left in the cartridge TCP IP...

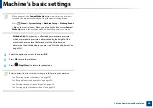
Page 37: ... follow these steps It may be necessary to press OK to navigate to lower level menus for some models 1 Select Menu button on the control panel 2 Press System Setup Machine Setup 3 Select the option you want then press OK Language change the language that is displayed on the control panel Date Time When you set the time and date they are used in delay fax and delay print They are printed on reports...

Page 38: ...fected by atmospheric pressure which atmospheric pressure is determined by the height of the machine above sea level Before you set the altitude value determine the altitude where you are see Altitude adjustment on page 208 4 Select the option you want then press OK 5 Press OK to save the selection 6 Press Stop Clear to return to ready mode Refer to below links to set other settings useful for usi...

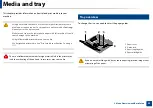
Page 39: ...is machine It could cause damage to the machine Using inflammable print media can cause a fire Use designated print media see Print media specifications on page 113 The use of inflammable media or foreign materials left in the printer may lead to overheating of the unit and in rare cases may cause a fire 2 Tray overview To change the size you need to adjust the paper guides If you do not adjust th...

Page 40: ...ns or models Check your machine type see Front view on page 21 1 Pull out the paper tray see Tray overview on page 39 2 Open the paper cover 3 Press and unlatch the guide lock in the tray pull the tray out manually Then adjust the paper length guide and paper width guide 4 Flex or fan the edge of the paper stack to separate the pages before loading papers 2 1 2 3 ...

Page 41: ...length guide and paper width guide For paper longer than Legal sized press and unlatch the guide lock in the tray pull the tray out manually Then adjust the paper length guide and paper width guide Do not push the paper width guide too far causing the media to buckle Do not use a paper with a leading edge curl it may cause a paper jam or the paper can be wrinkled If you do not adjust the paper wid...

Page 42: ...sing it to buckle 7 Close the paper cover 8 Insert the paper tray 9 When you print a document set the paper type and size for the tray see Setting the paper size and type on page 46 The tray is preset to Letter or A4 size depending on your country To change the size to A4 or Letter you must adjust the lever and paper width guide properly ...

Page 43: ...u want to change the size to Letter hold the lever at the back of the tray and rotate the lever clockwise 3 Squeeze the paper width guide and slide it to the edge of the lever If you want to change the size to A4 first move the paper width guide to left and rotate the lever counterclockwise If you force the lever it could damage the tray L T R A 4 L T R A 4 ...

Page 44: ...ce If your machine is connected to the local you can set the machine s setting from Samsung Easy Printer Manager Advanced Setting Device Settings see Using Samsung Easy Printer Manager on page 252 If your machine is connected to the network you can set the machine s setting from SyncThru Web Service Settings tab Machine Settings see Using SyncThru Web Service on page 249 You can set it using Syste...

Page 45: ...on Condition Do not use labels with wrinkles bubbles or other indications of separation Make sure that there is no exposed adhesive material between labels Exposed areas can cause labels to peel off during printing which can cause paper jams Exposed adhesive can also cause damage to machine components Do not run a sheet of labels through the machine more than once The adhesive backing is designed ...

Page 46: ...ing paper in the paper tray set the paper size and type using the control panel buttons The paper setting in the machine and driver should match to print without a paper mismatch error You change the paper setting set in the machine from Samsung Easy Printer Manager program or SyncThru Web Service If your machine is connected to the local you can set the machine s setting from Samsung Easy Printer...

Page 47: ...the Printing Preferences see Opening printing preferences on page 54 6 Using the output support The surface of the output tray may become hot if you print a large number of pages at once Make sure that you do not touch the surface and do not allow children near it The printed pages stack on the output support and the output support will help the printed pages to align The printer sends output to t...

Page 48: ... ink or correction fluid on the paper is completely dry before loading Do not load originals that include different sizes or weights of paper Do not load booklets pamphlets transparencies or documents with other unusual characteristics 8 Loading originals You can use the scanner glass or the document feeder to load an original for copying scanning and sending a fax Illustrations on this user s gui...

Page 49: ... 49 2 Menu Overview and Basic Setup 1 Lift and open the scanner lid 2 Place the original face down on the scanner glass Align it with the registration guide at the top left corner of the glass 3 Close the scanner lid ...

Page 50: ... magazine is thicker than 30 mm start copying with the scanner lid open Be careful not to break the scanner glass You may get hurt Do not put hands while closing the scanner lid The scanner lid may fall on your hands and get hurt Do not look into the light from inside of the scanner while copying or scanning It is harmful to eyes In the document feeder 1 Flex or fan the edge of the paper stack to ...

Reviews: