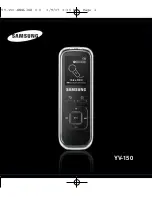
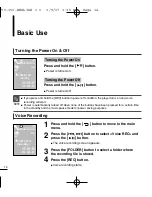
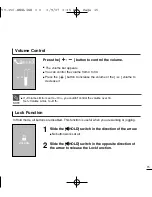
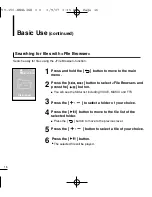
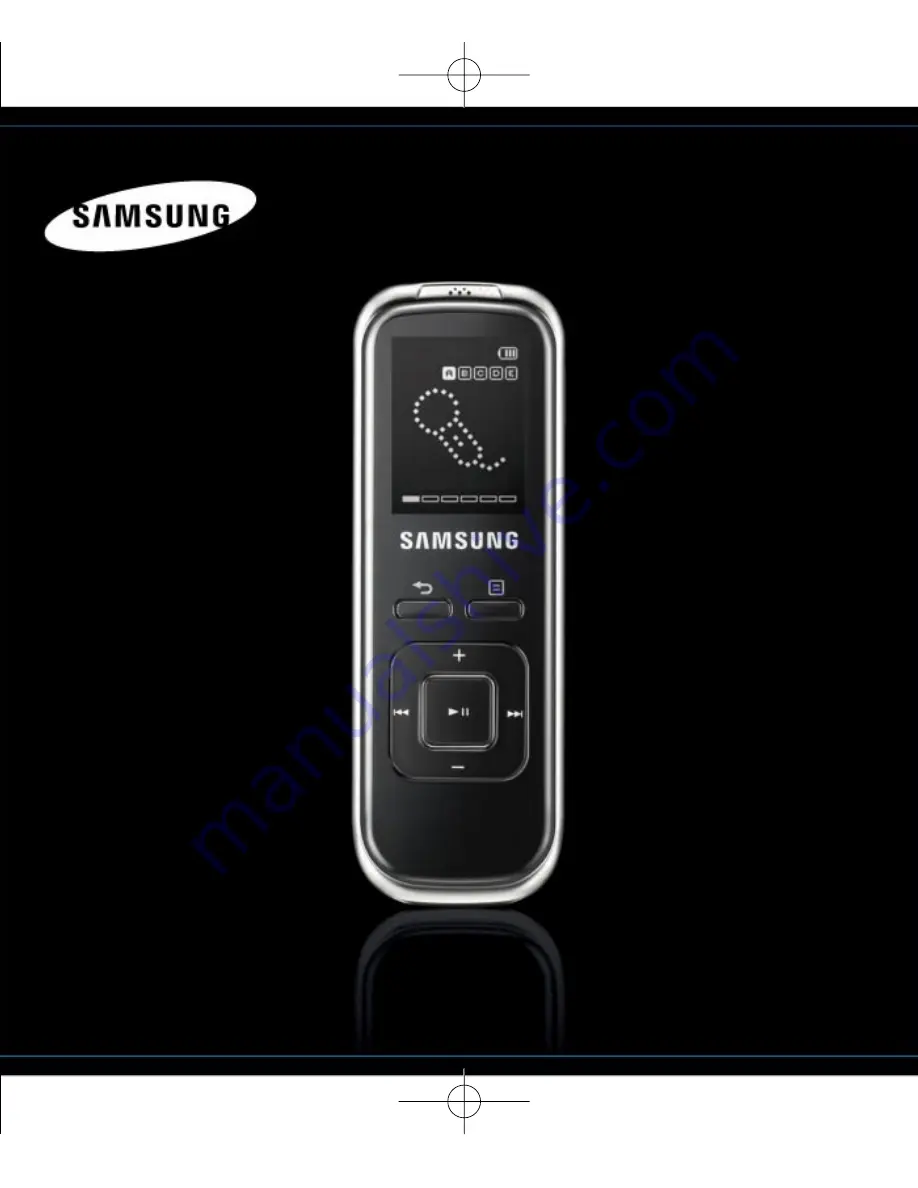
background image

Voice REC

YV-150

YV-150-ENGLISH 0.0  3/9/07 3:35 PM  Page 1

Summary of Contents for yePP YV-150 512MB

Page 1: ...Voice REC YV 150 YV 150 ENGLISH 0 0 3 9 07 3 35 PM Page 1 ...

Page 2: ... a sound in higher than 85db for an extended time you will be adversely affected on your hearing The higher the sound is the more seriously damaged your hearing is an ordinary conversation is made in 50 to 60 db and the noise level on the road is approximately 80 db You are strongly advised to set the volume level to medium the medium level is usually less than 2 3 of the maximum If you feel a rin...

Page 3: ...uch as benzene or thinner as it may cause fire electric shock or deteriorate the surface Do not place the player near magnetic objects as it may cause a malfunction Product Use Avoid malfunction Avoid malfunction Management of Important Data Be sure to back up important data Please be aware that we claim no responsibility for damage from data loss due to breakdown repair or other causes CAUTION Fa...

Page 4: ... with Samsung Media Studio 22 Using as a Removable Disk 24 Disconnecting from your PC 25 Installing TTS 26 Using TTS 27 Creating a TS3 File 29 Chapter 3 Using the Player Voice Recording 30 Voice Recording 30 Using Voice Recording menu 32 Recording with a phone 34 Listening to Voice or Music File 35 Listening to Voice or Music File 35 Section Repeat 38 Using Voice Music Play menu 39 Setting a Bookm...

Page 5: ... Chapter 5 Troubleshooting Troubleshooting 57 Chapter 4 Setting Setting 51 Setting Date Time 51 Setting Display Off Sleep Timer 52 Setting Language Beep 53 Setting Volume Limit 54 Setting Default 55 System Information 56 YV 150 ENGLISH 0 0 3 9 07 3 35 PM Page 5 ...

Page 6: ...a long recording time Management of Recording Files You can classify your recordings in 5 separate folders of A B C D and E This will help you manage the folders You can easily search for a desired file using File Browser function VOR Voice Operating Recording Function VOR is a voice activated recording function where recording pauses when the sound is not loud or too soft MP3 WMA and TS3 Playback...

Page 7: ...le External Microphone Earphones Hand Strap Phone Cable Installation CD Phone Recording Adaptor AAA LR03 Batteries Design of accessories is subject to change for the purpose of improvement without notice Checking the Accessories YV 150 ENGLISH 0 0 3 9 07 3 35 PM Page 7 ...

Page 8: ...nu Button Move File Quick Search Button Volume Control Button Back Button Built in Microphone Earphone Jack External Device Microphone Jack Power Play Pause Select Button Front Left Side Hold Switch USB Connection Port YV 150 ENGLISH 0 0 3 9 07 3 35 PM Page 8 ...

Page 9: ...9 Section Repeat Delete Button Recording Button Folder Bookmark Button Rear Right Side Strap Fastening Built in Speaker Battery Cover Hand Strap Hook YV 150 ENGLISH 0 0 3 9 07 3 35 PM Page 9 ...

Page 10: ...e arrow to lock the buttons Slide in the opposite direction of the arrow to unlock the buttons Press to repeat the section Press and hold to delete the selected file Press to move to the previous level Press and hold to move to the main menu Press to move to the menu screen Press to move to the folder where the file is stored Press and hold to add a bookmark Press and hold to start recording Press...

Page 11: ... hour minute second 7 Remaining Recording Time Display 8 Record Standby Display 9 Hold Display 10 Remaining Capacity of Battery Display 11 Recording Folder Display 12 Number of Recorded Files Display The screen pictures are for illustration purposes only The actual screen may differ NOTE E D C B 0030 A HQ NR VOR VOICE_0030 Recording Œ Ô ˇ ˆ Ø Voice Recording YV 150 ENGLISH 0 0 3 9 07 3 35 PM Page ...

Page 12: ...12 Basic Information Connecting the Earphone Microphone Connecting the Earphone Top Earphones Connecting the External Microphone Top External Microphone YV 150 ENGLISH 0 0 3 9 07 3 35 PM Page 12 ...

Page 13: ...ery type your settings and volume Slide the battery cover in the direction of the arrow as shown in the diagram and open it Insert rightly the batteries fitting their poles Be careful not to reverse the poles of the batteries Close the battery cover by sliding it in the direction of the arrow as shown in the diagram 1 2 3 1 2 3 Using the earphone Using the speaker Mode Time A maximum of 15 hours A...

Page 14: ...ning the Power On Power is turned on Press and hold the button Turning the Power Off Power is turned off Press and hold the button If you press and hold the REC button in power off condition the player turns on and voice recording will start Power is automatically turned off when none of the buttons have been pressed for a certain time in the standby and the music pause mode for power saving purpo...

Page 15: ...the œ œHOLD switch in the direction of the arrow In Hold mode all buttons are disabled This function is useful when you are walking or jogging 2 Slide the œ œHOLD switch in the opposite direction of the arrow to release the Lock function Lock Function HOLD ON E D C B A 30 Vol 15 0 If Volume Limit is set to On you couldn t control the volume over 16 Set Volume Limit to Off NOTE YV 150 ENGLISH 0 0 3...

Page 16: ...to the previous level 3 Press the to select a folder of your choice 5 Press the button to select a file of your choice 6 Press the button The selected file will be played Press the button to select File Browser and press the button You will see the folder list including VOICE MUSIC and TTS 2 1 Press and hold the button to move to the main menu E D C B A File Browser YV 150 ENGLISH 0 0 3 9 07 3 35 ...

Page 17: ...ct the file you want to delete in the file list and press and hold the DEL button If you want to directly delete a file during playing press and hold the DEL button after pausing You can t recover the file once it is deleted So double check to make sure the file is the one you want to delete You cannot delete the file during playback NOTE E NO YES D C B A Delete CAUTION YV 150 ENGLISH 0 0 3 9 07 3...

Page 18: ...Windows 2000 or Windows XP after logging on with the Administrator account Please refer to the PC user manual on how to log on with the Administrator account CAUTION 2 Click NEXT Media Studio installation starts An icon is created on the desktop after installation is complete and Media Studio starts Before you start Insert the installation CD provided with the player into the CD ROM drive YV 150 E...

Page 19: ...ive 2X or higher USB Port 2 0 DirectX 9 0 or higher Resolution 1024 X 768 or higher Windows Media Player 9 0 or higher Internet Explorer 6 0 or higher The PC system must meet the following minimum specifications If you connect the player through a USB hub the connection may be unstable Please connect the player to your PC directly The player could not work while connecting to your PC If you do not...

Page 20: ... Help for more information on how to use Media Studio Click MENU Help Help from the menu at the top of the Media Studio program Media Studio enables you to select and organize files and folders in preparation for transfer to your player 2 YV 150 YV 150 YV 150 ENGLISH 0 0 3 9 07 3 35 PM Page 20 ...

Page 21: ...ed folder are added to the list on the left side of the Media Studio Screen 1 Media Studio will automatically start when the player is connected to your PC If the program does not start automatically double click the Media Studio icon on the desktop 2 Click the desired file icon on the left side Choose the file type you want to transfer by clicking on one of these icons Click icon to display music...

Page 22: ...erviceSM CDDB is a registered trademark of Gracenote The Gracenote logo and logotype the Gracenote CDDB logo and logotype and the Powered by Gracenote CDDB logo are trademarks of Gracenote Music Recognition Service and MRS are service marks of Gracenote 4 3 2 Portable window YV 150 YV 150 Perform the following steps to transfer files from your PC to the player YV 150 ENGLISH 0 0 3 9 07 3 35 PM Pag...

Page 23: ...one of these icons Click icon to display music list Click icon to display etc list The ETC list includes other file type TS3 3 Select the file to transfer in the left file list Do not disconnect the USB cable during file transfer This may cause damage to the player or your PC CAUTION 4 Click icon The selected file is transferred to the player Before you start Connect the player to your PC Media St...

Page 24: ...ogy and service to prevent the illegal use of digital contents and protect the profit and rights of copyright holders DRM files are charged music files applied with the illegal copy protection technology of legally purchased MP3 music The file transfer message will appear during file download or upload Disconnecting the USB cable while the message is displayed may cause malfunction of the player T...

Page 25: ...desktop and click the left mouse button 2 Click Safely Remove USB Mass Storage Device Drive message 3 Disconnect the player from your PC Do not disconnect the player from the PC during file transfer This may cause damage to data and the player You cannot remove the player while files within the player are being played on your PC Please retry after playback is finished CAUTION 1 2 YV 150 ENGLISH 0 ...

Page 26: ... on your PC in a human voice a great help to enhance your language skill 1 Click Install TTS 2 Click NEXT TTS installation starts An icon is created on the desktop after installation is complete Before you start Insert the installation CD provided with the player into the CD ROM drive YV 150 ENGLISH 0 0 3 9 07 3 35 PM Page 26 ...

Page 27: ... voice file format of TS3 that you can listen to in the player 10 Print To print the text file 11 Help To get useful information about the use of the program 12 Voice Engine To view the language currently selected 13 Play To listen to the voice version of the text 14 Pause To pause the play 15 Stop To stop the play 16 REW Backward To move the previous part of the text 17 FF Forward To move the nex...

Page 28: ...ined words or sentences ADD To add words to be newly defined MOD To modify the definition of saved words DEL To delete saved words Speech Control Volume To control the volume Pitch To adjust the voice pitch Rate To adjust the speech rate Setting Language To select the lanuguage for the voice to read the text letter To read character by character word To read word by word sentence To read sentence ...

Page 29: ...t Click the TTS icon on your desktop 1 2 1 Press the Generation Button 2 3 When the Save TS3 File window appears input a file name and select a folder for saving and press the Save button 3 You can search TS3 files that are transferred to the player in the File Browser TTS folder Page 16 For more information refer to the Help NOTE YV 150 ENGLISH 0 0 3 9 07 3 35 PM Page 29 ...

Page 30: ...use the built in or external microphone to record a voice Voice Recording Voice Recording Before you start Turn on the player and check the battery capacity Connect the external microphone to the player if you want to use it page 12 1 Press and hold the button to move to the main menu 2 Press the button to select Voice REC and press the button The voice recording screen appears 1 2 3 4 E D C B A V...

Page 31: ...the earphones during the recording Otherwise it can cause noise on the recording Do not put the microphone too close to or far distant from your mouth Otherwise the sound quality may be poor If the battery capacity is low you cannot record So check the battery and replace it with a new one before recording Do never remove the battery during the recording Otherwise the player will not completely re...

Page 32: ...the button SP To set the recording quality to standard HQ To set the recording quality to high quality SHQ To set the recording quality to the best quality 2 Press the button to select Voice REC Quality and press the button The voice recording quality menu appears During the voice recording the menu is not accessed NOTE Voice REC Qua VOR Noise Reductio YV 150 ENGLISH 0 0 3 9 07 3 35 PM Page 32 ...

Page 33: ...to record only if a sound or voice is detected To set Noise Reduction 1 Press the button in standby mode The voice recording menu appears 3 Press the button to select the mode and press the button Off To record as a original sound On To reduce noise to make the recording clearer 2 Press the button to select Noise Reduction and press the button The noise reduction menu appears Noise Reduction filte...

Page 34: ...hone connector to the phone recording adapter 2 Connect the phone to the phone recording adapter using the phone cable 3 Connect the player to the phone recording adapter using the external device cable 5 Press the REC button during the phone conversation Recording starts 6 To stop recording press the REC button again Recording stops 1 2 3 4 Press the FOLDER button to select a folder where the rec...

Page 35: ...ile Browser and press the button The file browser screen appears Before you start Turn on the player and check the battery capacity You can listen to a recorded file or music file that is transferred to the player Press the to select a folder of your choice Press the button to move to the previous level 5 Press the button to select a file of your choice 6 Press the button The selected file will be...

Page 36: ... the beginning or the end of the file 2 Release the button at the point you want to start It starts playing from the point you release the button To search within a file Power is automatically turned off when none of the buttons have been pressed for a certain time in the standby and the music pause mode for power saving purposes NOTE Listening to Voice or Music File Listening to Voice or Music Fi...

Page 37: ...nt file starts playing from the beginning Press the button after 3 seconds of play To play from the beginning of the current file Press the button within 3 seconds of play The previous file will start playing Press the button The next file will start playing To play the previous next file YV 150 ENGLISH 0 0 3 9 07 3 35 PM Page 37 ...

Page 38: ... play repeatedly You will see the mark over the repeated section on the progress bar 3 Press the A B button again to set the ending of the section you want to repeat To set a section to repeat Press the A B button again during Section Repeat Section Repeat will be canceled To cancel the section repeat 2 3 You can set the start and end points of the section repeat only within a file NOTE E D C B 3 ...

Page 39: ...ile 3 Press the button to select desired mode and press the button Off To turn the AVSS off On To turn the AVSS on E D C B A E D C B A 1 Press the button in voice or music play mode The play menu appears 2 3 Press the button to select desired mode and press the button To select Play Mode Normal To play all the files in order one time Repeat All To repeat all files Repeat One To repeat one file Rep...

Page 40: ...to select desired mode and press the button Select from Normal Voice Pop Classical and 3D Sound You can set the play speed either faster or slower than normal Different DNSe can be selected that enable you to enhance the file your listening to AVSS Play Mode Play Speed DNSe AVSS Play Mode Play Speed DNSe Listening to Voice or Music File Using Voice Music Play menu Continued The Voice mode in DNSe ...

Page 41: ...to move to the main menu 2 Press the button to select File Browser and press the button 3 Press the button to select the file to bookmark and press the button 4 Press and hold the B MARK button on the point where you want to add a bookmark You will see the mark to bookmarked section on the progress bar You can add up to 20 bookmarks 1 2 3 E D C B 3 87 A HQ NOR VOICE_0031 Normal 4 YV 150 ENGLISH 0 ...

Page 42: ...ected bookmark To play a bookmark E D C B A Bookmark To delete a bookmark Press the button to select Bookmark and press the button 1 3 Press the button to select YES and press the button The selected bookmark will be deleted 2 Use the button to select the desired file in the bookmark list and press and hold the DEL button E NO YES D C B A bookmark Delete Setting a Bookmark Setting a Bookmark Conti...

Page 43: ...rt 1 2 E D C B A FM Radio If the earphones are not connected the player does not receive FM Radio reception Make sure to connect the earphones in advance CAUTION To use mute function The earphones are used as antennas to receive FM Radio reception If you press and hold the REC button while listening to FM Radio voice recording starts NOTE Press the button during listening to FM Radio Sound is mute...

Page 44: ... Press the button to select Go to Preset Mode and press the button You will see PRESET on the screen 3 Press the button to select a preset frequency It can automatically scan for a stored radio frequency To switch to preset mode If no preset frequencies are set you will see No preset and the player will not switch to preset mode For more information on the preset setup see pages 46 47 NOTE E D C B...

Page 45: ...from the point the button is released will be searched Press button in manual mode Moves to next frequency whenever the button is pressed To automatically search for frequencies To manually search for frequencies ManualMode E D C B A MANUAL 93 9MHz 87 5 108 0 Mono Auto Searching E D C B A MANUAL 93 9MHz 87 5 108 0 Mono YV 150 ENGLISH 0 0 3 9 07 3 35 PM Page 45 ...

Page 46: ...d To automatically set Presets Press the button to cancel during auto scanning The auto preset setting is canceled and frequencies set up to then are stored To cancel during setting Listening to FM Radio Setting FM Presets You can preset favorite radio frequencies for later use E D C B A Using Auto Preset deletes all previous presets CAUTION Go to Preset Mod Add Preset Auto Preset FM Sensitivity F...

Page 47: ...et You will see the preset number and frequency in the confirmation window 5 Press the button to select the desired preset number and press the button The frequency is added as a preset To set a preset for other frequencies follow 1 4 steps above 1 E D C B A PRESET 93 9MHz 87 5 108 0 Mono 01 E D C B A 2 Press the button The manual mode menu appears Go to Preset Mod Add Preset Auto Preset FM Sensit...

Page 48: ...ess the button to select Delete Preset and press the button The confirmation window appears 3 Select YES and press the button The selected preset number and frequency will be deleted 4 To delete other preset numbers follow 1 3 steps above 1 E D C B A E NO YES D C B A Delete Go to Manual Mo Delete Preset Auto Preset FM Sensitivity FM Region YV 150 ENGLISH 0 0 3 9 07 3 35 PM Page 48 ...

Page 49: ... Region 1 Press the button in FM Radio mode The FM Radio menu appears 2 Press the button to select FM Region and press the button Select from Korea US Japan and Other Countries Frequency range by region Korea US Search for FM frequencies in 100 kHz increments between 87 5 MHz 108 0 MHz Japan Search for FM frequencies in 100 kHz increments between 76 0 MHz 108 0 MHz Other Countries Search for FM fr...

Page 50: ... on the player and check the battery capacity 1 Press and hold the button to move to the main menu 2 Press the button to select Now Playing and press the button It will move to the playback screen E D C B A Now Playing YV 150 ENGLISH 0 0 3 9 07 3 35 PM Page 50 ...

Page 51: ...n Year Month Date 5 When done press the button The date time setting is completed You can set the current date and time E D C B A Settings E D C B A Date Time Set AM PM AM 55 2006 10 12 HOUR MIN YEAR MONTH DATE 01 1 Press and hold the button to move to the main menu If you do not press any buttons for a certain time in the Settings screen settings will be canceled and the player will return to the...

Page 52: ...een will automatically turn off Press any button to turn it back on You can set to turns off power automatically after the preset time E D C B A Settings To set Sleep Timer 3 Press the button to select Sleep Timer and press the button Select from Off 15min 30min 60min 90min and 120min 1 Press and hold the button to move to the main menu 2 Press the button to select Settings and press the button Th...

Page 53: ... menu 2 Press the button to select Settings and press the button The setting menu appears 3 Press the button to select Language and press the button Select from English and E D C B A Settings Date Time Set Display Off Sleep Timer Language Beep E D C B A Settings Date Time Set Display Off Sleep Timer Language Beep You can set the preferred language for the menu You can set the player to beep when t...

Page 54: ...e button The setting menu appears 3 Press the button to select Volume Limit and press the button Off Not to limit the volume level On To limit the maximum volume level up to 15 E D C B A Settings Volume Limit Default Set About You can avoid hearing damage by setting the limit of the volume when using the earphone YV 150 ENGLISH 0 0 3 9 07 3 35 PM Page 54 ...

Page 55: ...l settings to default NO To cancel default settings 2 Press the button to select Settings and press the button The setting menu appears 1 Press and hold the button to move to the main menu 3 Press the button to select Default Set and press the button The confirmation window appears E D C B A Set as default NO YES YV 150 ENGLISH 0 0 3 9 07 3 35 PM Page 55 ...

Page 56: ...ble indicates the remaining capacity and Total means the entire memory capacity 2 Press the button to select Settings and press the button The setting menu appears 1 Press and hold the button to move to the main menu E D C B A Memory Available 124MB Total 460MB Firmware Ver 1 00 WA 1GB 1 000 000 000 bytes actual formatted capacity may be less as the internal firmware uses a portion of the memory N...

Page 57: ...urned off Press any button to turn on the screen display or check the settings Page 52 The screen may not be visible under direct sunlight The screen will not turn on Check the battery status Check the battery if it is used up Replace the battery Power is automatically turned off when none of the buttons have been pressed for a certain time in the standby and the music pause mode for power saving ...

Page 58: ...lable file has been saved in the player Check if the file is damaged Check if there is enough battery power Playing is disabled Check if the USB cable is securely connected Reconnect if necessary Check if the memory is full File upload is disabled Check if the file is in VBR Variable Bit Rate format Abnormal Play Time Display during Play Press Start on the toolbar of your PC to run Windows Update ...

Page 59: ...ly view the menu structure Menu Selection Voice REC File Browser Bookmark FM Radio Settings Now Playing Sleep Timer Date Time Set Language Display Off Beep Default Set Volume Limit About YV 150 ENGLISH 0 0 3 9 07 3 35 PM Page 59 ...

Page 60: ...le up to 2000 Earphone Output 22mW CH 16Ω Speaker Output 150mW 8Ω Output Frequency Range 30Hz 14kHz Signal to Noise Ratio 85dB with 20KHz LPF Play Time 20 hours for the earphones 15 hours for the speaker based on MP3 128Kbps VOL 20 and display off conditions Temperature Range for Operation 5 35o C 23 95o F Case Plastic Weight 40 4g excluding the battery Dimension W x H x D 33 x 97 x 18 3 mm FM Fre...

Page 61: ...her than this product player and the license does not extend to any unlicensed product player or process conforming to ISO IEC 11172 3 or ISO IEC 13818 3 used or sold in combination with this product player The license only covers the use of this product player to encode and or decode audio files conforming to the ISO IEC 11172 3 or ISO IEC 13818 3 No rights are granted under this license for prod...

Page 62: ...om latin GUATEMALA 1 800 299 0013 www samsung com latin JAMAICA 1 800 234 7267 www samsung com latin PANAMA 800 7267 www samsung com latin PUERTO RICO 1 800 682 3180 www samsung com latin REP DOMINICA 1 800 751 2676 www samsung com latin TRINIDAD TOBAGO 1 800 7267 864 www samsung com latin VENEZUELA 0 800 100 5303 www samsung com latin COLOMBIA 01 8000112112 www samsung com co BELGIUM 02 201 2418 ...

Page 63: ...KRAINE 8 800 502 0000 www samsung com ur LITHUANIA 8 800 77777 www samsung lt LATVIA 800 7267 www samsung com lv index htm ESTONIA 800 7267 www samsung ee AUSTRALIA 1300 362 603 www samsung com au CHINA 800 810 5858 010 6475 1880 www samsung com cn HONG KONG 3698 4698 www samsung com hk INDIA 3030 8282 1800 110011 www samsung com in INDONESIA 0800 112 8888 www samsung com id JAPAN 0120 327 527 www...

Page 64: ...REV 0 0 YV 150 ENGLISH 0 0 3 9 07 3 35 PM Page 64 ...

Reviews: