20
S&C Instruction Sheet 716-504
Installation
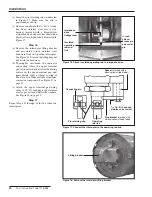
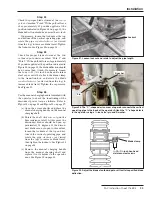
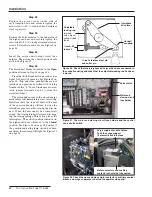
(i) Insert the pin retaining clip as indicated
in Figure 17. Make sure the clip is
positioned as shown.
(j) Remove and discard the
5⁄16
–18
×
2
¼
-inch
hex head stainless steel screw, stop
bracket (marked with a black/yellow
striped label), and spacer (marked with a
black/yellow striped label) illustrated in
Figure 17.
Step 16
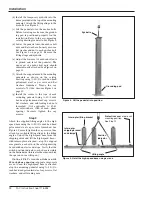
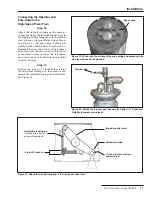
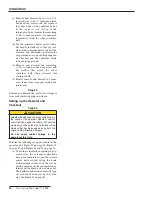
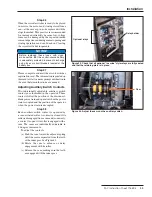
(a) Remove the interrupter lifting bracket
and associated ½-inch stainless steel
hardware from on top of the interrupter.
See Figure 18. Discard the lifting bracket
but retain the hardware.
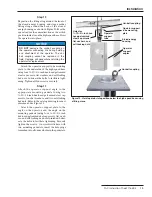
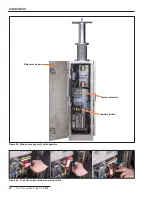
(b) Thoroughly wire-brush the indicator
end-casting where the upper terminal
pad is to be attached as well as the mating
surface on the upper terminal pad, and
immediately apply a liberal coating of
Penetrox A or other suitable aluminum-
connector compound. See Figure 19 on
page 21.
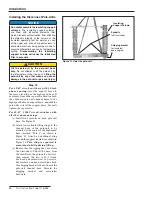
(c) Attach the upper terminal pad using
three ½–13
×
1
¼
-inch hex-head stainless
steel cap screws and Belleville washers.
See Figure 20 on page 21.
Step 17
Repeat Steps 13 through 16 for the other two
interrupters.
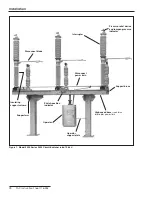
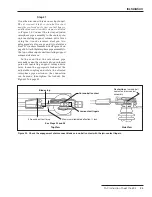
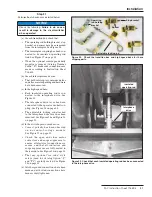
Figure 16 Attach insulated operating rod to interphase drive.
Figure 17. Connect the interrupter to the operating rod link.
Spacer
(marked with a
black/yellow striped label)
Connecting pin
Lifting bracket
Pin retaining clip
Operating
rod link
Stop bracket
(marked with
a black/yellow striped label)
5⁄16
–18
×
2
¼
hex-head
stainless steel screw
½
-inch
silicon-
bronze pin
and cotter
pin
Insulated
operating
rod end
link
s
Interphase
drive
linkage lever
Figure 18. Remove the interrupter lifting bracket.

