22
S&C Instruction Sheet 761-515
Installation
Checking Alignment and Adjusting
the Stop Plates
Step 23
NOTICE
The switch should be opened and closed
slowly only when checking for alignment and
complete closure .
When opening or closing the switch in
service, do not slow down or stop part way .
Arcing will occur if the switch is partially
open or partially closed .
Remove the ties holding the switch blades to
their stationary main contact assemblies.
Open and close the switch slowly to ensure
no operational difficulties are encountered
caused by undetected damage in shipping.
Step 24
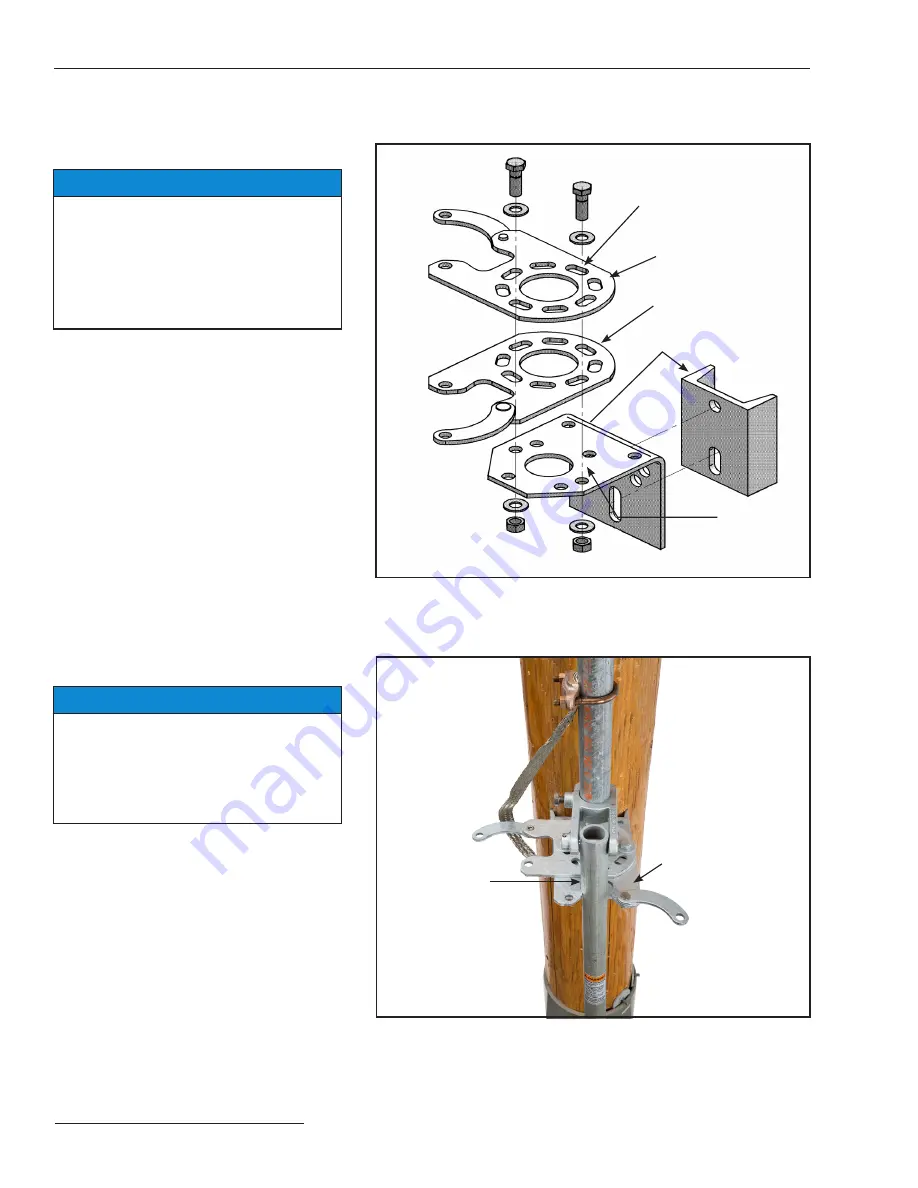
The stop plate holes are slotted to allow room
for adjustment. Loosen the bolts securing
the adjustable stop-plates to the foot-bearing
support plate. See Figure 22. Place the switch
in the fully
Open
position and adjust the
open-position stop plate so the handle, when
lowered, fits into the open-position slot. Mark
the location of the open-position stop plate on
the support plate.
Step 25
NOTICE
DO NOT skip this important step!
Loose
or improperly installed vertical operating
pipe is the primary cause of incomplete
blade contact . Over time this condition can
cause heating and eventually arcing of the
blade contacts .
The most common cause of contact overheating
and damage is not putting enough "wind up"
torque in the vertical operating pipe when the
switch is in the
Closed
position. Wind up is
the torque left in the pipe after the handle is
secured in the closed stop-plate. This windup
prevents the pipe from vibrating in high winds,
and it creates strong positive blade-to-contact
pressure—ensuring the switch is securely held
in the
Closed
position.
Handle against
closed stop-plate
Closed stop-plate
Support plate
Figure 22. Exploded view of stop plates and foot-bearing assembly.
Foot-bearing assembly
Closed stop plate
Open stop plate
Slotted holes
Figure 23. Adjust the closed-position stop plate.


