14
S&C Instruction Sheet 775-510
Connecting the Control Cable
Use the following procedure to connect the control cable
for power-controlled Scada-Mate SD switches:
NOTICE
Shorting blocks for sensor secondaries are shipped
installed in the switch connector . Remove the shorting
blocks before connecting the control cable . Save the
shorting blocks and cable plug cover for future use .
STEP 16.
An optional liquid-tight control cable may be
included with the Scada-Mate SD switch for
connection of the switch to the control unit.
(a) Remove the control cable from its shipping
carton.
(b) The control cable is provided with a multi-pin
connector plug (male) for connection to the
switch and a multi-pin connector receptacle
(female) for connection to the control unit.
Locate the connector receptacle on the front of
the switch base and remove the dust cover.
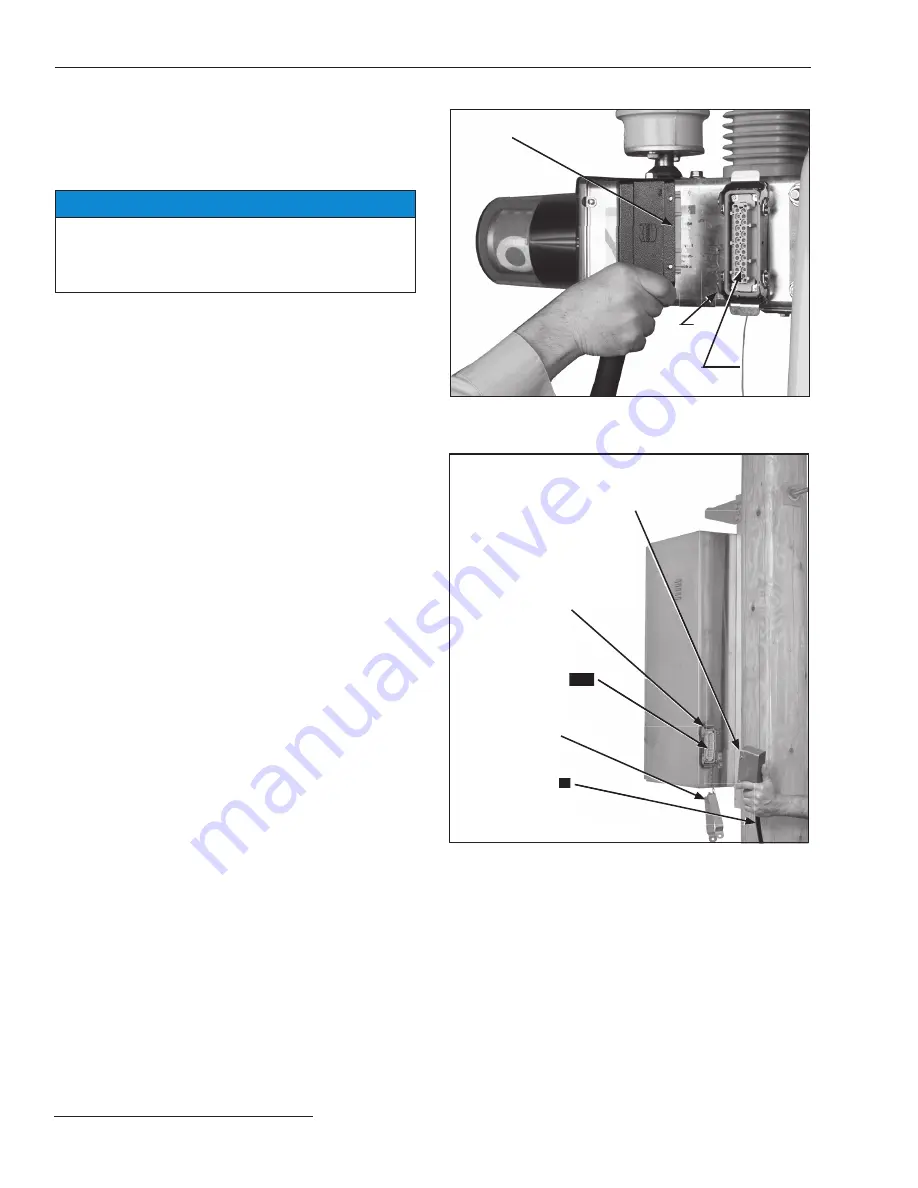
(c) Remove the sensor shorting blocks from the
receptacle and attach the control-cable plug.
(d) Secure the connection with the connector clips.
(e) Retain the dust cover and sensor shorting blocks
for future use. See Figure 11.
STEP 17.
Locate the receptacle on the back of the control
unit enclosure.
(a) Remove the dust cover, and attach the control-
cable connector plug.
(b) Secure the connection with the connector clips.
(c) Retain the dust cover for future use. See
Figure 12.
Figure 11. Plug the connector into the socket and secure with
the clips.
Figure 12. Connecting the control cable to the control unit
enclo sure.
Connector plug
(male)
Connector receptacle
(female)
Clips
Connector receptacle
Connector clips
Control cable
Connector plug
Security belt
Installation


