S&C Instruction Sheet 775-510
9
Switch Installation
Follow these steps when installing the Scada-Mate SD
switch:
STEP 5.
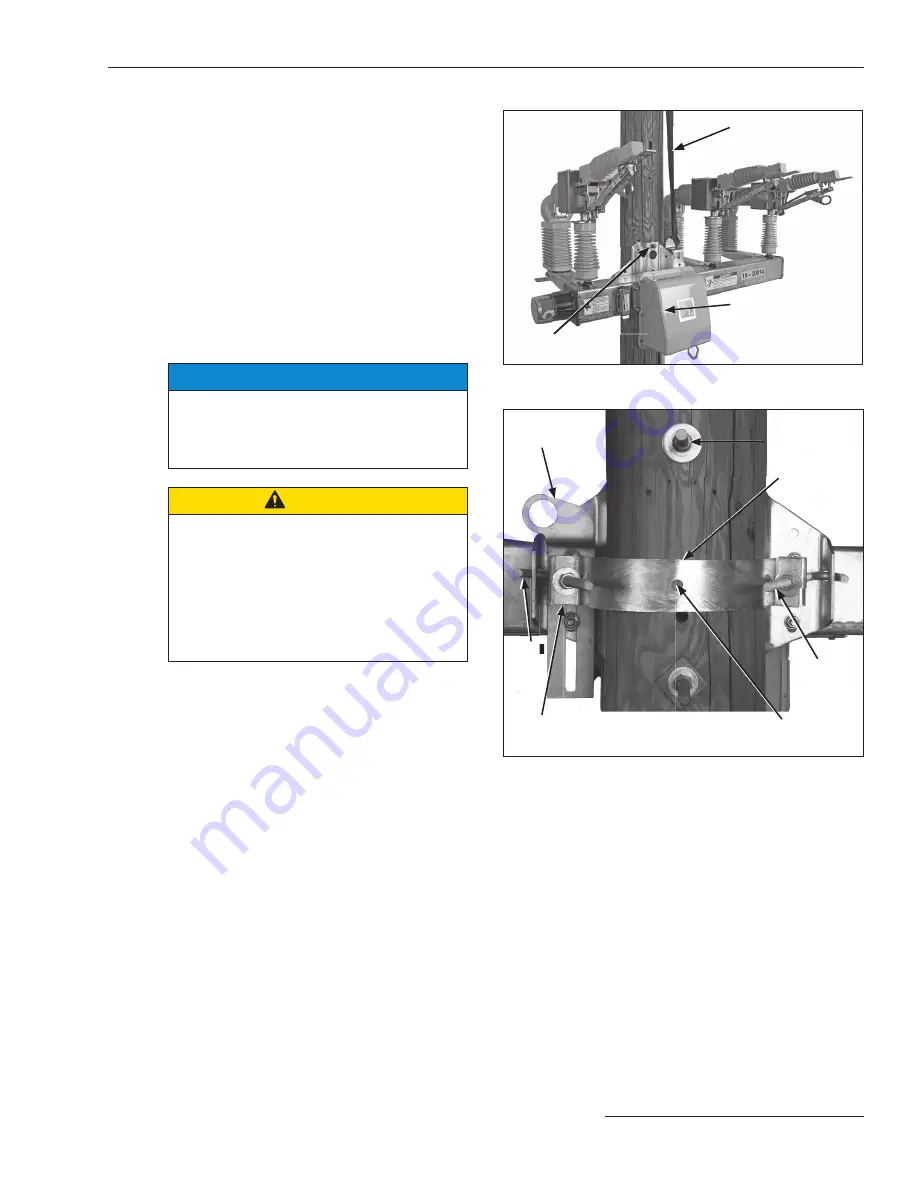
Handle and lift the switch per the “Handling”
section on page 7. When the switch is hoisted to
mounting level, guide the switch so the through-
bolts projecting from the utility pole slip into the
holes in the pole-saddle. The saddle has a keyhole
and an open slotted hole for this purpose. Lower
the switch slightly so it bears on the through-
bolts. Fully tighten the through-bolts, making
sure the fl at washer for each bolt is between the
bolt head and the pole-saddle. See Figures 4
and 5.
NOTICE
Do not lift the switch by rigging on the
switch pole bases, the interrupters, the
sensors, or the interrupter OPEN/CLOSE
indicator . Damage to the switch may result .
CAUTION
Do not use the lifting bracket to lift the crated
switch from the truck or other conveyance .
The lifting bracket will
ONLY hold the weight
of the switch and will
NOT hold the weight of
associated packing materials .
Failure to uncrate the switch before
lifting may cause damage to the switch or
personal injury.
Installing the Optional Pole Band and J-Bolts
Conduct the following steps to install the optional pole
band and J-bolts:
STEP 6.
Secure the optional pole band to the pole-saddle
using the J-bolts provided. Two
¼
×
1
×
3-inch (6
×
25
×
76-mm) stiffening blocks are
furnished to be used behind the pole-band
fl anges and underneath the J-bolt nuts. Fully
tighten the nuts. Attach the pole band to the back
side of the pole through the hole in the center of
the band using one of the three
½
-inch diameter
lag screws provided. See Figure 5. Then, attach
the pole-saddle to the pole using the two
remaining
½
-inch diameter lag screws.
STEP 7.
When all nuts and lag screws have been fully
tightened, remove the hoisting sling from the
lifting bracket. Push the lifting bracket
downward to lower it.
Figure 4. Slide the pole saddle onto the extended through-bolts.
Figure 5. Rear of the pole showing the mounting hardware and
the optional J-bolts and pole band.
Lower through bolt
(not visible)
Lifting sling
Upper
through-bolt
J-bolt
Lag hole
Lifting
bracket
Stiffening
block
Pole-band
Through-bolts
(user-furnished)
J-bolt
Installation


