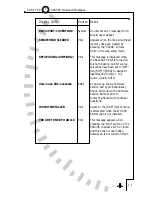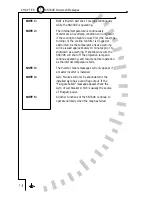
important to maintain the correct visual orientation on the HSI.
In addition, the autopilot will be using the OBS to obtain a course
reference. Pressing [SHFT]>[SYNC] when a localizer frequency is
tuned rotates the course pointer to align with the present heading.
When the nav source is a long-range nav receiver such as GPS or
loran, the SN3308’s course pointer can
auto-slew, or
automatically point to the correct course. The auto-slew function
can be enabled or disabled by pressing [SHFT]>[NAV] and
toggling the AUTO SLEW softkey. If enabled, when the nav
receiver sequences to subsequent waypoints on a flight plan or an
approach, the course pointer will auto-slew to each course in
turn. Simply use standard intercept and tracking techniques to
keep the needle centered.
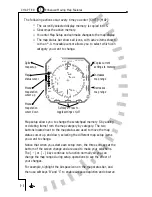
Bearing Pointers (RMI)
Conceptually, a Radio Magnetic Indicator (RMI) is even simpler
than an HSI. A traditional RMI provides one or two independent
pointers which point to the navigation station, much like an ADF
display. But instead of using a fixed compass card like many ADF
displays, an RMI automatically rotates the compass card so that
the current heading is always at the top of the display. Thus,
each pointer indicates the actual bearing
TO
the station (reading
the head of the pointer) or
FROM
the station (reading the tail of
the pointer).
The two bearing pointers on the SN3308 are especially useful
because they can be connected to a VOR receiver, an ADF
receiver, or a GPS/loran receiver. Since all three types of
navigation signals are converted to a common display format in
this case, the SN3308’s bearing pointers make excellent cross-
checks against your primary nav source.
To make the best use of the Bearing Pointers we recommend
that you select “AUTO” as the source for bearing pointer 1, and
that it be displayed at all times.
6 - 2
6
Getting the Most From Your SN3308
C H A P T E R
Summary of Contents for SN3308
Page 1: ......
Page 15: ...Welcome to the SN3308 1 C H A P T E R...
Page 19: ...Display Overview 2 C H A P T E R...
Page 24: ...Operational Basics 3 C H A P T E R...
Page 36: ...Button Operations 4 C H A P T E R...
Page 57: ...Enhanced Moving Map Features 5 C H A P T E R...
Page 70: ...Getting the Most From Your SN3308 6 C H A P T E R...
Page 76: ...Flags Abnormal Conditions and Messages 7 C H A P T E R...
Page 85: ...Technical Specifications and Operating Limits 8 C H A P T E R...
Page 87: ...Installation Information 9 C H A P T E R...
Page 89: ...Technology of the SN3308 1 A P P E N D I X...
Page 92: ...Illustrations 2 A P P E N D I X...
Page 98: ...Limited Parts Labor Warranty 1 w A R R A N T Y...

