Sanden Heat Pump – Installation Manual
Page 28 of 32
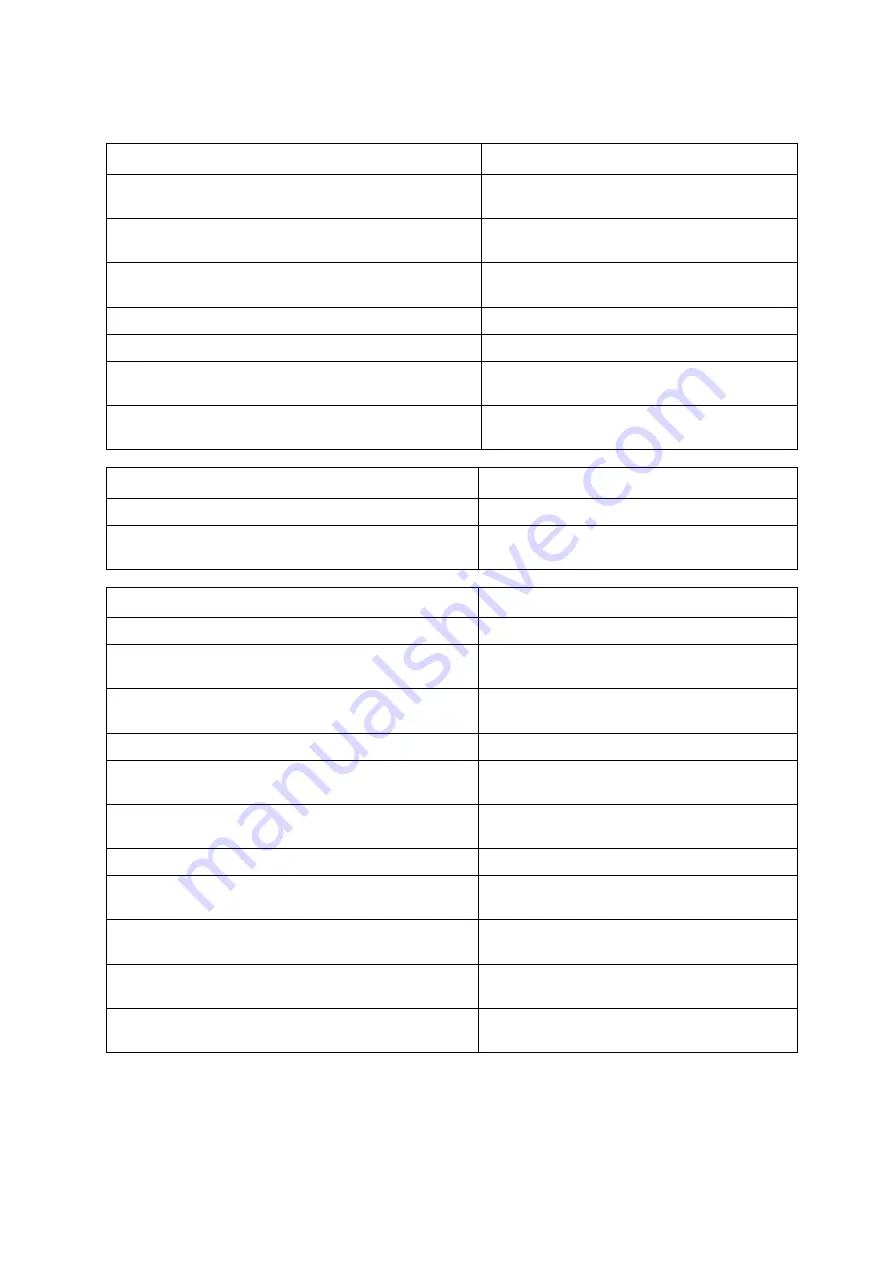
Check sheet
Safety items
Action
Completed
Fix the legs of the tank unit in place with anchor
bolts if necessary.
The floor has been properly waterproofed and
properly drained.
The earth leakage breaker can be turned off with the
test button.
Earth (ground) work is implemented.
The tank unit is installed on a level sturdy surface.
There are no gas containers or flammable materials
anywhere near the unit.
The wiring between the tank unit and the heat pump
unit is properly connected.
Around units
Action
Completed
A concrete base block is installed (if necessary).
An inspection space is retained in accordance with
the installation manual
Around the piping
Action
Completed
A dedicated water supply/stop cock is mounted.
The metal piping for the hot water supply has been
properly insulated.
There is no water leaking from the water supply/hot
water supply and heat pump pipes.
Pipe insulation Protection is provided.
Union joints are used so that the parts can be easily
removed.
Piping is installed from the drain outlet and drain
hopper to the drain ditch.
The filter in the pressure-reducing valve is clean.
Independent pipes, not a twin tube, are used for the
heat pump unit pipes (insulated, UV stabilised)
The drainage hose from the heat pump unit leads
into the drain ditch.
Pressure reduction valve (500kPa) has been fitted
to the cold water supply of the unit
During draining of the tank, unit water does not
overflow from the drain ditch.
Installed By…………………………………………………… Date…………………………………
Inspected By …………………………………………………. Date…………………………………
Summary of Contents for GAUS-160FQS
Page 24: ...Sanden Heat Pump Installation Manual Page 24 of 32 315L 300L 250L 160L...
Page 25: ...Sanden Heat Pump Installation Manual Page 25 of 32 Wiring Diagram...
Page 29: ...MEMO...
Page 30: ......
Page 31: ......
Page 32: ...SANDEN Heat Pump 40980 44913 Installation Manual AU...


