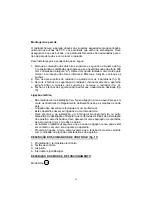
The radiator must be installed out of any potential "water spray" area as defined
in Fig. (6)
Mounting on the wall.
The radiator should be fixed to the wall using the special support brackets, raw-
plus and screws provided in the product box. However before installation, we
would recommend that the raw-plugs and screws are checked, and if required
changed, to suit the type of wall on which the radiator is to be fitted.
Installation sequence:
1. With reference to the width dimension "A" and the minimum height dimension
(590 mm) form the floor, as in Fig. (7); mark the position of the two fixing holes
for both wall brackets as shown. Ensure that both brackets are level.
2. Drill the corresponding holes and fix the two separate wall brackets to the wall
with the raw-plugs and screws provided, Fig.(8).
3. On the radiator, open the four security catches located on the back fascia.
Then whilst lifting the radiator at an angle, Fig.(9), engage the wall brackets
onto the back of the radiator mounting positions.
4. Close the security catches to locate and fix the radiator in position, Fig.(10).
Electrical Connection
-
The MCN electric radiators are intended for permanent fixed connection to
the electrical supply. All installation work must be carried out in accordance
with all relevant local, national and international installation and safety standards
pertaining to the country of installation.
-
Any electrical connections or installations must be made by a suitable qualified
professional person(s).
-
This product must be connected to an earth / ground connection point.
-
The radiator must be connected to the electrical supply in conjunction with
a suitably rated electrically isolating double pole switch. All switches used
must have a minimum contact clearance of at least 3mm.
-
When the installing the appliance ensure that the electrical supply cable is
routed away from areas on the product which radiate heat.
-
Before making any connection ensure that the voltage and frequency detailed
on the radiator electrical data label corresponds to that of the general electrical
supply of the country of installation.
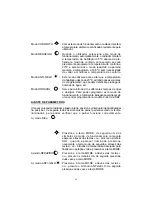
DESCRIPTION OF THE CONTROL PANEL (fig.11)
1- Programmer/electronic thermostat
2- Control keys
3- Pilot light
4- On/Off switch
13
The radiator can be available with this security catches, or the additional
security hook, or both ones.


