background image

10

ENGLISH 
DECOR Axial Extractor Fans 


The installation and settings must be 
done only by an Qualified Electrician

.


The DECOR extractor fan range is 
manufactured to the high standards of 
production and quality as lay down by the 
international Quality Standard ISO 9001. 
All components have been checked and 
every one of the final products will have 
been individually tested at the end of the 
manufacturing process. 
Please read this instructions booklet 
carefully before installing or starting up 
the product. It contains important 
information on personal and user safety 
measures to be followed while installing, 
using and carrying out maintenance work 
on the equipment. 


Important information


-  Check that the apparatus is in perfect 

condition while unpacking. Any fault or 
damage caused in origin is covered by 
the S&P guarantee. Please make sure 
that the apparatus coincides with the 
product you have ordered and that the 
details on the instructions plate fulfil 
your necessities. 

-  Installation must only be carried out by 

qualified persons. 

Make sure that the installation 

complies with each country’s current 

mechanical and electrical norms.   

-  If a ventilator is going to be installed to 

extract air from premises where a 
boiler or other combustion apparatus 
are installed, make sure that the 
building has sufficient air intakes to 
assure adequate combustion.   

- The extractor outlet must not be 

connected to a duct used to exhaust 
smoke or fumes from any appliance 
that uses gas or any other type of fuel.   
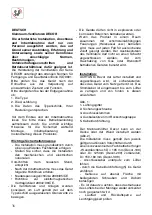
Installation fig.1


IMPORTANT

: Before installing and 

wiring the unit, ensure that the main 
supply is switched off. 


1 : Protection grille 


2 : Fixing screw 


3 : Connection terminals 
4 : Outlet with backdraught shutter 
5 : Cable entry 


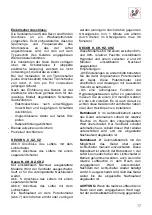
The DECOR can either discharge directly 
to the outside or via an individual or 
central ducting system (see Fig. 2). 


The unit can be mounted on the wall or 
ceiling using the 4 rubber blocks and the 
screws provided. 


Drill a hole in chosen position in the wall 
or ceiling of: (fig.1) 


If the unit is to be installed with individual 
ducting, use a standard duct:   

- DECOR-100: 100 mm  
- DECOR-200: 125 mm  
- DECOR-300: 150-160 mm 


Loosen the screw (2), which holds the 
grille in place (1) and remove the grille. 
Ensure that there are no obstructions to 
the airflow and that the impeller turns 
freely. 
Fix the extractor to the wall in such a way 
that it is not distorted in order to avoid 
noise generation or problems with the 
rotation of the impeller. Make sure that 
the backdraught shutter opens freely and 
has not being damaged in transit.   
 
Introduce the mains cable through one of 
the cable point (5) and fix it to the wall so 
that the fixing screw (2) is above.   
Connect the electrical wiring as set out 
below and then mount the protection 
grille (1) and tighten the screw (2). 

Summary of Contents for Decor-100 CHZ Visual

Page 1: ...Soler Palau Decor 100 CHZ Visual 5210022900...

Page 2: ...DECOR 100 DECOR 200 DECOR 300...

Page 3: ......

Page 4: ...3 1 4 3 2 5 Fig 1 DECOR 100 DECOR 200 DECOR 100 105 mm DECOR 200 125 mm DECOR 300 160 mm DECOR 300 52 9 mm 1 2 3 5...

Page 5: ...4 Fig 2...

Page 6: ......

Page 7: ...5 Fig 4 Fig 3 L N Fig 5 L N L N...

Page 8: ...6 Fig 7 Fig 8 Fig 6 Fig 9 L N L N...

Page 9: ...tradas de aire de la sala sean correctamente dimensionadas No se puede conectar la descarga del extractor a un conducto utilizado para evacuar los humos de aparatos alimentados a gas u otro combustibl...

Page 10: ...temporizaci n para que se ponga en marcha con el mismo interruptor que la luz Para ajustar esta temporizaci n girar el potenci metro situado en el circuito impreso fig 7 Para disminuir el tiempo de t...

Page 11: ...sentido antihorario min 2 minutos Para aumentar el tiempo de temporizaci n girar en el sentido horario m x 20 minutos DECOR 100 CD y CDZ Modelos equipados con un detector de presencia El aparato se p...

Page 12: ......

Page 13: ...that the building has sufficient air intakes to assure adequate combustion The extractor outlet must not be connected to a duct used to exhaust smoke or fumes from any appliance that uses gas or any...

Page 14: ...nute To increase the run on time turn clockwise max 30 minutes DECOR H CH HZ CHZ Models provided with an electronic humidistat which can be adjusted from 60 to 90 RH relative humidity and with a timer...

Page 15: ...ter do not force the adjuster to the maximum setting The humidity level in the room is above 90 RH DECOR 100 CD and CDZ Models provided with a PIR passive infra red detector and adjustable run on time...

Page 16: ...raccorder le DECOR s assurer que le c ble d alimentation soit d connect du r seau lectrique Le c ble lectrique doit tre encastr et entrer dans l appareil par l arri re 1 Grille de protection 2 Vis de...

Page 17: ...manipul s avec pr caution Pour que la mesure d humidit soit correcte il faut que l a rateur soit install dans une zone o il existe une bonne circulation d air Ne pas modifier le r glage de l hygrom tr...

Page 18: ......

Page 19: ...l se met en marche automatiquement quand il d tecte un mouvement et ce pour une distance maximum de 2 m tres fig 8 Il est de plus quip d une temporisation r glable entre 1 et 30 minutes assurant le fo...

Page 20: ...004 108 CE Die Ventilatoren und Anlagen wurden konzipiert um Luft gem der auf dem Typenschild ausgewiesenen Grenzwerte zu bewegen Die Ger te d rfen nicht in explosiven oder korrosiven Bereichen betrie...

Page 21: ...gert werden verringern durch drehen gegen den Uhrzeigersinn min 1 Minute und erh hn durch drehen im Uhrzeigersinn max 30 Minuten DECOR H CH HZ CHZ Diese Modelle sind mit einem zwischen 60 und 90 relat...

Page 22: ...nd mit einem Infrarotdetektor ausgestattet Das Ger t wird automatisch eingeschaltet sobald der Detektor eine Bewegung bzw die Anwesenheit einer Person in einem Umkreis von max 4 Meteren erkennt Diese...

Page 23: ...ia een kanaal zijnde geen gookgaskanaal Installatie Fig 1 1 Afdekrooster 2 Montageschroeven 3 Aansluitklemmen 4 Uitblaas met terugslagklep 5 Kabelinvoer De DECOR is geschikt voor montage in de wand of...

Page 24: ......

Page 25: ...ilator aan volgens schema 6 U kunt de ventilator ook aansluiten op een twee draads leiding waarbij de ingebouwde hygrostaat automatisch de ventilator in werking stelt bij het ingestelde RV niveau Deze...

Page 26: ...ue as entradas de ar para o compartimento est o devidamente dimensionadas N o se pode interligar a descarga do aparelho a uma conduta que seja utlizada para evacua o de fumos de combust o de equipamen...

Page 27: ...uema da fig 6 mostra como se pode ligar o exaustor com temporiza o com o mesmo mesmo interruptor da luz Para regular a temporiza o rodar o potenci metro existente no circuito impresso fig 7 Para dimin...

Page 28: ...r o potenci metro t min existente no circuito impresso fig 9 Para diminuir o tempo de temporiza o rodar no sentido anti hor rio min 2 minutos Para aumentar o tempo de temporiza o rodar no sentido hor...

Page 29: ...la korrekt f rbr nning Fr nluftfl ktens anslutningar f r inte anslutas till kanal vilken anv nds som fr nluft av r k eller avgaser fr n n gon verksamhet som anv nder gas eller annan typ av br nsle Ins...

Page 30: ......

Page 31: ...den vrider man moturs min 1 minut Om man nskar ka tidsperioden vrider man medurs max 30 minuter DECOR H CH HZ CHZ Dessa modeller r utrustade med elektronisk hygrostat som kan st llas in mellan 60 och...

Page 32: ...e satt p h gsta niv Vrid medurs men varsamt f r att maximera inst llt v rde Luftfuktigheten i rummet r ver 90 RH DECOR 100 CD och CDZ Dessa modeller r utrustade med en infrar d detektor PIR och med ju...

Page 33: ...h zachodzi proces spalania upewnij si e budynek posiada wloty powietrza zapewnieniaj ce odpowiednie spalanie Instalacja UWAGA Przed rozpoczeciem monta u wentylatora od cz zasilanie pr du od instalacji...

Page 34: ...at regulowany od 60 do 90 RH wilgotno ci wzgl dnej oraz wy cznik czasowy regulowany od 2 do 20 minut Zalecenia szczeg owe Aby zmieni ustawienia wentylatora nale y u y potencjometr w zgodnie z instrukc...

Page 35: ...y maksymalne Poziom wilgotno ci w pomieszczeniu jest wy szy ni 90 RH DECOR 100 CD i CDZ Powy szy model jest wyposa ony w detektor podczerwieni PIR Wentylator wl cza si automatycznie w momencie wykryci...

Page 36: ......

Page 37: ...rati funzionanti a gas o altro combustibile Impianto fig 1 IMPORTANTE Prima di iniziare la installazione e l allacciamento dell apparecchio staccare ogni collegamento elettrico Il cavo deve scorrere a...

Page 38: ...tardo girare il potenziometro situato nel circuito stampato fig 7 e accessibile una volta che la griglia 1 stata rimossa Per ridurre i tempi girare in senso antiorario minimo 1 minuto Per incrementare...

Page 39: ...minuti ATTENZIONE Prima di procedere ad una nuova impostazione dell estrattore occorre aspettare che la fase di temporizzazione sia terminata DECOR 100 CD e CDZ Modelli dotati di rilevatore di presen...

Page 40: ...Fastsp ndingsskrue 5 Tilslutningsklemmer DECOR er velegnet til v g eller loftsmontering og kan enten lede luften ud direkte eller via et enkelt aftr k eller et centralt kanalsystem fig 2 Ventilator ka...

Page 41: ...heden konstant er h jere end 90 RH vil ventilatoren konstant k re Drift Eksempel 1 Automatik drift fig 9 Ventilatoren starter automatisk n r fugtighedsniveauet i lokalet overstiger det indstillede niv...

Page 42: ......

Page 43: ...den starter automatisk n r den opfanger bev gelse i rummet indenfor en radius af 2 meter Fig 8 og forts tte indenfor den valgte efterl bsperiode Den nskede efterl bstid indstilles via potentiometeret...

Page 44: ...36 DECOR DECOR 9001 1 2 3 4 5 6 DECOR 2 4 1 DECOR 100 100 mm DECOR 120 125 mm DECOR 150 150 160 mm 2 1...

Page 45: ...37 backdraught shutter 5 2 1 2 DECOR 100 3 DECOR 100 5 DECOR S C SZ CZ Fig 3 Fig 4 DECOR R CR RZ CRZ Fig 5 Fig 6 fig7 1 1 30...

Page 46: ...38 DECOR H CH HZ CHZ 60 90 2 20 PCB 90 1 fig 8 2 1 hygrostat fig 6 60 60 60 fig 9 1 Hr 60 90 t min 2 20...

Page 47: ...39 60 Hr 90 HR DECOR 100 CD and CDZ PIR 1 30 2 fig 8 fig 7 1 1 30 8 S P...

Page 48: ......

Page 49: ...40 DECOR DECOR ISO 9001 www solerpalau com Soler Palau 1 Fig 1 1 2 3 4 5 D COR 2 Fig 2 4 Fig 1...

Page 50: ...41 DECOR 100 100 DECOR 200 125 DECOR 300 150 160 2 1 5 2 3 1 2 DECOR 3 5 DECOR S C SZ CZ 3 Fig 3 4 Fig 4 DECOR R CR RZ CRZ 5 Fig 5 6 Fig 6 7 Fig 7 1 30 DECOR H CH HZ CHZ 60 90 2 20...

Page 51: ...42 90 1 8 Fig 8 2 1 6 Fig 6 60 2 60 60 60 9 Fig 9 Hr 60 90 t min 2 20...

Page 52: ...43 60 90 DECOR 100 CD CDZ 1 30 2 8 Fig 8 7 Fig 7 1 30 Soler Palau Soler Palau 8...

Page 53: ...S P SISTEMAS DE VENTILACI N S L U C Llevant 4 Pol gono Industrial Llevant 08150 Parets del Vall s Barcelona Espa a Tel 34 93 571 93 00 Fax 34 93 571 93 01 www solerpalau com Ref 9023017902 02...

Page 54: ......

Reviews: