background image

33

IT

L’apparecchio dovrà essere collocato in 
modo da non essere schiacciato, dato che 
in questo caso potrebbe essere ostacolata 
la rotazione della ventola con i conseguenti 
rumori.
Eseguire l’allacciamento elettrico secondo 
le istruzioni che seguono a continuazione, 
collocare la griglia di protezione e fi ssarla 
con l’apposita vite (4).

ALLACCIAMENTO ELETTRICO

Questo apparecchio è considerato 
adatto per l’uso in paesi che hanno 
un clima caldo e umido conforme 
alle specifi cato della norma IEC 

60721-2-1. Può essere utilizzato anche in 
altri paesi.

L’EDM è un aspiratore concepito per essere 
alimentato da una rete monofasica, alla ten-
sione ed alla frequenza indicate sulla targa 
delle specifi che tecniche situata sull’appa-
recchio.
Prima di collegare l’apparecchio accertarsi 
che i valori di tensione e di frequenza della 
rete di distribuzione elettrica siano rispon-
denti ai dati di targa dell’apparecchio.
Non è necessario collegare l’apparecchio ad 
una presa con impianto di messa a terra in 
quanto è costruito a doppio isolamento ele-
ttrico (classe II).
All’installazione elettrica dell’apparecchio 
occorre prevedere un interruttore onnipo-
lare con distanza d’ apertura dei contatti 
uguale o superiore a 3 mm.
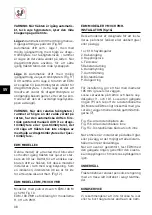
L’installazione si può realizzare con il cavo 
sottotraccia forando l’incavo posteriore (7) 
previsto a tale scopo, oppure con il cavo a 
vista introducendolo attraverso il passacavo 
laterale (2). Se si opta per utilizzare il pas-
sacavo laterale, il cavo deve essere introdo-
tto in modo orizzontale, como indicato nella 
fi g. 3.
Dopo aver introdotto il cavo, abrir la tapa 
conexión (3 – fi g.4) e procedere all’allaccia-
mento elettrico secondo il modello dell’as-
piratore. Volver a cerrar la tapa conexión.

EDM MODELLI S E C

Nel caso di questi due modelli ci sono due 
possibilità d’allacciamento:
Fig.5 - Messa in funzione dell’aspiratore con 
l’interruttore della luce.
Fig.6 - Messa in funzione dell’aspiratore con 
un interruttore independente.

EDM MODELLI T, CT, R CR ED EC

Modelli dotati di un temporizzatore fi sso 
(circa 9 minuti) (T e CT) o un temporizzatore 
regolabile R, CR ed EC). La temporizzazione 
permette che l’apparecchio rimanga in fun-
zione per il tempo impostato con il tempori-
zzatore dopo aver spento l’interruttore.
Lo schema della fi g. 7 indica come collegare 
l’apparecchio con temporizzatore ed inte-
rruttore di luce.
I modelli R, CR ed EC sono dotati di un tem-
porizzatore regolabile.
Per impostare la temporizzazione, girare il 
potenziomentro come indicato nella fi gura 8.
•  Se si desidera aumentare il tempo di em-

porizzazione, si dovrà girare il potenzio-
metro o la manopola in senso orario.

•  Per diminuire il tempo di temporizzazione 

si dovrá girare il potenziometro o la la ma-
nopola in senso antiorario.

EDM MODELLI C, CT, EC, CR, CH E M

Questi modelli sono dotati di griglia di chiu-
sura ad alette automatica.

ATTENZIONE: L’apertura delle alette è co-
mandata da un termoattuatore. Ci vuole 
qualche secondo fi nchè le alette si aprano 
completamente.

EDM MODELLI H, CH E VMH

I modelli H, CH e VMH sono dotati de un 
igrostato elettronico regolabile tra 60 e 90 
% di umidità relativa. Sono dotati anche di 
interruttore ON/OFF tipo cordina (IC) che 
permette mettere in funzione l’aspiratore 

Summary of Contents for EDM-100 Series

Page 1: ...EDM 100 ES IT EN SV FR DA DE PL NL CS PT FI AR RU...

Page 2: ......

Page 3: ...3 LJ LJ LJ LJ...

Page 4: ...4 LJ LJ LJ...

Page 5: ...5 LJ LJ LJ...

Page 6: ...6 LJ LJ LJ...

Page 7: ...7 LJ LJ...

Page 8: ...e experiencia y cono cimientos si han re cibido supervisi n o instrucciones sobre el uso del aparato de una manera segura y comprenda los pe ligros involucrados Los ni os no deben jugar con el apara t...

Page 9: ...m Abrir la tapa conexi n 3 g 4 y efectuar la conexi n el ctrica seg n el modelo ins talado g 5 a 13 Volver a cerrar la tapa conexi n EDM MODELOS S Y C Para estos modelos seguir los esquemas Fig 5 Pues...

Page 10: ...so 3 Funcionamiento autom tico con posibilidad de puesta en marcha con el in terruptor de la luz g 11 Funcionamiento similar al caso 2 donde el interruptor con cadena se reemplaza por el interruptor d...

Page 11: ...actor con un pa o impregnado de deter gente suave ASISTENCIA T CNICA La extensa red de Servicios O ciales S P garantiza una adecuada asistencia t cnica en cualquier punto de Espa a En caso de observar...

Page 12: ...aged from 8 years and above and per sons with reduced physical sensory or mental capabilities or lack of experien ceand knowledge if they have been given supervision or ins truction concerning use of...

Page 13: ...en the connection cover 3 and proceed to the appropriate electrical wiring depending on the EDM model Then close the connection cover EDM MODELS S AND C For these models use the following dia grams Fi...

Page 14: ...l operations i e pull cord or light switch that is the extractor cannot be stopped by either the pull cord or the light switch EDM MODEL EC This model is equipped with a photoelectric cell that activa...

Page 15: ...would automatica lly cancel the S P guarantee If you detect any fault contact your S P dealer S P reserves the right to alter speci ca tions without notice PUTTING OUT OF SERVICE AND RECYCLING EEC le...

Page 16: ...conform ment la r glementation en vigueur dans chaque pays INSTRUCTION D UTILISATION Cet appareil peut tre utilis par des enfants g s de 8 ans et plus et des personnes ayant des capacit s physiques s...

Page 17: ...le raccordement pr voir dans l insta llation lectrique un interrupteur ayant une ouverture entre contacts d au moins 3 mm Le c ble lectrique peut tre introduit dans l EDM soit par le passe c ble l ar...

Page 18: ...matique avec possibilit de mise en marche manuelle avec la cordelette g 10 Fonctionnement en automatique similaire au cas 1 plus la possibilit de mettre en marche l appareil en actionnant l interrup t...

Page 19: ...teurs r partis de part et d autre de la vitre Si la vitre ou cloison est paisse il se peut que tous les l ments s parateurs ne soient pas n cessaires Pour nir xer l EDM avec la bague de se rrage le ra...

Page 20: ...g behinderten Personen benutzt werden Kinder d r fen nicht mit diesem Ger t spielen War tung und Reinigung sollte nicht von unau fbesichtigten Kindern durchgef hrt werden MONTAGE ACHTUNG Bevor der L f...

Page 21: ...ere Kabel durchf hrung 7 zu ffnen und das Kabel durchzuf hren im zweiten Fall ist das Kabel gem Abb 4b durch die seitliche Kabeldur chf hrung 2 zu f hren Nach Einf hrung des Kabels ist dieses mit der...

Page 22: ...durch Bet tigung des Ein Aus Zugschalters IC auch dann in Betrieb zu nehmen wenn die relative Luftfeuchigkeit des Raumes unter dem mit dem Einstellk nopf vorgegebenen Wert liegt und so den Hygrostaten...

Page 23: ...er Au enseite des Fensters der Wand anbringen Abb 5a Alle Distanzringe au en Abb 5b Alle Distanzringe innen Abb 5c Distanzringe au en und innen Wird das Ger t in einem Doppelfenster oder einer Wand ei...

Page 24: ...n elk land van kracht zijnde reglementen GEBRUIKSHAND LEIDING Dit apparaat kan wor den gebruikt door kin deren in de leeftijd van 8 jaar en hoger en per sonen met verminder de lichamelijke zin tuiglij...

Page 25: ...elfa sige netaansluiting en met de frequentie die is aangegeven op het kenmerkenplaatje dat zich in het apparaat bevindt De afzuigventilatoren zijn gemaakt met du bbele isolering klasse II en hebben d...

Page 26: ...chakelen met de schakelaar van de trekkoord IC bij lagere vochtigheids graad in de ruimte dan de ingestelde In dit geval gaat het rode indicatorlampje L wel aan bij het inschakelen van de afzuig venti...

Page 27: ...aats beide beschermingsroosters terug UITGEVOERD Het is enkel nodig om regelmatig de afzui gventilator met een met zacht detergent bevochtigde doek schoon te maken KLANTENSERVICE Het uitgebreide netwe...

Page 28: ...ebido forma o ou estarem sobre super vis o sobre o uso do aparelho de forma se gura e compreender os perigos envolvidos As crian as nao de vem brincar com o aparelho A limpeza e manuten o nao deve ser...

Page 29: ...uncionamento do extractor com o mesmo interruptor que o da luz Fig 6 Um interruptor independente para o funcionamento do extractor EDM MODELOS T CT R CR Y EC Modelos equipados com uma temporiza o xa c...

Page 30: ...est instalado Neste caso prefer vel deixar a corrente no interior do aparelho para que seja inacess vel depois de veri car se o interruptor IC est na posi o de paragem luz piloto L apagada ATEN O quan...

Page 31: ...garante uma adequada assist ncia t cnica No caso de se veri car alguma anomalia no funcionamento do aparelho dever apre sent lo para revis o em qualquer um dos Servi os mencionados onde ser devida men...

Page 32: ...essere pulito periodicamente utilizzando un panno umido INSTALLAZIONE IMPORTANTE Prima di procedere all ins tallazione ed all allacciamento elettrico de ll apparecchio accertarsi che il contatto con l...

Page 33: ...n modo orizzontale como indicato nella g 3 Dopo aver introdotto il cavo abrir la tapa conexi n 3 g 4 e procedere all allaccia mento elettrico secondo il modello dell as piratore Volver a cerrar la tap...

Page 34: ...unzione il ventila tore manualmente con l interruttore della luce g 11 Funzionamento similare al caso 2 dove l interruttore tipo cordina sostituito da ll interruttore della luce IL del locale dov inst...

Page 35: ...hio ssarlo con il raccordo lettato allacciare l appa recchio e montare di nuovo le griglie di protezione MANUTENZIONE C unicamente bisogno di provvedera a una pulizia regolare dell aspiratore Lavare l...

Page 36: ...aren het och kunskap s l nge de f tt handled ning eller instruktio ner ang ende anv nd ningen av apparaten p ett s kert s tt s att de f rst r risker na med densamma Barn f r inte leka med apparaten Re...

Page 37: ...stsatta cirka 9 minuter icke inst llbar timer T och CT eller inst llbar R CR och EC Timern g r att kten kan vara ig ng under dagen en ligt inst llning efter att str mbrytaren har slagits av Schemat p...

Page 38: ...uten drift av kten b r dessa modeller installeras i rum med svag belysning Som en indikation intensiteten 30 lux r f r lite f r att kunna l sa normalt Fig 12 EDM MODELLER M VM OCH VMH Modeller med pul...

Page 39: ...ringar utan varsel UTG NGEN PRODUKT OCH TERVINNING Utifr n EEC lagstiftning och v r omtanke f r kommande genera tion ska vi tervinna s mycket material som m jligt Gl m d rf r inte att tervinna f rpack...

Page 40: ...ydes Fig 1 1 Beskyttelses gitter 2 Ledningsholder 3 Forbindelses d ksel 4 Fastholdelses skrue 5 Forbindelses skema 6 Udgang 7 Fure EDM ventilatoren kan installeres i loftet eller p v ggen og med luftu...

Page 41: ...justerbar tidskontrol For justering af tidskontrollen drejes potentio meteret placeret i det trykte kredsl b g 8 For at ge tiden drejes i urets retning CW For at formindske tiden drejes modsat urets r...

Page 42: ...sintensitet p 30 lux ikke er tilstr kkelig til at en person med normalt syn kan l se g 12 EDM MODELLER M VM OG VMH Disse modeller er forsynet med k de af bryder EDM 100 M og VM Fig 13 EDM 100 VMH se a...

Page 43: ...n forudg ende information VED BORTSKAFFELSE OG GENANVENDELSE AF PRODUKTET Under henvisning til g ldende EU lovgivning samt skyldig hensyn tagen til kommende generationer b r vi altid genanvende udtjen...

Page 44: ...e UWAGA Wentylatory EDM nie sa przezna czone do montazu w kuchennych syste mach wentylacyjnych INSTRUKCJE U YTKOWANIA Urz dzenie mo e by u ytkowane przez dzieci wwieku8latorazpowy ej 8roku ycia osobyn...

Page 45: ...mi dzy stykami wszyst kich biegun w wynosi nie mniej ni 3 mm Przew d elektryczny musi byc doprowa dzony do wentylatora od tylu 7 jezeli przewody sa w murze lub z boku 2 jezeli przewody sa prowadzone p...

Page 46: ...wylaczonej off UWAGA W przypadku gdy poziom wil gotnosci wzglednej w pomieszczeniu jest wyzszy niz ustawiony na hydrostacie wen tylator wlacza sie automatycznie ignorujac dzialania manualne tzn wenty...

Page 47: ...elikat nego detergentu Monta wentylatora w spos b niezgodny z instrukcj oraz praca wentylatora w stanie zdemontowanym s zabronione Pr by sa modzielnej naprawy powoduj utrat gwa rancji W przypadku wyst...

Page 48: ...sou pod dozo rem zodpov dn osoby nebo pokud jim takov osoba nedala dosta te n instrukce kter zajist bezpe n u v n spot ebi e a pochopen rizik s t m spojen ch U ivatel mus zajistit aby si se spot ebi e...

Page 49: ...I Ventil tory mus b t sp n ny sp na em s mezerou mezi kontakty minim ln 3 mm EDM TYPY S C Zapojen ventil toru se prov d dle zobraze n ch sch mat Obr 5 Uveden ventil toru do chodu sv tel n m vyp na em...

Page 50: ...nastaven hodnota automatick chod m p ednost p ed ru n ovl dan m chodem tzn e spot ebi nelze vypnout tahov m vyp na em ani s ov m vyp na em EDM TYPY EC Uveden typ m zabudovanou fotoelektrickou bu ku kt...

Page 51: ...je d vodem ke zru en z ruky V p pad e u spot ebi e zjist te jakoukoli provozn vadu obra te se laskav na va eho prodejce S P S P si vyhrazuje pr vo na zm ny v provede n bez p edchoz ho upozorn n VY AZ...

Page 52: ...52 RU EDM 100 EDM ISO 9001 1 1 2 3 4 EDM 2 105 100 4 1 EDM 6...

Page 53: ...53 RU 7 2 3 4 4 1 4 IEC 60721 2 1 EDM II 3 3 4 5 13 EDM S C 5 6 EDM T CT R CR EC 9 T CT R CR EC 7 R CR EC 8 CW CCW EDM C CT EC CR CH M EDM H CH VMH H CH VMH 60 90 RH e...

Page 54: ...54 RU IC H CH VMH 1 9 IC L EDM 2 10 1 IC L 3 11 2 IL EDM IC L EDM EC 30 30 12 EDM M VM VMH EDM 100N VM 13 EDM 100 VMH H CH VMH EDM M VM VMH 14...

Page 55: ...55 RU 1 10 2 3 4 5 6 7 8 9 105 1 10 9 4 8 EDM 7 15a 15b 15c EDM S P S P S P...

Page 56: ...tta ilman valvontaa ENNEN ASENNUSTA HUOM Varmista ett s hk on kytketty pois ennen puhaltimen kytkent 1 Etulevy 2 L pivienti 3 Vedonpoistaja 4 Ruuvi 5 Kytkent rima 6 Poistoputki 7 L pivienti ASENNUS ED...

Page 57: ...n 9 mi nuuttia Malli R CR ja EC on varustettu s dett v l l aikaviiveell Ajastimesta johtuen puhallin voi olla toimin nassa koko p iv n vaikka s hk t on katkaistu Kytkent kaavio g 7 liitos on tehty s h...

Page 58: ...aan yksinkertainen tai kaksinkertainen lasi 1 ja 10 Suojaritil 2 L pivienti 3 Kytkent kansi 4 Ruuvi 5 Kytkent rima 6 Poistoputki 7 Kumitiiviste 8 V lilevyt 9 Kierteinen rengas Tee lasiin tai sein n 10...

Page 59: ...5 9 G 9 G G 9 7 B G 9 C 8 B 1 F 6 A 4 8 9 7 G C G J 6 9 7 B G 7 4 9 G 9 G F 9 7 B 9 7 8 6 9 G 8 I J 6 9 C G 8 F 9 G 8 9 C G 8 1 G 7 G C D 9 C D 9 5 0 C G 7 8 9 9 D 9 C G 3 C I 9 7 8 8 1 1 F 9 C 1 F 9...

Page 60: ...A A H 1 A 4 M M A B 2 M A 7 H N 9 B 9 C G 8 9 9 9 F 9 7 8 G 8 9 C G 3 2 I 9 7 8 G 8 9 C 2 2 8 6 L N A A L A B A H H B O A B H A H H H H M 7 M 1 A M M 6 L F H 0 A M C E 6 L M H 6 L H 0 A B M 4 M E M 2...

Page 61: ...5 9 E 6 1 5 0 D 6 4 5 9 E 6 1 5 0 D 6 5 4 5 6 1 5 7 B 0 D 6 6 5 E 6 9 0 D 6 6 9 7 B 6 0 9 9 6 9 9 4 F 6 9 E 6 1 5 9 F 9 6 9 7 E 6 9 4 G E 9 7 2 9 E 5 6 4 D 4 E 9 A 9 6 3 6 9 E 6 9 8 6 B 9 1 6 F 9 6 5...

Page 62: ...D 3 J 8 1 G 0 F A G 8 4 7 8 9 1 G H A G 6 A 3 7 H 1 7 8 G B G B B 0 B 2 B H 8 G G B 1 8 G B 8 G B 8 4 8 4 9 G B 4 8 B 8 0 K B 9 G B K 9 G A H A G 4 B 0 A 8 8 F B E 9 G A H B K K G G 9 B 8 A G B 8 G B...

Page 63: ......

Page 64: ...S P SISTEMAS DE VENTILACI N S L U C Llevant 4 Pol gono Industrial Llevant 08150 Parets del Vall s Barcelona Espa a Tel 34 93 571 93 00 www solerpalau com Ref 9023065703...

Reviews: