background image

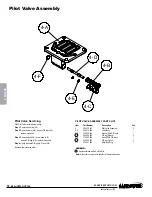
Pilot Valve Assembly

hdf3asl7sm-rev1218

sandpiperpump

.

com

Model HDF3-A/HDF4-A • 

17

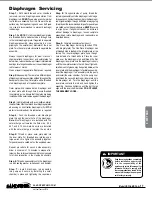
Step  1: 

With manifolds and outer chambers 

removed, remove diaphragm assemblies from 

diaphragm rod. 

DO NOT

 use a pipe wrench or similar 

tool to remove assembly from rod. Flaws in the rod 

surface may damage bearings and seal. Soft jaws 

in a vise are recommended to prevent diaphragm 

rod damage.

Step 1.A: 

NOTE: 

Not all inner diaphragm plates 

are threaded. Some models utilize a through hole 

in the inner diaphragm plate. If required to separate 

diaphragm assembly, place assembly in a vise, 

gripping on the exterior cast diameter of the inner 

plate. Turn the outer plate clockwise to separate the 

assembly.

Always inspect diaphragms for wear cracks or 

chemical attack. Inspect inner and outer plates for 

deformities, rust scale and wear. Inspect intermediate 

bearings for elongation and wear. Inspect diaphragm 

rod for wear or marks. 

Clean or repair if appropriate. Replace as required. 

Step 2:


Reassembly: There are two different types 

of diaphragm plate assemblies utilized throughout the 

Sandpiper product line: Outer plate with a threaded 

stud, diaphragm, and a threaded inner plate. 

Outer plate with a threaded stud, diaphragm, and 

an inner plate with through hole. Secure threaded 

inner plate in a vise. Ensure that the plates are being 

installed with the outer radius against the diaphragm. 

Step 3:

 Lightly lubricate, with a compatible material, 

the inner faces of both outer and inner diaphragm plates 

when using on non Overlay diaphragms (For EPDM 

water is recommended). No lubrication is required. 

Step  4: 

Push the threaded outer diaphragm 

plate through the center hole of the diaphragm. 

Note: 

Most diaphragms are installed with the 

natural bulge out towards the fluid side.  S05, 

S07, and S10 non–metallic units are installed 

with the natural bulge in towards the air side.  

Step  5: 

Thread or place, outer plate stud into 

the inner plate. For threaded inner plates, use a 

torque wrench to tighten the assembly together.  

Torque values are called out on the exploded view. 

Repeat procedure for second side assembly. 

Allow a minimum of 15 minutes to elapse after 

torquing, then re-torque the assembly to compensate 

for stress relaxation in the clamped assembly. 

Step 6:

 Thread one assembly onto the diaphragm 

rod with sealing washer (when used) and bumper. 

Step  7: 

Install diaphragm rod assembly 

into pump and secure by installing the outer 

chamber in place and tightening the capscrews. 

Step  8: 

On opposite side of pump, thread the 

remaining assembly onto the diaphragm rod. Using a 

torque wrench, tighten the assembly to the diaphragm 

rod. Align diaphragm through bolt holes, always going 

forward past the recommended torque. Torque values 

are called out on the exploded view. 

NEVER

 reverse 

to align holes, if alignment cannot be achieved 

without damage to diaphragm, loosen complete 

assemblies, rotate diaphragm and reassemble as 

described above. 

Step 9: 

Complete assembly of entire unit.

One Piece Diaphragm Servicing (Bonded PTFE 

with integral plate) The One Piece diaphragm has 

a threaded stud installed in the integral plate at the 

factory. The inner diaphragm plate has a through 

hole instead of a threaded hole. Place the inner 

plate over the diaphragm stud and thread the first 

diaphragm / inner plate onto the diaphragm rod only 

until the inner plate contacts the rod. Do not tighten. A 

small amount of grease may be applied between the 

inner plate and the diaphragm to facilitate assembly. 

Insert the diaphragm / rod assembly into the pump 

and install the outer chamber. Turn the pump over 

and thread the second diaphragm / inner plate onto 

the diaphragm rod. Turn the diaphragm until the 

inner plate contacts the rod and hand tighten the 

assembly. Continue tightening until the bolt holes 

align with the inner chamber holes. 

DO NOT LEAVE 

THE ASSEMBLY LOOSE.

Diaphragm  Servicing

IMPORTANT

Read these instructions completely, 

before installation and start-up. 

It is the responsibility of the 

purchaser to retain this manual for 

reference. Failure to comply with 

the recommendations stated in this 

manual will damage the pump, and 

void factory warranty.

UNIVERSAL ALL SP

5: WET END

Summary of Contents for HDF4-A

Page 1: ...Main St Mansfield Ohio 44902 USA Telephone 419 524 8388 Fax 419 522 7867 SANDPIPERPUMP COM Copyright 2017 Warren Rupp Inc All rights reserved Certified Quality ISO 9001 Certified ISO 14001 Certified S...

Page 2: ...WARNING The use of non OEM replacement parts will void or negate agency certifications including CE ATEX CSA 3A and EC1935 compliance Food Contact Materials Warren Rupp Inc cannot ensure nor warrant n...

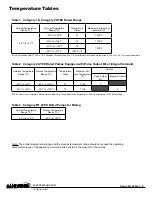
Page 3: ...20 C to 50 C 20 C to 100 C T5 T100 X Ambient Temperature Range C Process Temperature Range C 20 C to 60 C 20 C to 150 C 1 Per CSA standards ANSI LC6 2018 US Canadian Technical Letter R14 G Series Natu...

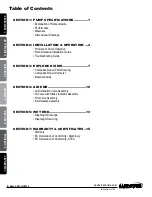
Page 4: ...e SECTION 3 EXPLODED VIEW 7 Composite Repair Parts Drawing Composite Repair Parts List Material Codes SECTION 4 AIR END 10 Air Distribution Valve Assembly Air Valve with Stroke Indicator Assembly Pilo...

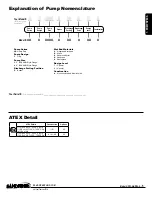
Page 5: ...150 ANSI Style Flange Discharge Porting Position D Bottom Your Serial fill in from pump nameplate ______________________________________ __ __ _____ __ ___ __ __ __ Pump Pump Pump Options Discharge D...

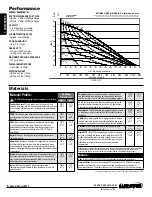
Page 6: ...inylidene Fluoride A durable fluoroplastic with excellent chemical resistance Excellent for UV applications High tensile strength and impact resistance 250 F 121 C 0 F 18 C Santoprene Injection molded...

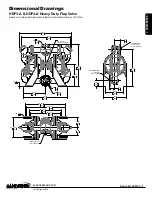
Page 7: ...30 69 779 15 34 390 2X 7 50 191 2X 6 00 152 8X 75 19 34 26 870 36 72 933 29 50 749 AIR INLET 3 4 NPT FEMALE 16 18 411 12 69 322 3 75 95 3 75 95 4 26 108 25 75 654 SUCTION PORT 3 150 ANSI STYLE FLANGE...

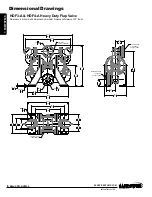
Page 8: ...awings 34 26 870 2X 9 00 229 16 00 406 9 00 229 16X 53 13 15 34 390 30 69 779 4X 75 19 4X 1 00 25 36 72 933 31 00 787 AIR INLET 3 4 NPT FEMALE 16 18 411 6 75 171 5 01 127 26 50 673 6 75 171 DISCHARGE...

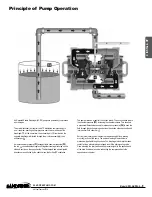
Page 9: ...d liquid s directions are controlled by the check valves ball or flap orientation The pump primes as a result of the suction stroke The suction stroke lowers the chamber pressure P3 increasing the cha...

Page 10: ...cycle erratically or stop operating Water in the air supply can be reduced by using a point of use air dryer Air Inlet and Priming To start the pump slightly open the air shut off valve After the pump...

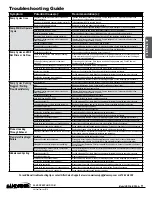
Page 11: ...point of use air drier Clogged manifolds Clean manifolds to allow proper air flow Deadhead system pressure meets or exceeds air supply pressure Increase the inlet air pressure to the pump Pump is desi...

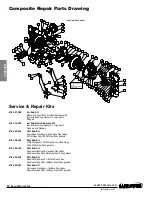
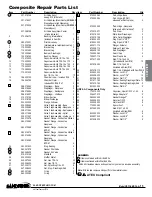
Page 12: ...014 000 PLATE I 38 612 015 156 PLATE O 39 618 003 330 PL 40 618 004 330 PL 41 620 011 114 PLUNG 42 670 006 000 RETAIN 43 685 008 120 ROD 44 720 004 360 S 45 722 007 115 SEA 46 807 016 330 STU 47 807 0...

Page 13: ...nge Conductive EPDM 4 24 360 021 000 Ring Sealing 4 25 360 041 379 Gasket Pilot Valve 1 26 360 048 425 Gasket Air Valve 1 27 518 014 156 Manifold 2 28 530 033 000 Muffler Metal 1 29 545 007 330 Nut He...

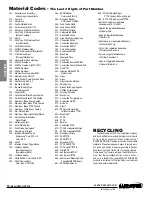
Page 14: ...4 Conductive Neoprene 385 Conductive EPDM 408 Cork and Neoprene 425 Compressed Fibre 426 Blue Gard 440 Vegetable Fibre 500 Delrin 500 502 Conductive Acetal ESD 800 503 Conductive Acetal Glass Filled 5...

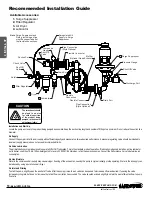
Page 15: ...RTANT Read these instructions completely before installation and start up It is the responsibility of the purchaser to retain this manual for reference Failure to comply with the recommendations state...

Page 16: ...ol 2 4 F 675 037 080 Retaining Ring 1 4 A 4 F 4 D 4 B 4 C 4 E Pilot Valve Servicing With Pilot Valve removed from pump Step 1 Remove snap ring 4 F Step 2 Remove sleeve 4 B inspect O Rings 4 C replace...

Page 17: ...ly together Torque values are called out on the exploded view Repeat procedure for second side assembly Allow a minimum of 15 minutes to elapse after torquing then re torque the assembly to compensate...

Page 18: ...N809 2012 Pumps and Pump Units for Liquids Common Safety Requirements to verify conformance 5 YEAR Limited Product Warranty Warren Rupp Inc Warren Rupp warrants to the original end use purchaser that...

Page 19: ...ies U Series F Series T Series EH Series SH Series GH Series Conductive plastic pump models with integral muffler S Series PB Series Tranquilizer surge suppressors Hazardous Location Applied I M1 Ex h...

Reviews: