1
3
2
5
4
Quick Start Guide
GB
1
2
3
4
5
6
7
8
9
0
10+
REPEAT
TITLE
SUBTITLE
AUDIO
MUTE
SOURCE
STEP
DISPLAY
MENU
VOL+
VOL-
SLOW
ZOOM
1
2
3
4
5
6
7
8
9
0
10+
REPEAT
TITLE
SUBTITLE
AUDIO
MUTE
SOURCE
STEP
DISPLAY
MENU
VOL+
VOL-
SLOW
ZOOM
SOURCE
SOURCE
To DC IN
9V-12V socket
To DC IN
9V-12V socket
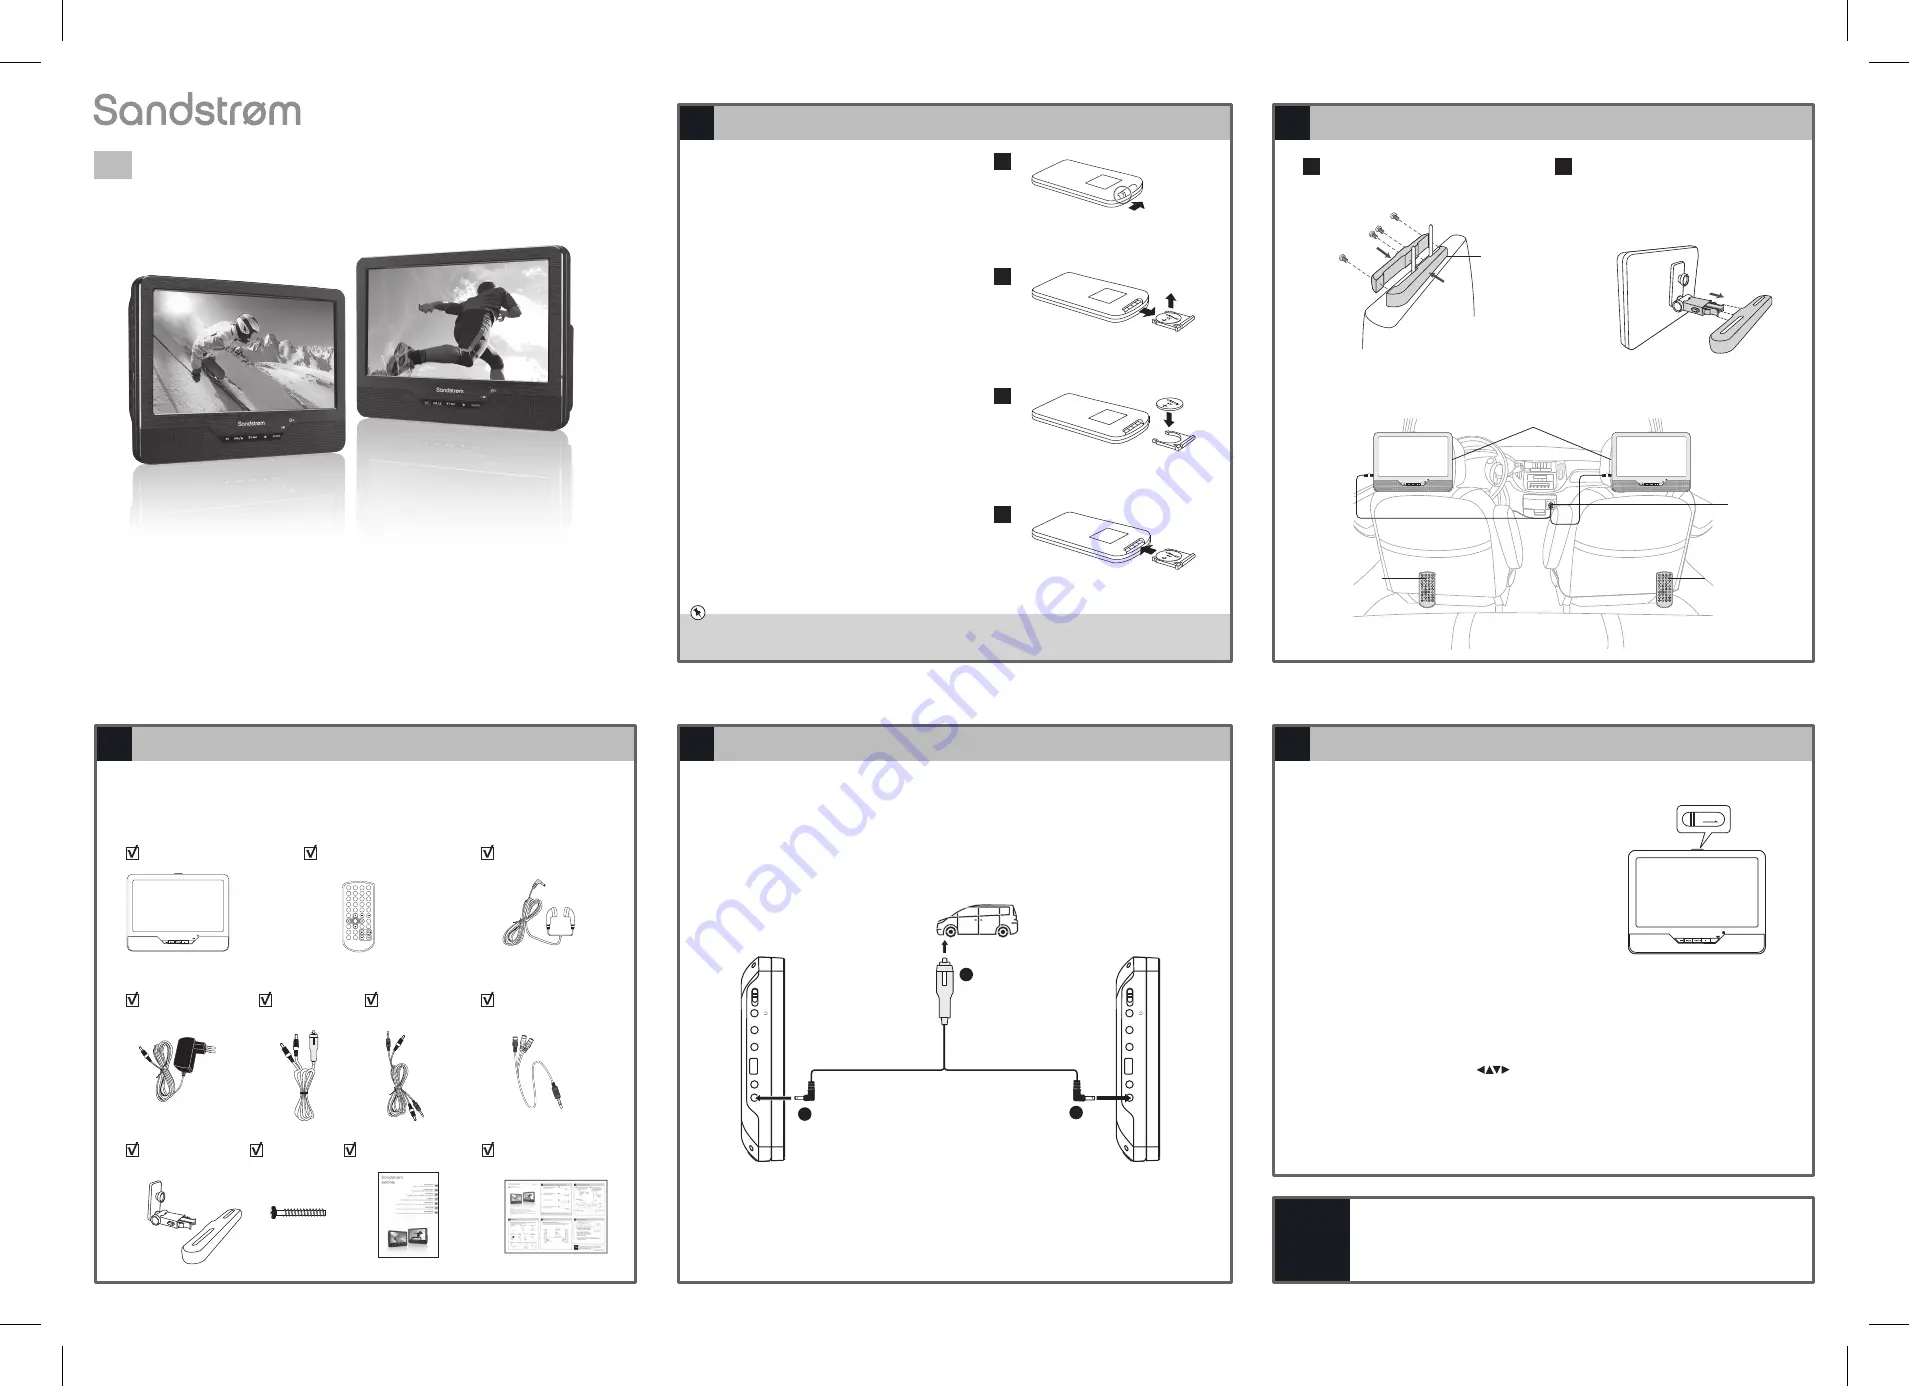
Unpacking
In-Car Use
Battery Replacement for the Remote Control
Basic DVD Playback
Mounting the DVD in a Car
For car headrests which cannot
be removed, use the following
method to secure the car
mount:
Installation Guide
1. Slide and hold the battery release tab
in the direction of the arrow.
3. Replace with a new battery.
4. Insert the battery compartment back
into the remote control.
2. Pull out the battery compartment
and remove the old battery.
1
1
Grip the DVD firmly with both
hands and slot the angled
support firmly into the support
bar. It will click. Ensure the
entire unit is secure.
2
2
3
4
DVD Player A
DVD Player B
Car Power
Adapter
DC cable
Remote Control B
Horizontal
support bar
Remote Control A
Using the DVD Players A and B Together (in-car use)
To playback on both DVD players A and B together, use the car power adapter
(included) to connect both units to the car’s cigarette lighter socket.
You will find that there are many exciting features available.
To get to know all these features, please take some time to read
the instruction manual provided.
1. Slide the ON/OFF switch to the ON position
on both the DVD players A and B.
2. Slide the OPEN latch to open the disc tray.
3. Hold the disc by its sides and carefully place
onto the disc holder with the label side
facing to the front panel. Gently push the
disc down until you hear a “click” sound.
4. Close the disc cover. The unit starts
playback if the disc does not have any
menus recorded on it. If the disc has one or
more titles recorded on it, a menu screen
will appear on the screen.
DVD Player A
left side
DVD Player x 2
Remote Control x 2
Earphones x 2
Instruction Manual x 1
Car Mounting
Kit x 2
Quick Start Guide x 1
Remove all items from the packaging. Retain the packaging. If you dispose
of it please do so according to local regulations.
The following items are included:
Mains Adapter x 1
Car Power
Adapter x 1
Screws x 8
(ø4 x 25mm)
3.5mm to RCA
AV Converter x 1
DC+AV Cable x 1
S92PDT12E
Dual 9” Portable DVD Player
QSG-S92PDT12E-130228V1-1
Thank you
for purchasing your new Sandstrøm DVD Player.
Please follow this quick start guide for a successful first time set up.
We recommend that you spend some time reading the instruction manual in order to fully
understand all the operational features it offers.
Read all the safety instructions carefully before use and keep the instruction manual for
future reference.
Install the battery correctly by following the polarity (+ and –) indications in the battery
compartment.
Tip:
5. To play a title, press the / 0-9 / 10+ buttons on the remote
control to highlight the title and then press the ENTER button on the
remote control to confirm.
1
1
2
DVD Player B
left side
To the cigarette
lighter socket
Car Power Adapter
(included)
Mounting Kits
(hidden by DVD units)
ON
OFF
AV OUT
DC
OUT
DC
IN
9~12V
AV IN
ON
OFF
AV OUT
DC
OUT
DC
IN
9~12V
AV IN
SOURCE
STEP
SEARCH
MUTE
SOURCE
1
2
3
4
5
6
7
8
9
0
10+
DISPLAY
SUBTITLE
ANGLE
AUDIO
MENU
/PBC
TITLE
ENTER
MODE
SETUP
VOL -
VOL +
REPEAT
SLOW
PROGRAM
ZOOM
SOURCE
OPEN
S92PDT12E_QSG_130228_Zell.pdf 1 28/2/13 10:35 AM


