Choosing a power supply
This radio can be operated using
4 Alkaline UM-3 (LR6) (AA size) batteries
Household AC adaptor (not supplied)
Installing batteries
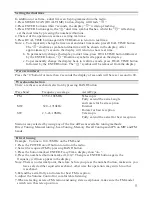
1.Position the radio face down.
2.Press the catch marked "OPEN" and side in the direction shown
3.Insert the 4 UM-3 (LR6) (AA size) batteries
4.Replace the battery cover
Battery replacement
The battery indicator will display the battery condition for approx. 7 seconds after the radio is
switched On. If the indicator shown“ ”,the batteries should be replaced. After removing the
batteries you have approximately 3 minutes to replace the batteries after which clock and
memory information will be lost.
Low battery warnings
1.Replace batteries if display shows “ ”.
2.Replace batteries if press power button, the radio still not operate.
Using the AC adaptor
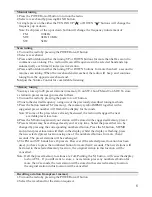
Insert the adaptor plug into the socket 6V DC on the left side of the radio. Plug the adaptor into
a standard mains socket outlet. Whenever the adaptor is used, the batteries are automatically
disconnected.
The mains adaptor should be disconnected from the mains supply when not in use.
We would recommend for economy that ATS-404 be used via the AC adaptor
wherever possible with battery operation for occasional or stand-by use only.
Setting the clock
The clock will start running when the batteries are installed or the AC adaptor is plugged in .
The display will show “0:00”.and “ ”real time symbol.
The real time can be set
1. When the radio is switched off.
2.If the radio is switched on, press the DISPLAY button to the time status.
3.press the “ENTER” button, the “ ” real time symbol will flash in the display.
4.Whilst the “ ” is flashing, set the correct time by pressing the numbered buttons. As you
press each button, the corresponding number will show on the display.
5.If you press wrong button ,after pressing the ENTER button .The radio will beep and ERROR
flashes in the display. Reset the correct time by pressing the numbered buttons again.
Note: Time can be adjusted whilst the “ ”real time symbol is flashing.
6.Press ENTER button again to complete the clock setting.
Note: a. Time should be entered in 24 Hr format e.g .3:00 pm should be entered as 15:00.
b. You may press SW select (12/24H) to select the 12 Hr format.
4
Summary of Contents for ATS-404
Page 1: ...ATS 404 User Manual...
Page 2: ......


