background image

8

OPERATING INSTRUCTIONS

Read All Instructions Before Use

Check that the heater outlet grill is not covered or obstructed in anyway, and make sure the power to 
the unit is switched on.
  

NOTE:

:KHQWKHKHDWIXQFWLRQLVXVHGIRUWKHÀUVWWLPHDVOLJKWRGRUPD\EHSUHVHQW7KLVLVQRUPDO

and should not occur again unless the heater is not used for an extended period of time.

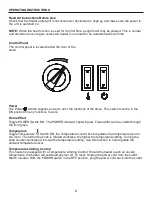
Power

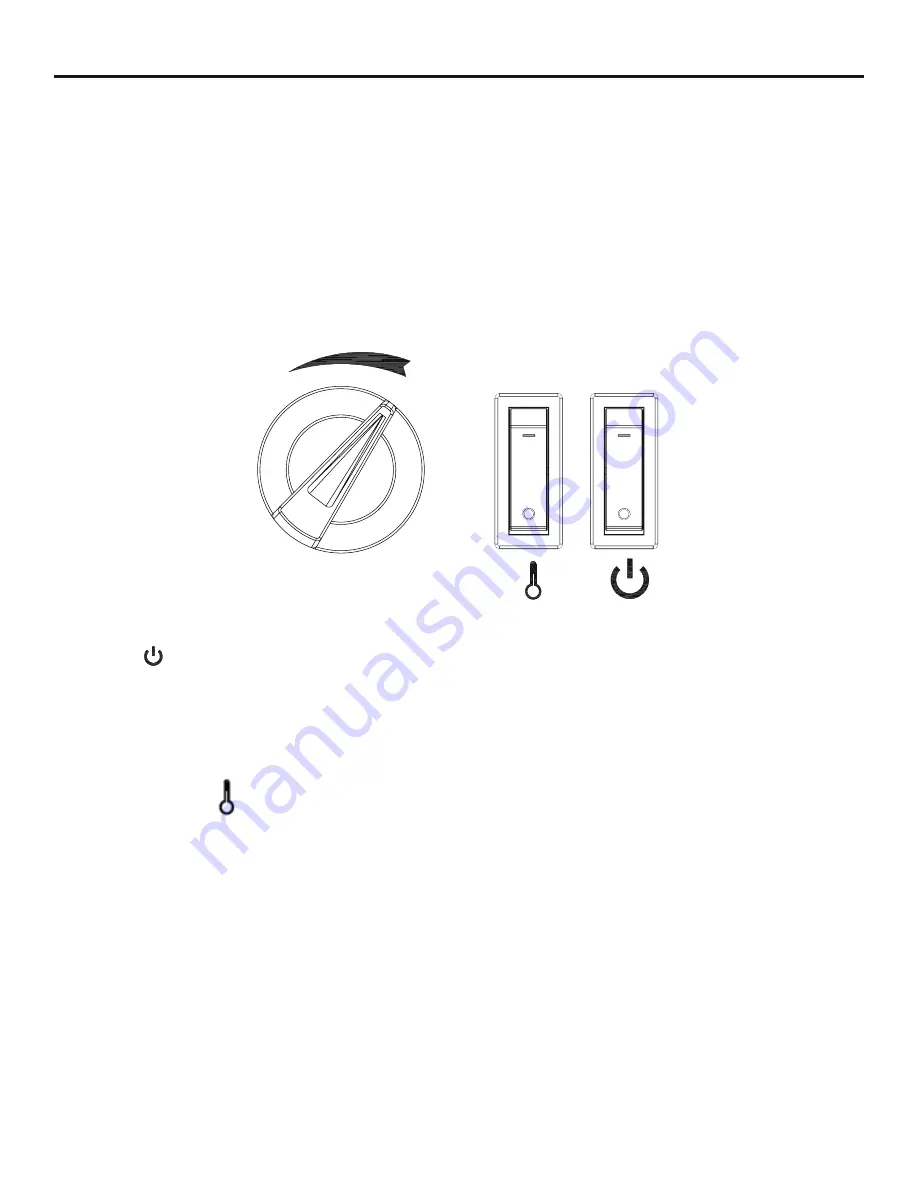
The Power      Switch supplies power to all of the functions of the stove. This switch must be in the 
ON position for any functions to work.

Flame Effect

Toggle POWER Switch ON. The POWER indicator light will glow. Flame effect will be visible through 
the front glass.

Temperature

Toggle Temperature      Switch ON, the Temperature control knob regulates the temperature level of 
the room. The further the knob is rotated clockwise, the higher the temperature setting. Turning the 
knob counter-clockwise will lower the temperature setting. Use this function to help regulate the 
ambient temperature level.

Temperature Limiting Control

This heater is equipped with a Temperature Limiting Control. Should the heater reach an unsafe 
temperature, the heater will automatically turn off. To reset: Unplug the power cord from the outlet. 
Wait 5 minutes. With the POWER switch in the OFF position, plug the power cord back into the outlet.

Control Panel

The control panel is located behind the door of the 
stove.

Summary of Contents for 470245

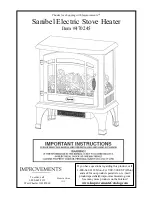
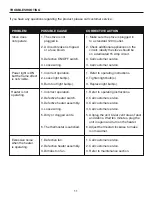
Page 1: ...tions regarding this product call 1 800 642 2112 Mon Fri 9 00 5 00 EST Ohio and ask for our product specialists or e mail productspecialist improvementscatalog com See many more products on the Internet www ImprovementsCatalog com If you have any questions regarding this product call 1 800 642 2112 and ask for our product specialists Mon Fri 9 00 5 00 EST or e mail ...

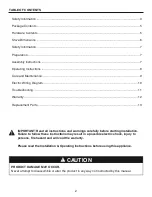
Page 2: ...ating Instructions before using this appliance TABLE OF CONTENTS Safety Information 3 Package Contents 5 Hardware Contents 5 Stove Dimensions 6 Safety Information 7 Preparation 7 Assembly Instructions 7 Operating Instructions 8 Care and Maintenance 9 Electric Wiring Diagram 10 Troubleshooting 11 Warranty 12 Replacement Parts 13 PRODUCT DAMAGE MAY OCCUR Never attempt to disassemble or alter the pro...

Page 3: ...etc 11 Do not run cord under carpeting Do not cover cord with throw rugs runners or the like UUDQJH FRUG DZD IURP WUDIÀF DUHDV DQG ZKHUH LW ZLOO QRW EH WULSSHG RYHU 12 To disconnect this appliance turn controls to the off position then remove plug from outlet 13 Connect to properly grounded outlets only 14 This appliance when installed must be electrically grounded in accordance with local codes w...

Page 4: ...rcuit with a properly grounded outlet is required 3UHIHUDEO WKH ÀUHSODFH ZLOO EH RQ D GHGLFDWHG FLUFXLW DV RWKHU DSSOLDQFHV RQ WKH same circuit may cause the circuit breaker to trip or the fuse to blow when the heater is in operation The unit comes standard with a 6 ft 1 8 m long three wire cord H LWLQJ WKH ULJKW VLGH RI WKH ÀUHSODFH Always plug the unit into a wall outlet receptacle An extension ...

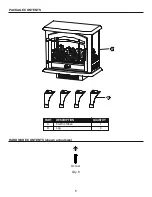
Page 5: ...5 PACKAGE CONTENTS A B A Electric Stove 1 B Leg 4 PART DESCRIPTION QUANTITY 5 5 217 176 VKRZQ DFWXDO VL H Screw Qty 8 AA ...

Page 6: ...6 STOVE DIMENSIONS TECHNICAL SPECIFICATIONS Voltage 120V AC Frequency 60Hz Amps 12 5A Rating 1500W REF ALL MODELS A 11 in 27 94 cm B 23 in 58 42 cm C 20 in 50 8 cm A B C ...

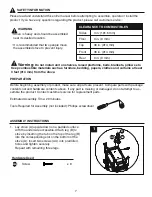
Page 7: ...HFRPPHQGHG WKDW WZR SHRSOH PRYH the assembled stove to prevent injury Before beginning assembly of product make sure all parts are present Compare parts with package contents list and hardware contents above If any part is missing or damaged do not attempt to as semble the product Contact customer service for replacement parts Estimated Assembly Time 20 minutes Tools Required for Assembly not incl...

Page 8: ... glow Flame effect will be visible through the front glass Temperature Toggle Temperature Switch ON the Temperature control knob regulates the temperature level of the room The further the knob is rotated clockwise the higher the temperature setting Turning the knob counter clockwise will lower the temperature setting Use this function to help regulate the ambient temperature level Temperature Lim...

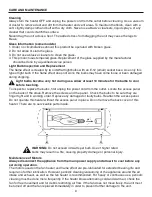
Page 9: ...ses tempered glass Replacement of the glass supplied by the manufacturer VKRXOG EH GRQH E D TXDOLÀHG VHUYLFH SHUVRQ Light Bulb Inspection and Replacement 7KH ÁDPH HIIHFW LV FUHDWHG E WZR DWW OLJKW EXOEV ZLWK DQ VPDOO VRFNHW EDVH 8VH RQO WKLV W SH RI OLJKW EXOE I WKH ÁDPH HIIHFW GRHV QRW ZRUN WKH EXOEV PD KDYH FRPH ORRVH RU EHHQ GDPDJHG during shipping Light bulbs become very hot during use Allow a...

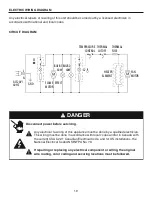
Page 10: ...l Code ANSI NFPA No 70 If repairing or replacing any electrical component or wiring the original wire routing color coding and securing locations must be followed DANGER Any electrical repairs or rewiring of this unit should be carried out by a licensed electrician in accordance with national and local codes ELECTRIC WIRING DIAGRAM CIRCUIT DIAGRAM AC120V 60HZ L N S1 FLAME EFFECT MOTOR BULB 1 40W B...

Page 11: ...ective heater switch 3 Defective heater assembly 4 Loose wiring 5 Dirty or clogged vents 7KH WKHUPRVWDW LV VDWLVÀHG 1 Make sure the stove is plugged in to a standard 120V outlet 2 Check additional appliances on the circuit ideally the stove should be on a dedicated 15 Amp circuit 3 Call customer service 4 Call customer service 1 Refer to operating instructions 2 Tighten light bulb s 3 Replace ligh...

Page 12: ...scretion fully discharge all obligations with respect to this warranty by refunding the wholesale price of the defective part s 5 Any installation labor construction transportation or other related costs expenses arising from defective part s repair replacement or otherwise of same will not be covered by this warranty nor shall the manufacturer assume responsibility for same Further the manufactur...

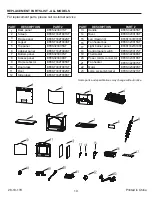
Page 13: ...t Top panel Light barrier panel Screen Rivet 22 14 17 19 12 Side glass Lamp socket bracket ODPH UHÀHFWRU Power cord connector Cabinet panel Control panel switch Flame panel Leg Design 3 EFEST333T001ST EFES323007ST EFEST332T003ST EFES323001ST EFEST333T002ST EFES323008ST EFES323005ST EFEST332T001ST EFEST332T008ST EFEST332T005ST EFEST332T004ST EFEST332T002ST EFES322007ST EFES323015ST EFES322005ST EFE...

Reviews: