background image

3

Safety

SAVE THESE INSTRUCTIONS

WARNING: WHEN USING THIS UNIT, BASIC PRECAUTIONS SHOULD ALWAYS BE FOLLOWED, INCLUDING THE FOLLOWING:

INSTRUCTIONS PERTAINING TO A RISK OF FIRE, ELECTRIC SHOCK OR INJURY TO PERSONS

1.  READ AND FOLLOW ALL INSTRUCTIONS
2.  WARNING: Risk of accidental injury or drowning: Children or handicapped persons should not use pedicure spa without 

adult supervision.

3.  WARNING: To avoid injury, exercise care when using a pedicure spa.
4.  WARNING: Risk of electric shock: Do not permit electric appliances (such as a hair dryer, lamp, telephone, radio, or 

television) to be within 5 ft (1.5 m) of this unit.

5.  DANGER: RISK OF ELECTRIC SHOCK: This unit should be grounded. Connect only to a dedicated 15 amp circuit that is 

protected by a Ground Fault Circuit Interrupter (GFCI). A GFCI should be provided by the electrician and should be 
tested on a routine basis. To test the GFCI, push the test button. The GFCI should interrupt power. Push the reset button. 
Power should be restored. If the GFCI fails to operate in this manner, there is a possibility of a ground fault, or defective 
GFCI. DO NOT USE THE UNIT. Have the problem corrected by a qualified service representative or an electrician before 
using.

6.  WARNING: Use the Pipeless™ Pedicure Bath only for its intended purpose: a fill and drain indoor appliance for foot and 

ankle hydromassage. DO NOT use attachments not recommended by manufacturer.

7.  RISK OF ELECTRIC SHOCK: Disconnect from the electrical supply before servicing.

WARNING

1.  DO NOT reach for any electrical object that has fallen into water. Unplug immediately.
2.  DO NOT drop or insert anything into any jet opening.
3.  DO NOT operate this unit without the complete jet assembly installed or without water filled 1 in (3 cm) above the jets .
4.  DO NOT overfill the basin.
5.  DO NOT stand on or in the basin, or on the foot rest.
6.  DO NOT leave this appliance unattended when in operation.
7.  Keep the electrical cord away from heated surfaces.
8.  Connect this appliance only to a properly grounded outlet (See Grounding Instructions on Page 5).
9.  To avoid injury, exercise care when entering or exiting the pedicure spa.
10.  It is important that you clean and disinfect the jets and basin after every use. Unless thoroughly cleaned after each use, 

bath residue will buildup within the jets and on the surface area of any whirlpool pedicure spa, which can promote the 
growth of infectious bacteria.

11.  Hydromassage should be pleasant and comfortable. Should you experience any pain or discomfort while using the 

pedicure spa, discontinue use immediately and consult your physician.

12.  Consult your physician if you are diabetic, have poor circulation, or if any area of your feet or legs is inflamed, has an 

open wound or if you have any other questions about whether you should be using hydromassage equipment.

13.  SANIJET recommends a qualified plumber and electrician install your Pipeless™ Pedicure Bath.
14.  Water supply temperature to the Pipeless™ Pedicure Bath MUST NOT exceed 106° F (41° C). Water temperature in excess 

of 106° F (41° C) may be injurious to users health. Check water temperature and adjust prior to use.

INSTALLER / OWNER BEARS ALL RESPONSIBILITIES TO COMPLY WITH ALL STATE AND LOCAL CODES WHEN

INSTALLING THIS PRODUCT. FAILURE TO COMPLY WITH THESE INSTRUCTIONS MAY VOID WARRANTY.

Summary of Contents for PIPELESS SSB2-S115-XX

Page 1: ...Purity is Premium PIPELESS PEDICURE BATH OWNER S MANUAL Models SSB2 S115 XX 115v 60Hz Models SSB2 S230 XX 230v 50Hz ...

Page 2: ...ility for quick and easy system disinfection Please read and follow all of the instructions contained in this Manual before installing operating or maintaining your new SANIJET Pipeless pedicure bath Before proceeding please take a few minutes to complete the warranty registration enclosed in your Owner s packet and submit it to SANIJET at the address provided on the form If you have questions con...

Page 3: ...y 2 Safety 3 Features and Specifications 4 Installation Electrical 5 Installation Standard Self Rimming 6 How to Remove for Service 8 Operating Instructions 9 Dry Run Protection 10 SANIJET Pipeless Disinfection 11 Troubleshooting 12 Table of Contents ...

Page 4: ...t do not install the unit SANIJET s responsibility for shipping damage ceases upon delivery of the product in good condition to the carrier It is the responsibility of the recipient to inspect the packaging for damage Any damage claims must be filed with the carrier within 2 business days from receipt of shipment All returns will be refused unless accompanied by a Return Material Authorization RMA...

Page 5: ... This warranty does NOT cover a metallic plated hardware light bulbs or fading from exposure to direct sunlight b failure damage or defect caused by any of the following after the product leaves SANIJET s factory mishandling abuse misuse neglect accident or natural disaster normal wear and use that does not affect the product s function failure to maintain the product as recommended by SANIJET See...

Page 6: ...en into water Unplug immediately 2 DO NOT drop or insert anything into any jet opening 3 DO NOT operate this unit without the complete jet assembly installed or without water filled 1 in 3 cm above the jets 4 DO NOT overfill the basin 5 DO NOT stand on or in the basin or on the foot rest 6 DO NOT leave this appliance unattended when in operation 7 Keep the electrical cord away from heated surfaces...

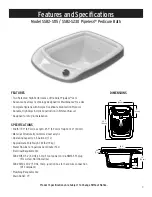
Page 7: ... 66 cm 25 5 23 cm 9 7 cm 2 5 49 cm 19 66 cm 25 5 23 cm 9 66 cm 25 5 7 cm 2 5 30 cm 12 11 cm 4 Width 19 0 49 cm x Length 25 5 49 cm x Height 12 0 30 cm Material Structurally reinforced cast acrylic Operating Capacity 4 5 Gallons 17 L Approximate Ship Weight 42 lbs 19 kg Water Flow Rate 14 gallons per minute 53 L Electrical Requirements SSB2 S115 115 V 60 Hz 2 Amp 3 foot power cord NEMA 5 15 plug ET...

Page 8: ...accessible for easy access for plugging or unplugging 3 foot power cord prior to unit service Power cord should be positioned as to not contact floor of pedicure unit s enclosure Turn off circuit breaker before installing or removal of unit or servicing electrical components 230 V 50 Hz unit is provided with a 2 x4 junction box with three bare leads for hard wire connections Conductor Insulation c...

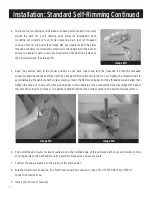
Page 9: ...n request 3 Install Drain Assembly a If using DK D100 purchased separately from SANIJET install the drain assembly on the pedicure bath See Image 3 Apply a bead of plumber s putty to the underside of the strainer body to prevent water from seeping under its chrome plate Secure the drain and seal beneath the drain hole in the pedicure sink by screwing in the strainer body Tightly thread the straine...

Page 10: ...round the finished edge of the pedicure bath to prevent moisture from entering between the bath and mounting platform Wipe away any excess caulk 7 Connect the drain assembly to the piping of the drain outlet 8 Establish Electrical Connection See Electrical Connections section on Page 5 for 115 V 60 Hz or 230 V 50 Hz connection instructions 9 Install your choice of faucetry 4 There are four mountin...

Page 11: ...rs or ChromaSoothe lights To remove bath from a mounting platform that DOES NOT provide access under the unit 1 Cut away any visible caulk from around the deck of the unit 2 Removethedraincoverfromthestrainerbodybyremovingthechromeknobonthedraincover twistcounterclockwise Insert a flat ended screwdriver into the brass fitting revealed when the knob is removed Unscrew the drain cover from the strai...

Page 12: ...ppliance turn the dial switch to the ON or OFF position 4 Bath additives including oil based products can be used in a SANIJET Pipeless Pedicure Bath since their residue can be easily cleaned CAUTION Use only low foaming additives and do not use products that contain sand or silicates 5 You should always be in a seated position when placing your feet into or removing them from the pedicure bath WA...

Page 13: ...n back ON If the motor does not sense a load after 8 seconds it will shut off again for another 15 seconds The motor will repeat this sequence a total of 10 times before going into standby mode Resetting the motor requires cycling the main power to the motors OFF and then back ON unplug system and wait 5 seconds then plug power supply back in again SAFETY SHUTOFF SENSOR The Pipeless Pedicure Bath ...

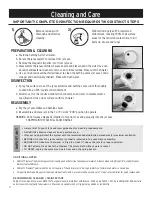
Page 14: ...requiring quick cleaning between treatments we recommend a second set of clean jet assemblies for quick replacement IMPORTANT Always refer to your state and local guidelines for cleaning requirements NEVER USE abrasive cleaners on any surface area After each use disinfect the system with the recommended disinfection procedures for maximum sanitation BEFORE USE check the jet assembly is properly in...

Page 15: ...econds then plugging system back in again 3 Jet Assembly Alignment a Check jet assembly is locked in the 9 o clock or 3 o clock run position in the jet motor case b Ensure magnetic impeller rotor is correctly installed in the jet motor case c Inspect separator plate to ensure proper assembly in the jet escutcheon d Inspect separator plate to ensure magnets 2 are present and properly installed EXCE...

Page 16: ...111223 SANIJET Customer Service Department Toll Free 877 934 0477 Toll Free Fax 214 352 0348 E mail info sanijet com 6200 Maple Avenue Dallas Texas 75235 sanijet com ...

Reviews: