c.
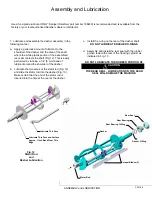
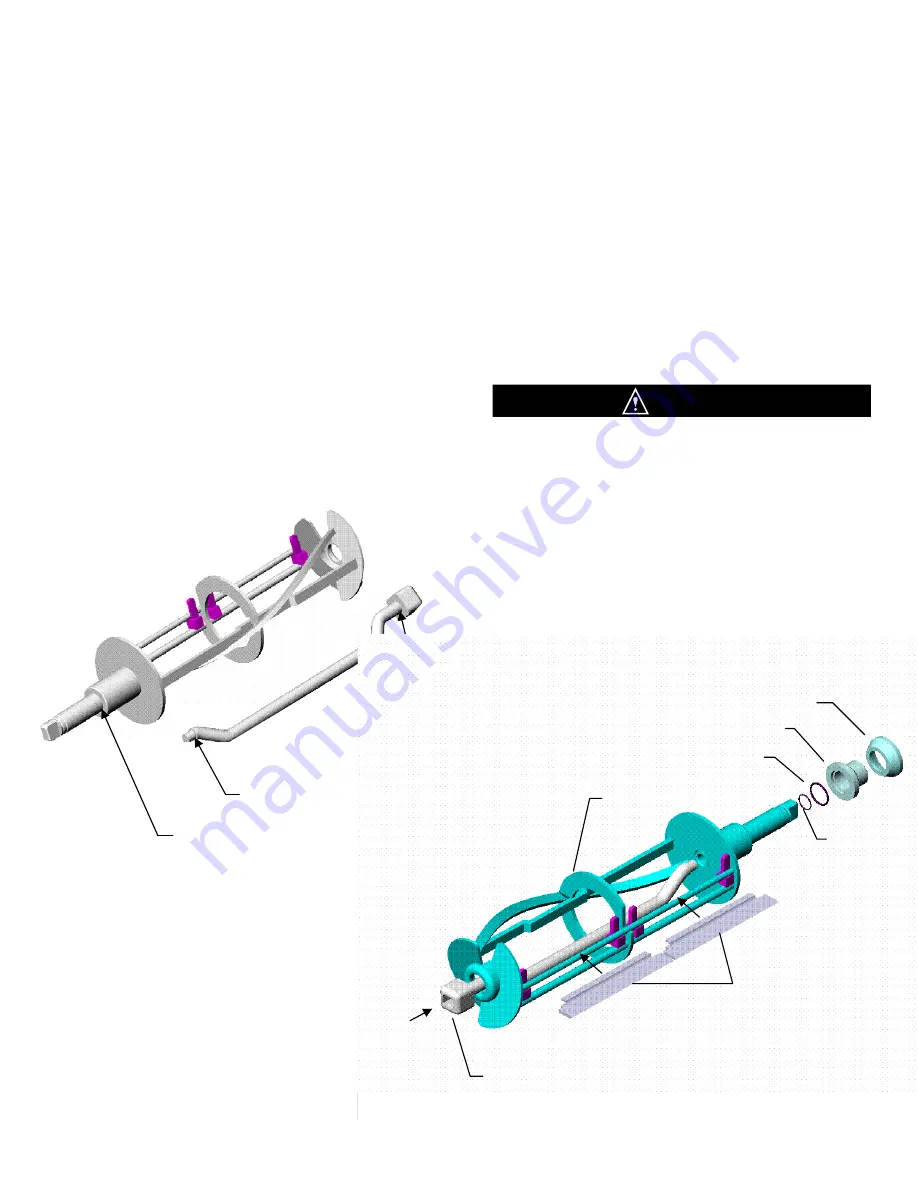
Install the o-ring on the rear of the dasher shaft.
DO NOT LUBRICATE DASHER O-RINGS
d. Assemble and install the rear seal with the rubber
portion toward the rear of the freezing cylinder as
indicated in Fig. 13.
DO NOT LUBRICATE THE RUBBER PORTION OF
THE REAR SEAL. LUBRICATION ON THE REAR
SEAL WILL DAMAGE THE MACHINE.
Use a food grade lubricant ONLY. Sanigel (SaniServ part number 188490) is recommended and is available from the
factory or your local authorized SaniServ dealer or distributor.
ASSEMBLY and LUBRICATION
Fig. 24a
Stator Rod and Dasher Lubrication
PAGE 6
Assembly and Lubrication
1.
Lubricate and assemble the dasher assembly in the
following manner:
a. Apply a generous amount of lubricant to the
shoulder of the dasher and the area of the shaft
where the white plastic portion of the assembled
rear seal contacts the shaft (Fig. 12). This is easily
performed by running a 1/4” (6 mm) bead of
lubricant around the shoulder of the dasher.
b. Lubricate the two areas of the stator rod (Fig. 12)
and slide the stator rod into the dasher (Fig. 13).
Make certain that the end of the stator rod is
inserted into the hole at the rear of the dasher.
Fig. 13
Dasher Assembly
CAUTION
Fig. 12
Stator Rod
and
Dasher Lubrication
Lubricate This Face and Surface
Approx. 1 Inch Back From This
Edge
Lubricate This Face
Rear Seal
Rear Bearing
Dasher O-Ring
Rear Bearing O-Ring
Scraper Blades (2)
Dasher
Stator Rod
Summary of Contents for A7081HEP
Page 2: ......
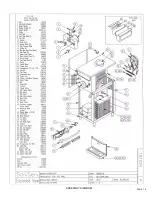
Page 17: ...PAGE 16 ASSEMBLY DIAGRAM ...
Page 18: ...Notes ...
Page 19: ...Service Log ...


