background image


MACHINE SIZE  BRUSH DIAMETER


13” 

12”

3

Grounding Instructions

This appliance must be grounded. If it should malfunction or 
breakdown,  grounding  provides  a  path  of  least  resistance 
for electric current to reduce the risk of electric shock. This 
appliance  is  equipped  with  a  cord  having  an  equipment-
grounding conductor and grounding plug. The plug must be 
plugged into an appropriate outlet that is properly installed 
and  grounded  in  accordance  with  all  local  codes  and 
ordinances.

DANGER

Improper connection of an equipment-grounding conductor 
can  result  in  risk  of  electric  shock.  Check  with  a  qualified 
electrician or service person if you are in doubt as to whether 
the  outlet  is  properly  grounded.  Do  not  modify  the  plug 
provided with the appliance. If it will not fit the outlet, have 
proper outlet installed by a qualified technician.

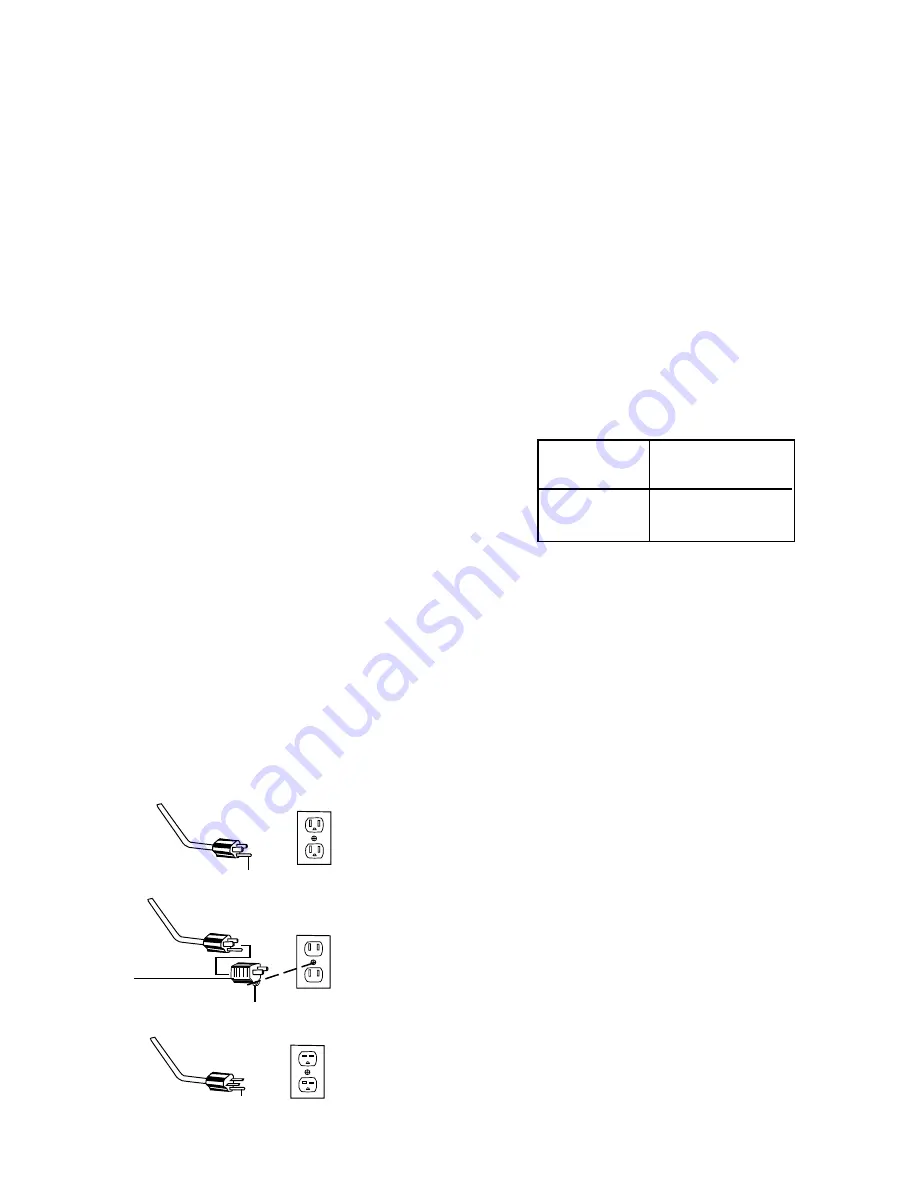
This appliance is for use on a nominal 120 volt circuit and 
has  a  grounding  plug  that  looks  like  the  plug  illustrated  in 
Figure 1. A temporary adapter which looks like the adapter 
illustrated in Figure 2 may be used to connect this plug to a 
two-pole receptacle, as shown, if a properly grounded outlet 
is not available. The temporary adapter should be used only 
until a properly grounded outlet, Figure 1, can be installed 
by a qualified electrician. The green colored rigid ear, lug, or 
the like extending from the adapter must be connected to a 
permanent ground such as a properly grounded outlet box 
cover. Whenever the adapter is used, it must be held in place 
by a metal screw.

For floor finishing machines rated 150-250 volts:

If the machine is provided with an attachment plug cap as 
shown in Fig. 3, it is intended for use on a 240 volt (nominal) 
circuit. No adapter is available for this application. 

NOTE:  In Canada, the use of a temporary adapter is not 

permitted by the Canadian Electrical Code.


OPERATION/ACCESSORIES

Choosing the Right Brush and Drive Block

Your floor machine is packed complete and ready for use after 
you install a brush or drive block. 

Your floor machine is designed to be used for many different 
floor care applications. Make sure you use the correct brush 
or pad for the type of job you want to perform. (Accessories 
are available from the dealer from whom the floor machine 
was purchased.)

When ordering brushes or drive blocks, refer to this chart and 
specify correct brush or block diameter when ordering.

FIGURE 1

FIGURE 2

FIGURE 3

GROUNDED 
OUTLET BOX

Plug Grounding Pin

Grounding Tab

Metal Screw

Adapter

Plug Grounding Pin

Summary of Contents for SC6001

Page 1: ...Warranty Station or service information call 1 800 800 8975 En Mexico llame al 55 5343 4384 www sanitairevac com Please Retain We suggest you record the model type and serial numbers below They are located on the silver rating plate on your cleaner For prompt and complete service information always refer to these numbers when inquiring about service Model Type___________________________ Serial No ...

Page 2: ...ng Do not unplug by pulling on cord To unplug grasp the plug not the cord Do not handle the plug or floor machine with wet hands Wind the cord no tighter than is necessary to retain it during storage Refer to Cord Storage Page 7 Use extra care when working near stairs Do not use in conjunction with flammable or combustible liquids such as gasoline or use in areas where explosive vapor or dust may be...

Page 3: ...is not available The temporary adapter should be used only until a properly grounded outlet Figure 1 can be installed by a qualified electrician The green colored rigid ear lug or the like extending from the adapter must be connected to a permanent ground such as a properly grounded outlet box cover Whenever the adapter is used it must be held in place by a metal screw For floor finishing machines ra...

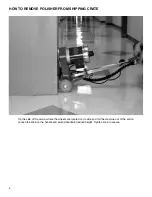
Page 4: ...ISHER FROM SHIPPING CRATE Tip the side of the carton where the wheels are located on its side and roll the machine out of the carton Loosen the knob on the handle and extend handle to desired height Tighten knob to secure ...

Page 5: ...m the electrical outlet before installing a brush or pad driver Fig 4 ON OFF DRIVE BELT ADJUSTMENT CAUTION Disconnect the power cord from the electrical outlet before adjusting drive belt tension 1 Remove screw that secures cover 2 Loosen the bolts holding the drive motor to the frame do not remove Fig 5 3 Turn the three screws at the rear of the frame until the belt is tight 4 Test the machine If...

Page 6: ... machine is a very sensitive powerful unit When in operation it should be guided gradually and smoothly without sudden or rough motions You will want to practice with your machine on a smooth surface first until you have experience in operating it For ease of operation always keep the brush or pad surface level balanced and flat on the floor at all times Always adjust the operating handle to a comfor...

Page 7: ...d the power cord around the cord storage hook on the handle shaft and both of the handle grips as shown CLEAN UP AND STORAGE After being used your floor machine can be wiped clean with a soft damp cloth and should be stored in a clean dry place ...

Page 8: ...sonable or neglect use or abuse while in possession of the purchaser are likewise excluded from this warranty If repair is done on your equipment by anyone other than those designated as an authorized Warranty Center THE MANUFACTURER at its sole option may determine that this warranty will not apply and the reimbursement for such repair will not be made PROCEDURE TO BE TAKEN TO OBTAIN PERFORMANCE ...

Page 9: ...n completa y rápida en cuanto al servicio de reparaciones y partes de esta aspiradora refiérase siempre a estos números Modelo y tipo______________________________ No de serie ______________________ También es importante guardar su recibo para tener prueba de la fecha de compra Índice Importante para su seguridad 2 Información sobre servicio de reparaciones y partes 2 Instrucciones para conexión a ...

Page 10: ...ara obtener información sobre la oficina más cercana de Eureka Sanitaire autorizada para atender cuestiones de garantía Debe saber los números de modelo tipo y serie o código de fecha cuando llama a USA 1 800 800 8975 México 55 5343 4384 Canadá 1 800 800 8975 Si lo prefiere puede escribirnos a Electrolux Home Care Products North America Service Division P O Box 3900 Peoria Illinois 61612 USA En Cana...

Page 11: ...tal como se ilustra si no se cuenta con un tomacorriente con conexión a tierra El adaptador temporario debe ser usado únicamente hasta que un electricista calificado pueda instalar un tomacorriente conectado correctamente a tierra Figura A La lengüeta verde oreja o cosa rígida similar que sobresale del adaptador debe ser conectada con una conexión a tierra permanente tal como la tapa de una caja to...

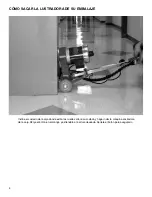
Page 12: ...RA DE SU EMBALAJE Incline el costado de la caja donde están las ruedas sobre su costado y haga rodar la máquina sacándola de la caja Afloje el botón en el mango y extiéndalo a la altura deseada Apriete el botón para asegurarlo ...

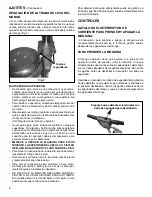
Page 13: ...MANGO El mango puede ser regulado a cualquier posición de trabajo simplemente empujando hacia arriba la traba del mango Fig 6 Mueva el mango a la posición deseada luego empuje firmemente hacia abajo la traba del mango la cual trabará el mango en la posición deseada Fig 6 Trabe Destrabe PRENDIDO ON Para instalar el cepillo o el propulsor del fieltro deje el mango en la posición vertical e incline la ...

Page 14: ...guridad para destrabarlo PAUTAS PARA SU OPERACIÓN Su máquina para pisos es una máquina muy sensitiva potente Cuando está en uso debe ser guiada gradual y suavemente sin mociones súbitas o bruscas Le conviene primero practicar con su máquina en una superficie lisa hasta adquirir experiencia para usarla Para facilitar su operación mantenga siempre el nivel del cepillo o fieltro balanceado y plano sobr...

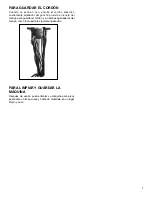
Page 15: ...or del gancho provisto en el eje del mango para guardar el cordón y en ambas agarraderas del mango como lo muestra la siguiente ilustración PARA LIMPIAR Y GUARDAR LA MÁQUINA Después de usarla puede limpiar su máquina para pisos pasándole un trapo suave y húmedo Guárdela en un lugar limpio y seco ...

Page 16: ...trato estando en posesión del comprador también quedan excluidos de esta garantía Si las reparaciones de su equipo son realizadas por otro que no sea el designado por un Centro de Garantía autorizado EL FABRICANTE a su sola discreción puede determinar que esta garantía no se aplica y no reembolsará el costo de tales reparaciones PROCEDIMIENTO A SEGUIR PARA OBTENER EL CUMPLIMIENTO DE LAS REPARACION...

Page 17: ...lus de cette Garantie limitée Les dommages défaillances et autres échecs dus à une utilisation incorrecte irraisonnable négligente ou abusive sont aussi exclus de cette garantie Si vous faites faire une réparation par quelqu un d autre qu un centre service agréé Sanitaire Eureka LE FABRICANT peut décider que cette garantie ne s applique à une telle réparation et refuser le remboursement d une tell...

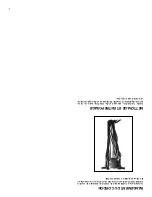
Page 18: ...lez le cordon d alimentation autour du crochet du cordon sur le manche et les deux poignées comme montré NETTOYAGE ET ENTREPOSAGE Après l utilisation essuyez votre machine avec un tissu propre légèrement mouillé Entreposez votre appareil dans un endroit sec et propre ...

Page 19: ...ssant et sensible Utilisez toujours des mouvements lents et réguliers en évitant des secoursses Entraînez vous avec votre appareil sur une surface lisse d abord Pour faciliter l usage gardez toujours la brosse ou feutre plat et en bon équilibre sur le plancher Choisissez toujours une hauteur du manche confortable qui permettra à la brosse ou au tampon de rester plat et tenu en bon équilibre avant ...

Page 20: ... cordon électrique de la prise avant d installer un entraînement de brosse ou feutre Fig 4 EN MARCHE EN ARRÊT RÉGLAGES RÉGLAGES DE LA COURROIE ATTENTION Débranchez toujours le cordon électrique de la prise avant de régler la tension de la courroie 1 Enlevez la vis qui tient le couvercle en place 2 Desserrez les boulons qui attachent le moteur au support sans les enlever complètement voir le croqui...

Page 21: ...CAISSE D EXPÉDITION Penchez le côté du carton où se trouvent les roues de l appareil et roulez l appareil pour le sortir de la caisse Desserrez le bouton sur le manche et tirez le manche à la hauteur voulue Serrez le bouton pour fixer le manche ...

Page 22: ...c mise à la terre soit installée par un électricien qualifié L oreille rigide ou le crochet ou autre dispositif semblable de couleur verte prolongeant l adaptateur doit être raccordé à un élément correctement mis à la terre comme le couvercle d une boîte de sortie mise à la terre L adaptateur doit être fixé par une vis métallique Pour les appareils avec un rapport de transformation de 150 250 V Si l...

Page 23: ...isé par ou près d un enfant Ne pas laisser l appareil sans surveillance lorsqu il est branché N utiliser que conformément à cette notice avec les accessoires recommandés par le fabricant Ne pas utiliser si le cordon ou la fiche est endommagé Si l appareil ne fonctionne pas comme il le devrait s il est tombé ou endommagé ou laissé à l extérieur le retourner à un atelier de réparation avant de l util...

Page 24: ...s plus rapides et les plus complets citez toujours ces renseignements lorsque vous appelez au service client Modèle et type ___________________ No de série ________________________ Il est aussi important de garder votre reçu comme preuve de la date d achat Table des matières Importantes mesures de sécurité 2 Renseignements sur le service 2 Instructions visant la mise à la terre 3 Mode d emploi Acc...

Reviews: