www.sanitairecommercial.com 5
E
N
BRUSH AND PAD DRIVER INSTALLATION
8. With the machine in the upright
position, remove the cord wrap hook
and two (2) Phillips head screws
from the bag. With the hook pointing
towards the ground, position the cord
wrap hook
over the 2
holes on
the back of
the handle.
Insert the
two screws
into the
holes and
tighten with
a screwdriver.
9. When storing the machine, wrap the
power cord around the operator
handle
grips and
the cord
wrap
hook.
CAUTION:
Disconnect the power cord from
the electrical outlet before installing a brush or
pad driver.
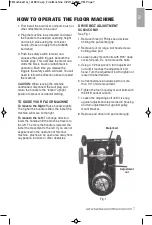
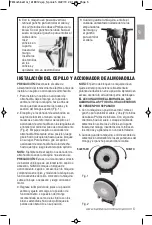
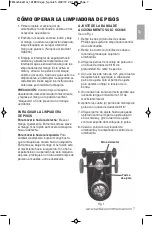
1. To install a brush or pad driver, leave the
handle in the upright position and tip the
machine backwards so it rests on its wheels
and upper handle section (Fig. 1).
2. The brush and pad driver both attach in the
same manner: align the cutouts on the inner
ring of the brush or pad driver with the tabs
on the inside of the ring of the drive hub
(Fig. 2). Push the brush or pad driver firmly
in position, then turn it counterclockwise
until it locks into place. To remove, turn the
brush or pad driver clockwise until it stops,
then lift it off.
Note:
Always remove the brush or pad
driver when the machine is not in use.
CAUTION:
This is the only proper way to
install a drive block, brush or attachment.
NEVER put a drive block, brush or attachment
on the machine by placing it on the floor and
moving the running machine over it, or by
placing the machine over the block or
attachment and then starting the motor.
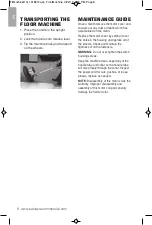
3. Return the floor machine to upright position
and adjust handle to operating position.
Recommended handle position is close to
the waist with arms extended down. Lock
the cam release lever into position.
Note:
The lock bolt does not require
extreme tightening to effectively hold the
cam release lever in position. Over-
tightening will shorten the functional
life of the lock bolt.
PAD DRIVER, PADS AND ALL
ACCESSORIES ARE SOLD SEPARATELY
4. With the machine in the upright position,
remove the cord wrap hook and two (2)
Phillips head screws from the bag. With the
hook pointing towards the ground, position
the cord wrap over the 2 holes on the back
of the handle. Insert the two screws into the
holes and tighten with a screwdriver.
5. When storing the machine, wrap the power
cord around the operator handle grips and
the cord wrap hook.
Fig. 1
ON
OFF
Fig. 2
FlrMachineOG_1618912.qxp_FloorMachine 3/22/19 1:59 PM Page 5


