background image


Page 19 

5.1  Battery charger 


High performance is achieved by 2-step automatic und digital control engineering. This 
allows for quick charging in the first step, then compensation/trickle charging in the 
second step. It is possible to check the condition of the battery. 
With LCD display und revolving mains plug. 


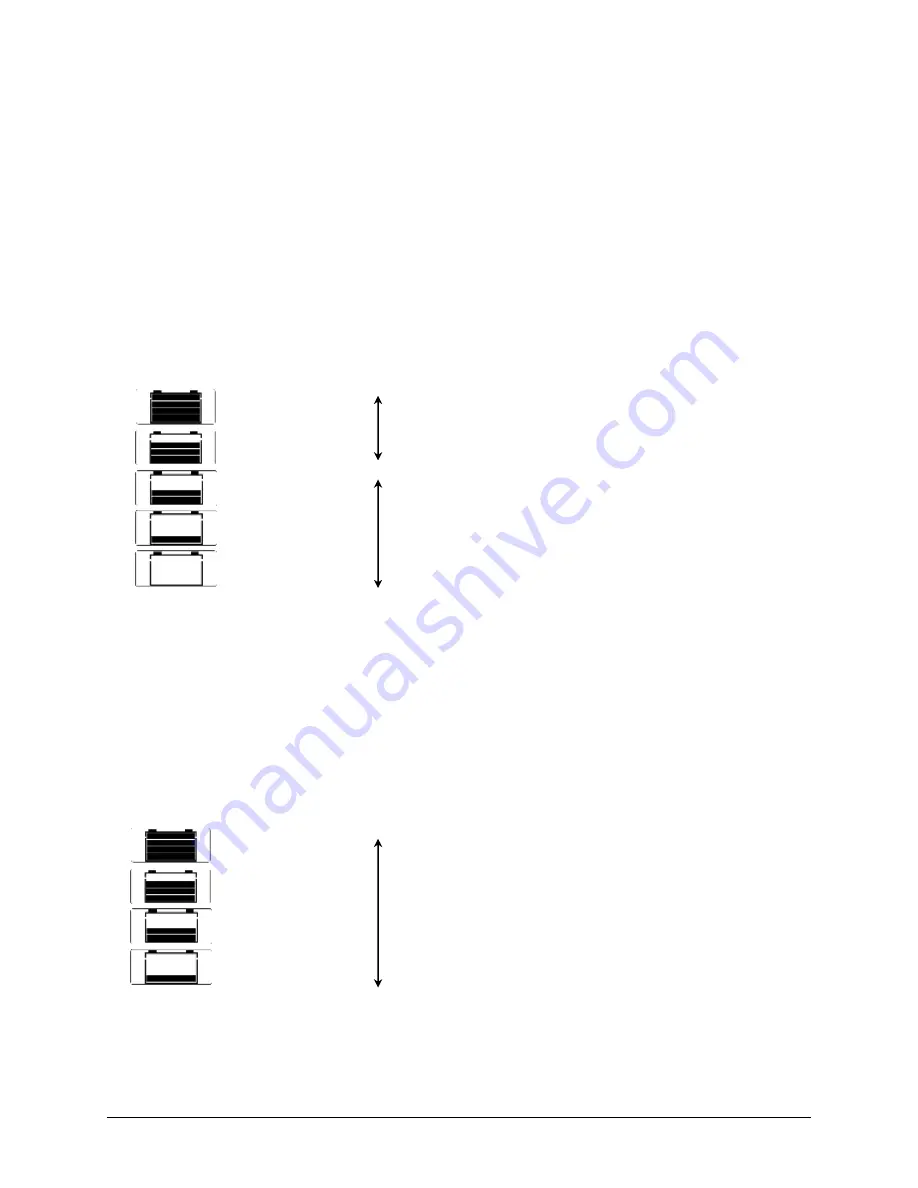
5.1.1  Testing 


Connect the battery charger with the battery (without plugging into the mains) 
After approximately 9 seconds the test result is displayed (off-load voltage of the 
battery) 


100% - full    

Battery is operational 


80 % 


50% 


20%   


Charge the battery 


0% - flat  


5.1.2  Charging 


1. 

Connect the charging unit to the battery 

2. 

The off-load voltage of the battery is shown on the display 

3.  

Plug the charging unit into the mains 

4. 

The charging operation begins 


The present charge status of the battery is symbolized by progress bars: 


full, 100 % 


approx. 80 % 


approx. 50 % 


flat, 0-20 % 


Summary of Contents for Liftkar SAL Uni

Page 1: ...Operator Manual Liftkar SAL Uni Liftkar SAL Ergo Liftkar SAL Fold Liftkar SAL Fold L Edition 12 2016 changes without notice en...

Page 2: ...Page 2...

Page 3: ...G THE BATTERY 12 3 1 Fitting the battery 12 3 2 Removing the battery 12 4 OPERATION 13 4 1 Ascending stairs 13 4 2 Descending stairs 13 4 3 Please pay attention to 14 4 3 1 Shift of balance 14 4 3 2 H...

Page 4: ...tself up onto the step above and lifts to only the necessary step height During descent the motor acts like an electric brake and the load is brought down without bumping It is also ideal for winding...

Page 5: ...ransportation remove battery to lighten the unit and to prevent accidental operation in transit 1 2 Technical data of the LIFTKAR SAL standard model Model ERGO UNI FOLD SAL 110 SAL 140 SAL 170 Capacit...

Page 6: ...Page 6 2 Controls 2 1 Model ERGO...

Page 7: ...compressed simultaneously on the left and right sides The lock must be tightened sufficiently to avoid movement in use As a rule The lock will be sufficiently tightened if a single operator can tilt b...

Page 8: ...Page 8 2 3 Model UNI...

Page 9: ...1 Flashing green The LIFTKAR is in descent mode The push button Q is not active now refer also to chapter Operation 4 2 Constantly red The LIFTKAR is in descent mode and the support wheels move fast t...

Page 10: ...On Off Ascend Descend button P for about 30 seconds until you can hear a beep signal Afterwards you can drive without the recurring beep signal 2 4 4 Speed switch Use the speed switch to select either...

Page 11: ...with your foot all functions will be stopped Safety instructions You avoid all risk if you switch on only after tilting the load 2 7 Main switch The main switch is situated on the battery cover The p...

Page 12: ...battery 3 1 Fitting the battery 1 Locate corner A on both sides into hook B on frame 2 Snap battery forward to engage locking hooks 3 2 Removing the battery Battery must be lifted vertically to diseng...

Page 13: ...ull the LIFTKAR back to touch the rise of the next step up Holding the LIFTKAR too flat on stairs with open risers can also result in the support wheels being partially trapped under the tread This ma...

Page 14: ...he floor This results in smooth continuous down the stairs motion In the case of closed stairs with short step for instance on the inside of narrow circular staircases the support wheels may touch the...

Page 15: ...ing it to rotate under the upper tread The electronics will go into overload mode and will need to be reset 4 3 3 Overload Do not overload Exceeding the load capacity will activate overload mode causi...

Page 16: ...the pneumatic tyres would absorb part of the impact it is nevertheless not recommended as it detrimental to service life 4 3 5 Inadvertent battery ejection For all normal operations the battery is hel...

Page 17: ...the staircase any step a few cm depending on the angle of the winding Therefore start as far as possible at the outside when ascending When descending the LIFTKAR tends to move to the outside of the...

Page 18: ...disuse The charger automatically switches to trickle charging so overcharging is not possible Do not leave the battery discharged or half discharged Always charge immediately after use If the batteri...

Page 19: ...the battery charger with the battery without plugging into the mains After approximately 9 seconds the test result is displayed off load voltage of the battery 100 full Battery is operational 80 50 20...

Page 20: ...ry pole terminals etc 5 1 3 Protective features technical data Protective features Protection if the charging clips are short circuited An electronic protection circuit prevents damage if the charging...

Page 21: ...t 4 5 h The charger has been function tested in a temperature range from 20 C to 50 C in atmospheric humidity ranging from 5 85 Component specification Climatic category B 5 1 4 Safety rules Utilisati...

Page 22: ...roduction faults Not included in the warranty are Normal wear and tear on parts Damage resulting from abnormal load Damage due to the exertion of force Unadmissible modifications to the unit or access...

Page 23: ...IIA This declaration will loose its validity if changes are performed on the unit without our approval Ing Jochum Bierma General Manager 9 Design protection by patents The lifting system of the SAL s...

Page 24: ...sano deutschland de SANO UK Powered Stairclimbers Ltd Bristol Court Betts Avenue Martlesham Heath Ipswich Suffolk IP5 3RY England Tel 44 0 1473 333 889 Fax 44 0 1473 333 742 info sano uk com www sano...

Reviews: