background image


Version 1

RN

 / 2008 

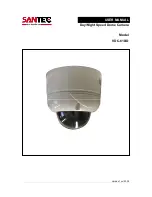
USER MANUAL 

Day/Night Speed Dome Camera 


Model 

VDC-610ID 


Summary of Contents for VDC-610ID

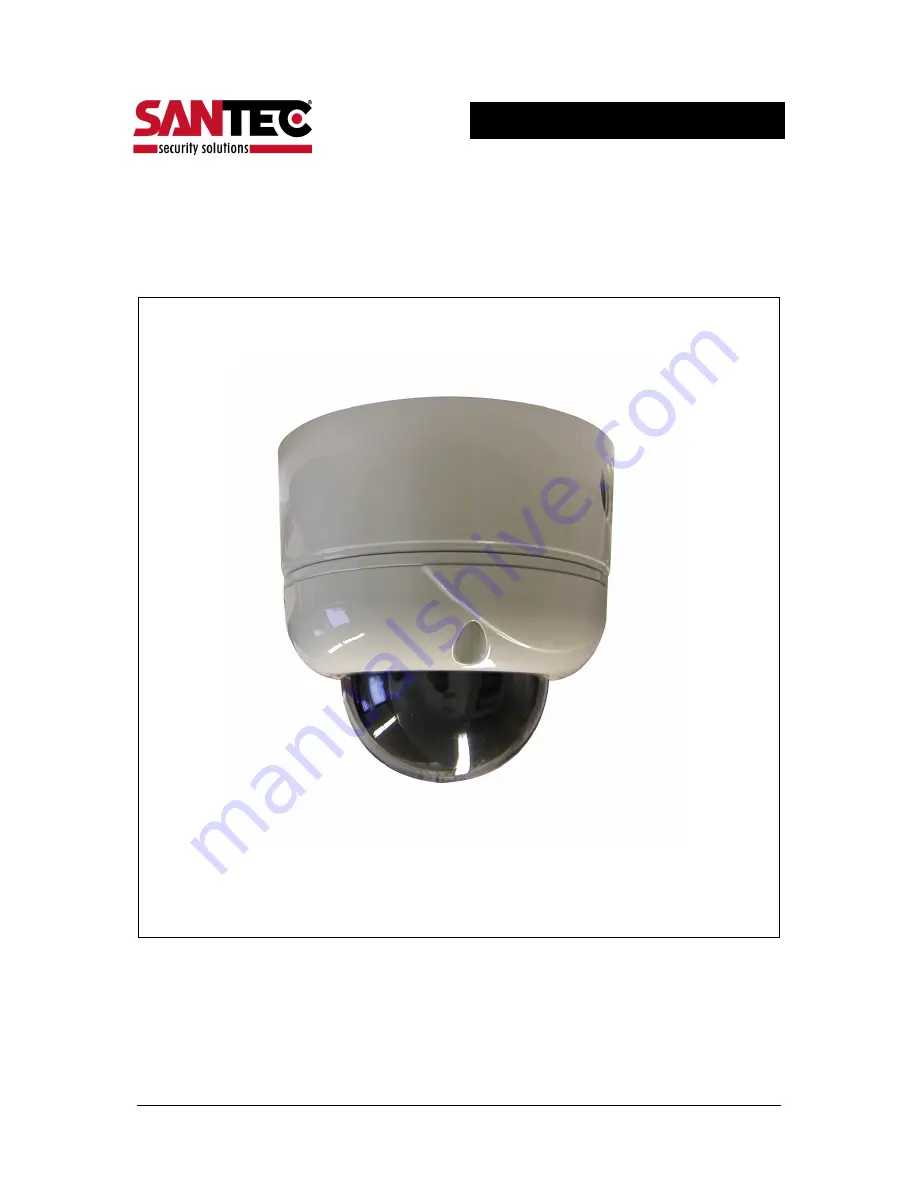
Page 1: ...Version 1RN 2008 USER MANUAL Day Night Speed Dome Camera Model VDC 610ID...

Page 2: ...O VIDEO Vertrieb AG Any duplication even on a digital data medium requires an approval in writing of SANYO VIDEO Vertrieb AG Reprint even in extracts is forbidden Errors and technical alterations are...

Page 3: ...atures 5 Names of Each Part 6 Installation 7 A Connection Methods 7 B Mount 8 Quick Operating Keys 9 Diagnostic 10 OSD Menu Setting 11 A OSD Menu Table 11 B DOME SET 12 C CAMERA SET 16 D PRESET SET 18...

Page 4: ...t hold its weight Never touch the power cord with wet hands Clean only with dry cloth Never install the product in extreme high or low temperature Never drop hit strongly nor vibrate the product Never...

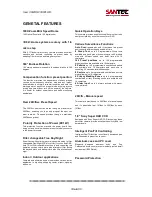
Page 5: ...on such as color picture plus infrared cut filter during the day and black and white picture plus filter elimination at night Indoor Outdoor applications Compact and minimize dome size provides variou...

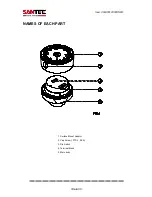
Page 6: ..._ _ _ _ _ _ _ _ _ _ _ _ _ _ _ _ _ _ _ _ _ _ _ _ _ _ _ _ _ _ _ _ _ _ _ _ _ _ _ _ _ _ _ _ _ _ _ _ _ _ _ _ _ _ _ _ _ _ _ _ _ _ _ _ _ _ _ _ S eit e 6 NAMES OF EACH PART 1 Surface Mount Adaptor 2 Cap Scre...

Page 7: ...it from the base Screws won t be removed 2 Loose the screws which connect mount cover and Main base and separate dome cover from the main base Screws won t be removed 3 Connect power DC12V 1 5 A to P...

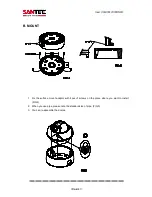
Page 8: ..._ _ _ _ _ _ _ _ _ _ _ _ _ _ _ _ _ _ _ _ _ _ _ _ _ _ _ _ _ _ _ _ _ _ _ _ _ _ _ _ _ _ _ _ _ S eit e 8 B MOUNT 1 Fix the surface mount adaptor with 4pcs of screws on the place where you want to install F...

Page 9: ...lip function 71 78 Preset GROUP TOUR Executing Group Tour 1 8 81 88 Preset PATTERN Executing Pattern 1 8 91 Preset ZERO POSITION 92 Preset FREEZE 93 Preset BLC MODE Selectable On Off in BLC function 9...

Page 10: ...conds the camera must receive a signal from any keys of controller or DVR s When received the correct signal OK is displayed after TX CONNECTION TEST If No Tested is displayed on the monitor Camera di...

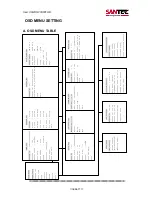
Page 11: ...N SET START ANGLE XXX X XX X END ANGLE XXX X XX X DIRECTION CW ENDLESS OFF ON SPEED QUICK DWELL TIME 03 SAVE AND EXIT EXIT SECTOR SET SECTOR NO 01 SECTOR ID SECTOR01 SECTOR START XXX X XX X SECTOR END...

Page 12: ...OM TELE button to move to the next character from left to right direction and ZOOM WIDE button to move to the next character from right to left direction Space displays when appears B 2 DOME SET RECOV...

Page 13: ...LE Mode Move joystick to right or left direction for selecting ENABLE DISABLE The default setting is DISABLE This function can be recalled by pushing 97 preset button B 7 DOME SET LANGUAGE Multiple la...

Page 14: ...menu will return to the previous page automatically After setting a Password an operator must press memorized password in order to enter OSD MAIN MENU or to change the data which is memorized original...

Page 15: ...ed Lens B 8 5 DOME SET NEXT PAGE INITIALIZATION To clear all memorized data for tour preset sector privacy or pattern move joystick to the right direction when the cursor is on INITIALIZATION To clear...

Page 16: ...then the menu is returned to the previous page automatically B 9 DOME SET NEXT PAGE SAVE AND EXIT To saving the memorized data and escape this page move joystick to the right direction when cursor is...

Page 17: ...ons have 4 modes according to the condition of exterior lighting The default setting is AWB and it may change the mode option accoding to the lighting conditions as below AWB Mode 3 200 K to 6 000 K D...

Page 18: ...to select preset no D 2 PRESET PRESET ID To set preset ID select up to 16 characters using Joystick to the left or right Press ZOOM TELE button moves to the next character from the left to the right...

Page 19: ...are available with two direction as CW or CCW by joystick to the right or left direction CW Clock wise direction Default CCW Count Clock Wise Direction E 4 AUTO SCAN ENDLESS Auto Scan can use endless...

Page 20: ...utton to move the next character from the left to the right direction and ZOOM WIDE button to move the next character from the right to left direction Space displays when appears Tour title is not dis...

Page 21: ...k in the center of the monitor This block appears as a translucent square with blue color after set ON The default setting is OFF G 3 PRIVACY SET ACTION MOVE ADJUST To set the blocking area press FOCU...

Page 22: ...ble user defined patterns set by the joystick are available H 2 PATTERN SET PATT TITLE To set PATTERN TITLE select up to 16 characters using Joystick to the left or right Press ZOOM TELE button moves...

Page 23: ...Normal Close or NO Normal Close The default setting is OFF I 3 ALARM SET ALARM ACT Alarm activates various surveillance modes with Preset number up to 164 Group tour up to 8 Pattern up to 8 Move joys...

Page 24: ...t to left direction Space displays when appears J 3 SECTOR SET SECTOR START To set SECTOR START angle press FOCUS FAR button then move joystick to the left or right direction to set the position To pr...

Page 25: ...000XXXX 4 010110XXXX 26 100011XXXX 48 101000XXXX 5 110110XXXX 27 100011XXXX 49 011000XXXX 6 001110XXXX 28 010011XXXX 50 111000XXXX 7 101110XXXX 29 110011XXXX 51 000100XXXX 8 011110XXXX 30 001011XXXX 5...

Page 26: ...ault Pelco D or Pelco P Auto detection DIP SW1 7 DIP SW1 8 OFF OFF Pelco D or Pelco P C BAUD RATE SETTING The 9 th Dip Switch is used for BAUD RATE setting DIP SW can be changeable to 2400bps 9600bps...

Page 27: ...nication cable is connected correctly Check camera ID setting Check the termination No picture Check if all the cables are connected correctly Check if the monitor is adjusted correctly Check if video...

Page 28: ...roup scanning or Patterns Auto Flip ON OFF OSD Menu Multiple Languages on screen Communication RS 485 Protocol Pelco D P POWER Power Consumption 9W Max Heater Type 15W Power Supply DC12V 750mA Heater...

Page 29: ...ma nu a l VD C 6 10I D _ _ _ _ _ _ _ _ _ _ _ _ _ _ _ _ _ _ _ _ _ _ _ _ _ _ _ _ _ _ _ _ _ _ _ _ _ _ _ _ _ _ _ _ _ _ _ _ _ _ _ _ _ _ _ _ _ _ _ _ _ _ _ _ _ _ _ _ _ _ _ _ _ _ _ _ _ _ _ _ _ S eit e 29 DIME...

Page 30: ...r ma nu a l VD C 6 10I D _ _ _ _ _ _ _ _ _ _ _ _ _ _ _ _ _ _ _ _ _ _ _ _ _ _ _ _ _ _ _ _ _ _ _ _ _ _ _ _ _ _ _ _ _ _ _ _ _ _ _ _ _ _ _ _ _ _ _ _ _ _ _ _ _ _ _ _ _ _ _ _ _ _ _ _ _ _ _ _ _ S eit e 3 0 N...

Page 31: ...r ma nu a l VD C 6 10I D _ _ _ _ _ _ _ _ _ _ _ _ _ _ _ _ _ _ _ _ _ _ _ _ _ _ _ _ _ _ _ _ _ _ _ _ _ _ _ _ _ _ _ _ _ _ _ _ _ _ _ _ _ _ _ _ _ _ _ _ _ _ _ _ _ _ _ _ _ _ _ _ _ _ _ _ _ _ _ _ _ S eit e 3 1 N...

Page 32: ..._ _ _ _ _ _ _ _ _ _ _ _ _ _ _ _ _ _ _ _ _ _ _ _ _ _ _ _ _ _ _ _ _ _ _ _ _ _ _ _ _ _ _ _ _ _ _ _ _ _ _ _ _ _ _ _ _ _ _ _ _ _ _ _ _ _ _ _ _ _ _ _ _ _ _ _ _ _ _ _ _ _ _ _ w w w sa nt ec v id eo c om Y ou...

Reviews: