
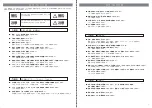


本体の ボタンで日付表示形式を選択し
ボタンで選択項目へ移動、 ボタンで日付表示形
式を選び
ボタンで確定します。
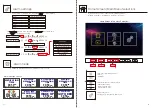
本体の ボタンで言語を選択し ボタン
で決定。画面右の項目から ボタンを押してご利
用の言語を選択し ボタンで確定させます。
5
6
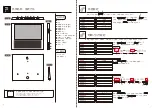
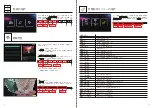
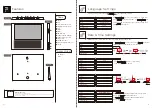
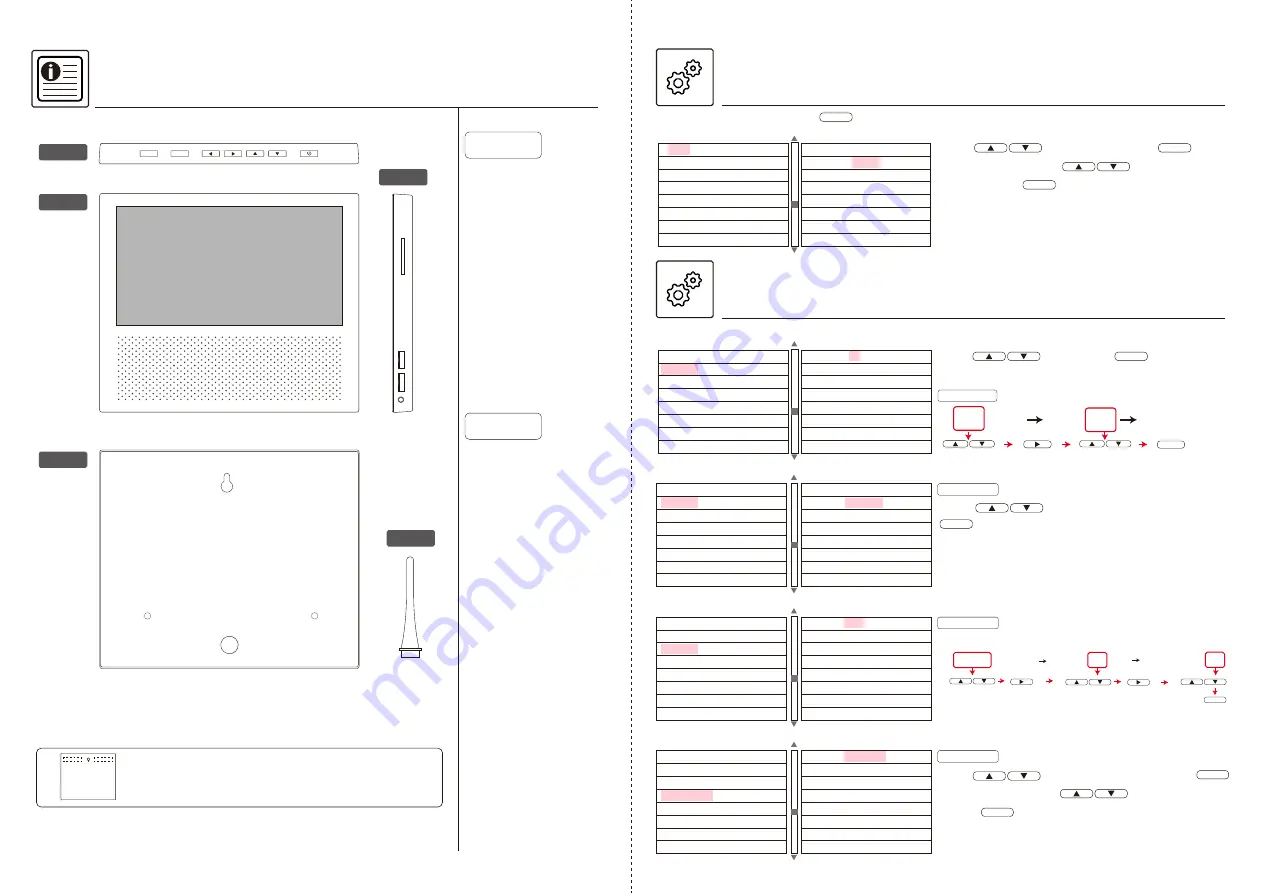
各部名称・接続方法
上部
全面
背面
側面
スタンド
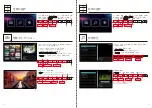
言語設定
OK
OK
英語
日本語
スペイン語
简体
繁體
ドイツ語
言語
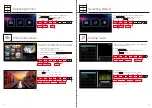
時間設定
時間形式
日付設定
日付表示形式
音量設定
自動電源 ON
自動電源 OFF
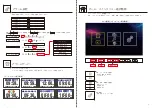
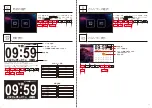
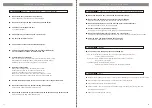
時間と日付設定
設定の項目の中から「時間設定・時間形式・日付設定・日付表示形式」の項目を表示させてください。
時間設定
時間形式
00:00
言語
時間設定
時間形式
日付設定
日付表示形式
音量設定
自動電源 ON
自動電源 OFF
時間設定
時間形式
日付設定
日付表示形式
音量設定
自動電源 ON
自動電源 OFF
日付設定
2020 - 01 - 01
時間設定
時間形式
日付設定
日付表示形式
音量設定
自動電源 ON
自動電源 OFF
日付表示形式
時間設定
時間形式
日付設定
日付表示形式
音量設定
自動電源 ON
自動電源 OFF
12 時間
24 時間
年 - 月 - 日
月 - 日 - 年
日 - 月 - 年
OK
設定マークを選択し ボタンを押して「言語」の項目を表示させてください。
OK
MENU
OK
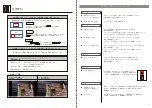
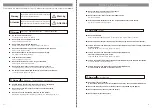
❶ ❷ ❸ ❹ ❺ ❻ ❼
❾
❿
⓫
❽
⓬
⓭
❶ メニュー
❷ OK
❸ 項目選択 : 左(音量小)
❹ 項目選択 : 右(音量大)
❺ 項目選択 : 上
❻ 項目選択 : 下
❼ 電源ボタン
❽ SD カード挿入口
❾ USB ポート ( 読み込み&充電 )
❿
USB ポート(充電のみ)
⓫ AC アダプター差込み口
⓬ 壁掛け用穴
⓭ スタンド取付穴
⓮ スタンド
各部名称
・AC アダプター
・自立用スタンド
付 属品
本体の ボタン移動し、 ボタンで
選択します。下記の参考例を基に時間を設定します。
OK
例
00 : 00 09 : 00 09 : 30
OK
ボタンで時間形式を選択し
本体の
OK
ボタンで確定します。
例
0000-00-00
OK
2020-00-00 2020-01-00
2020-01-01
OK
⓮
本製品を壁に掛けて使用する際の方法と注意
本製品を壁に掛けて使用する場合は傾きを抑える為に、市販の両面テープや、
本体下部分に画鋲等を用い、傾きを補正して頂く必要があります。
その際には壁紙の剥離や製品の落下には充分にご注意ください。


