background image

12

A

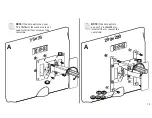
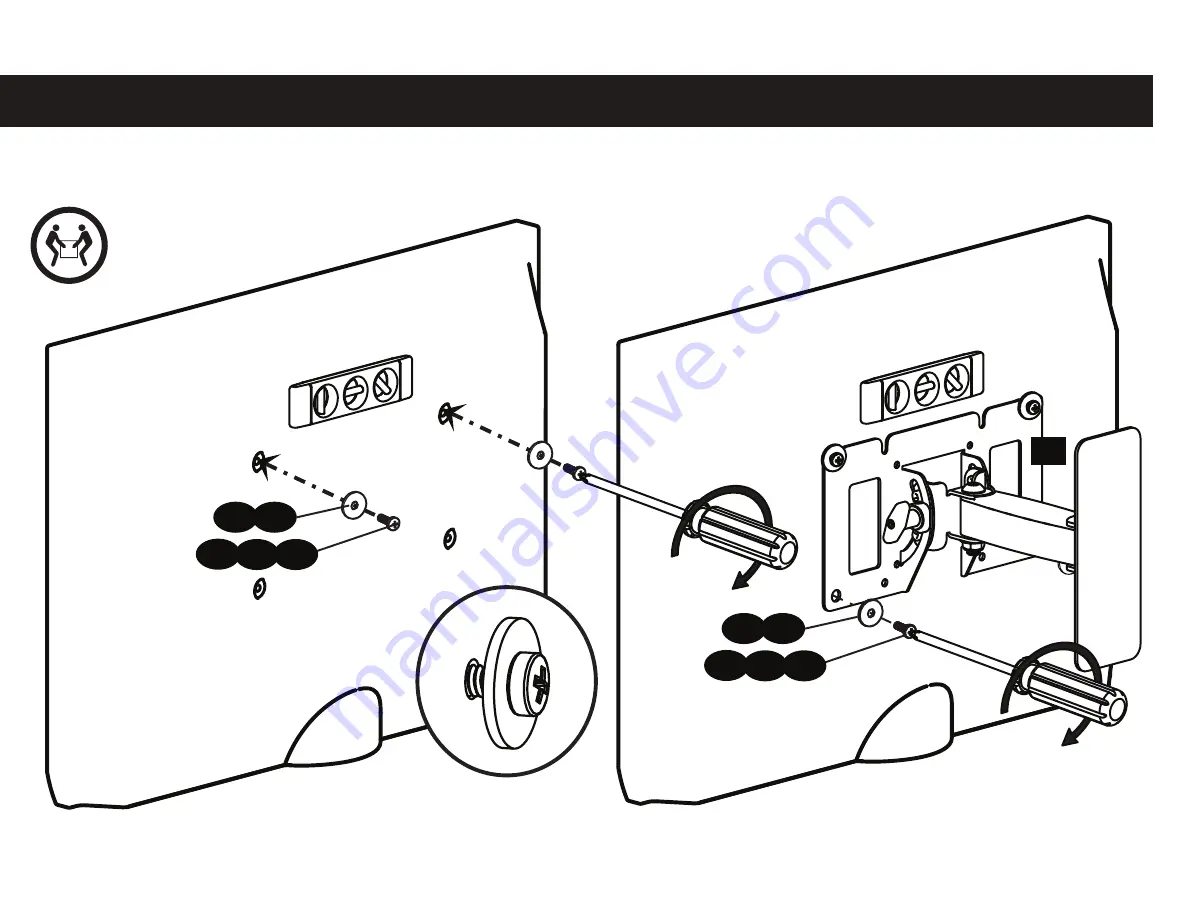
Install the top two screws but do not fully tighten. Leave a small gap so you can slide the TV bracket into place and then install the bottom two 
screws. Ensure that your bracket is level on the back of the TV. If you need extra space to accommodate cables, recesses, or protrusions; use 
spacers (see the irregular back option in STEP 2-B).

01

03 04

09

05

10

HEAVY! You may 

need assistance 

with this step.

A

200x1

00 or 1

00x1

00

200x1

00 or 1

00x1

00

03 04

09

05

10

STEP 2A

Summary of Contents for CLASSIC MSF07c

Page 1: ...MSF07c Instruction Manual ...

Page 2: ...ere are any special requirements for mounting your TV If you do not understand these instructions or have doubts about the safety of the installation assembly or use of this product contact Customer Service at 1 800 359 5520 UK 0800 056 2853 1 2 3 4 What is your wall made of Drywall with wood studs Perfect CAUTION Avoid potential personal injuries and property damage This product is designed for u...

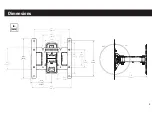
Page 3: ...3 Dimensions in mm 8 87 225 4 6 87 174 6 2 56 65 0 4 75 120 7 3 94 100 0 2 95 75 0 8 80 223 6 7 87 200 0 4 70 119 3 OFFSET 7 87 200 0 3 94 100 0 2 95 75 0 7 18 182 4 12 20 ...

Page 4: ...mbly verify all parts are included and undamaged If any parts are missing or damaged do not return the damaged item to your dealer contact Customer Service Never use damaged parts Parts and Hardware for STEP 1 NOTE Not all hardware included will be used TV Interface Bracket Wall Plate Assembly 01 x1 5 16 x 2 in Lag Bolts 02 x2 ...

Page 5: ...M5 x 35mm M4 x 12mm M6 x 12mm M5 x 12mm M4 M5 M6 03 04 05 06 07 08 x4 x4 x4 x4 x4 x4 TV Screws Washers Spacers 09 10 11 x4 x4 x4 Only needed for TVs with 200x200 mm 7 7 8 x 7 7 8 in hole patterns Extender Brackets Extender Bracket Nuts 12 13 x4 x2 7 32 in Hex Key 14 7 32 in ...

Page 6: ...6 ...

Page 7: ...8 in HOME EXTENDED Offset IMPORTANT When choosing a location for your TV on the wall please keep in mind that the TV will shift 119 3 mm 4 7 in from the EXTENDED to the HOME positions Before You Begin Consider TV Location and Offset ...

Page 8: ... thin nail or an edge to edge stud finder CAUTION Avoid potential personal injuries and property damage ƕ Drywall covering the wall must not exceed 16 mm 5 8 in ƕ Minimum wood stud size common 51 x 102 mm 2 x 4 in nominal 38 x 89 mm 1 x 3 in 2 Level the wall plate 01 and mark the hole locations 1 2 16 mm 5 8 in 01 ...

Page 9: ...5 mm 2 in using a 5 5 mm 7 32 in diameter drill bit 4 Tighten the lag bolts 02 only until they are pulled firmly against the wall plate 01 CAUTION Improper use could reduce the holding power of the lag bolt DO NOT over tighten the lag bolts 3 4 01 63 5 mm 2 in 5 5 mm 7 32 in 02 ...

Page 10: ...ace for cables see STEP 2 A If you have an irregular back TV or need extra space to accommodate cables see STEP 2 B SELECT TV HARDWARE CAUTION Avoid potential personal injuries and property damage Verify that there are adequate threads to secure the brackets to the monitor If you encounter resistance stop immediately and contact customer service Use the shortest screw and spacer combination to acc...

Page 11: ...tern on your TV is 200x200 mm 7 7 8 x 7 7 8 in install the extender brackets 12 using the nuts 13 provided If your TV hole pattern is less than 200x200 mm do not install the extender brackets Skip ahead to STEP 2 A or 2 B 13 01 12 ...

Page 12: ...tall the bottom two screws Ensure that your bracket is level on the back of the TV If you need extra space to accommodate cables recesses or protrusions use spacers see the irregular back option in STEP 2 B 01 03 04 09 05 10 HEAVY You may need assistance with this step A 200x100 or 100x100 200x100 or 100x100 03 04 09 05 10 STEP 2A ...
Page 13: ... pattern on your TV is 75x75mm the washers are not used Install all four screws at the same time NOTE If the hole pattern on your TV is 200x200 mm install all four screws at the same time 01 01 03 04 09 05 10 03 75x75 200x200 ...

Page 14: ...ll the bottom two screws Ensure that your bracket is level on the back of the TV Standard configurations are shown For special applications or if you are unsure about your hardware selection contact Customer Service B B 01 06 06 07 07 09 09 11 11 08 08 10 10 HEAVY You may need assistance with this step 200x100 or 100x100 200x100 or 100x100 ...

Page 15: ...ttern on your TV is 75x75mm the washers are not used Install all four screws at the same time NOTE If the hole pattern on your TV is 200x200mm install all four screws at the same time 01 01 06 07 09 11 08 10 11 06 75x75 200x200 ...

Page 16: ...16 Manage Cables 01 1 2 01 NOTE Leave enough slack in the cables to allow the TV to move freely ...

Page 17: ...If you need to remove your TV disconnect all cables and then reverse the procedures in STEP 2A 2B 7 32 in SWIVEL TILT Loosen the knob on the TV bracket to adjust the tilt of your TV Tighten the knob when your TV is set to the desired tilt EXTEND RETRACT 01 ...

Page 18: ...e al 1 800 359 5520 Reino Unido 0800 056 2853 para encontrar un soporte compatible Listo para comenzar Lea estas instrucciones en su totalidad para estar seguro de sentirse cómodo con este fácil proceso de instalación Consulte también el manual del usuario de su televisor para ver si existe algún requisito especial para instalar su televisor en la pared Si no entiende las instrucciones o si tiene ...

Page 19: ... mm x 102 mm 2 x 4 pulgadas nominal 38 mm x 89 mm 1 x 3 pulgadas 1 Localice el o los montantes Verifique el centro del montante con un punzón o un clavo delgado o bien utilice un detector de bordes de montantes 2 Nivele la placa mural 01 y marque la ubicación de los orificios 3 Realice los orificios guía IMPORTANTE Los orificios guía deben realizarse con una mecha de 5 5 mm 7 32 pulgada de diámetro ha...

Page 20: ...a sus necesidades Si usa elementos de sujeción demasiado largos puede dañar el televisor IMPORTANTE Si el patrón de orificios de su televisor es de 200 x 200 mm 7 x 7 pulgadas instale las placas de sujeción de expansión 12 usan do las tuercas 13 provistas Si el patrón de orificios de su televisor es de menos de 200 x 200 mm no instale las placas de sujeción de expansión Continúe con el PASO 2 A o 2...

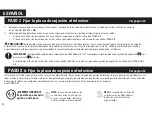
Page 21: ...udas sobre la selección de piezas contáctese con el servicio de atención al cliente ELEMENTO PESADO Es posible que necesite ayuda en este paso NOTA Si el patrón de orificios de su televisor es de 75 x 75 mm no se usan las arandelas Instale los cuatro tornillos al mismo tiempo NOTA Si el patrón de orificios de su televisor es de 200 x 200 mm instale los cuatro tornillos al mismo tiempo AJUSTE DE LA T...

Page 22: ...ntacter le service à la clientèle au 1 800 359 5520 ATTENTION Évitez les dommages matériels et les blessures ƕ Ne pas utiliser ce produit à d autres fins que celles spécifiées par le fabricant ƕ Le mur doit pouvoir supporter cinq fois le poids total du moniteur et du support ƕ Ce produit est conçu seulement pour être installé sur un mur dont la charpente est en bois ƕ Le fabricant n est pas responsa...

Page 23: ...Voir à la page 8 ATTENTION Évitez les dommages matériels et les blessures ƕ L épaisseur du matériau de revêtement de mur ne doit pas excéder 16 mm 5 8 po ƕ Dimension minimale du montant de bois commune 51 x 102 mm 2 x 4 po nominale 38 x 89 mm 1 5 x 3 5 po 1 Vérifiez le centre du montant à l aide d un poinçon ou d un clou fin ou utilisez un localisateur bord à bord 2 Mettez la plaque murale 01 à ni...

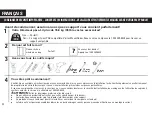
Page 24: ...te étape requiert deux personnes Remarque La configuration des trous du téléviseur de 75 mm x 75 mm ne nécessite pas de rondelle Choix des vis pour le téléviseur ÉTAPE 2 Installation des supports du téléviseur Voir à la page 10 FRANÇAIS Le type de téléviseur vous aidera à choisir la configuration de la quincaillerie à utiliser Faites correspondre votre type de téléviseur à l une des configurations...

Page 25: ...nnage Voir à la page 17 RÉGLAGE DE L INCLINAISON Desserrez le bouton sur la bride de montage du téléviseur pour ajuster l inclinaison du téléviseur Serrez le bouton lorsque le téléviseur est à l angle d inclinaison désiré RETRAIT DU TÉLÉVISEUR Mettez les languettes de verrouillage en position déverrouillée et soulevez le téléviseur et éloignez le de la plaque murale ...

Page 26: ...26 ...

Page 27: ...27 ...

Page 28: ...e without notice or obligation of any kind Milestone makes no representation of warranty expressed or implied regarding the information contained herein Milestone assumes no responsibility for accuracy completeness or sufficiency of the information contained in this document 2014 Milestone AV Technologies All rights reserved Sanus is a division of Milestone All other brand names or marks are used ...

Reviews: