6
Instruction Manual for SANUVAIR
®
S100
1-
778-877-3454
www.
bluegoldlabs
.com
Step by Step Setup & Installation - Wall-Mounted
1.
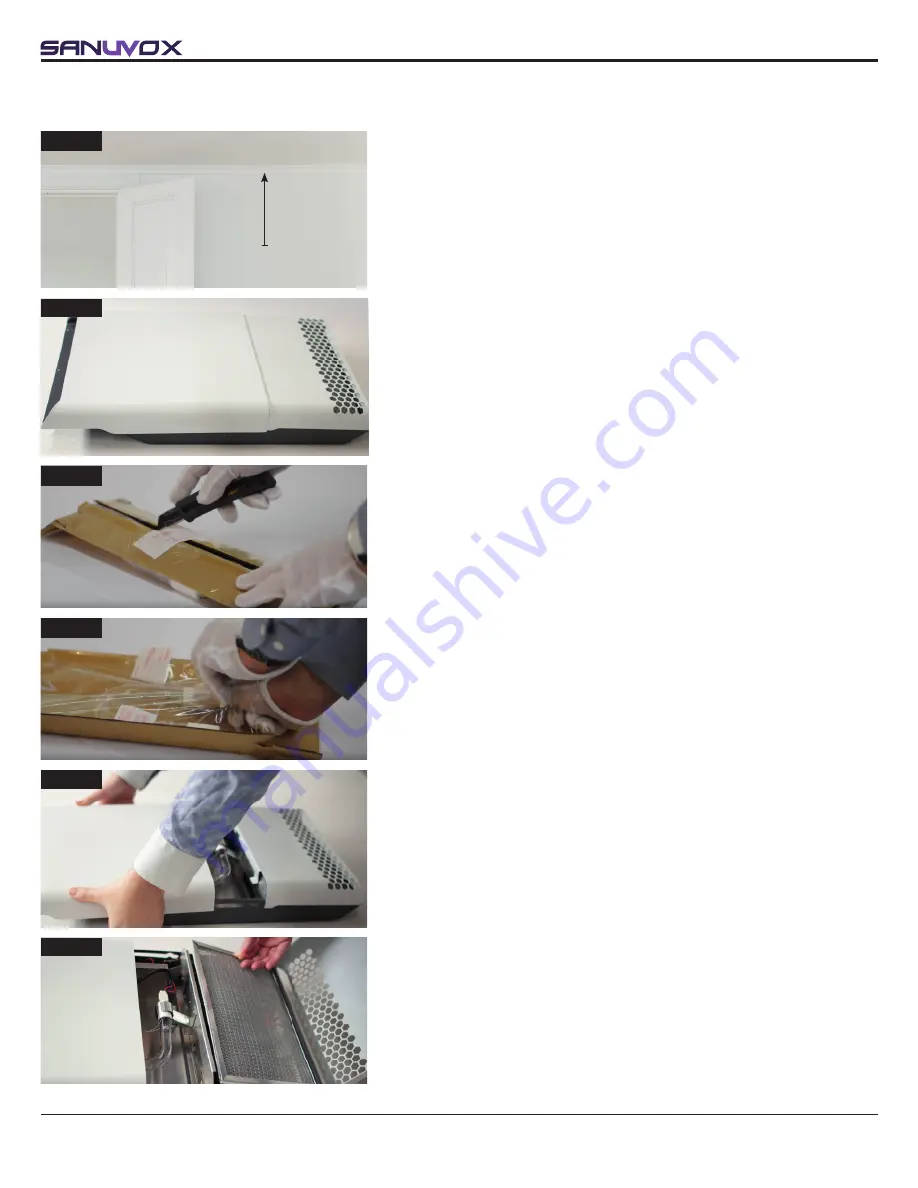
Check installation location of the unit, so that there is at least 24"
from the ceiling in order to have good air circulation.
Also make sure you have access to a 110V (or 230V) input to power
the unit.
STEP 1
2. Prepare unit for installation: Take the unit out of its box and lay the
unit
on a flat surface with the access doors facing up.
NOTE:
Keep box in case of return under warranty.
STEP 2
3. Prepare for UV lamp installation: remove lamp from packaging.
Only after you have visually inspected the UV lamp should you break
the security seal on the underside of the cardboard sleeve.
4. Carefully slide the
UV lamp
out from the cardboard sleeve. Be sure to
wear the cotton gloves (included) guaranteeing a clean lamp free from
fingerprints.
NOTE:
Fingerprints on the lamp will negatively impact the UV output of
the lamp.
STEP 3
STEP 4
STEP 5
STEP 6
5. Install lamp:
Open the unit by sliding its cover to gain access to the lamp
location. Connect the lamp to the connector (only one way possible)
and gently attach it to the lamp holder.
NOTE:
Lamp must be installed over the stopper.
6. Install Filter:
While the unit cover is still open, pull on the non-mesh
end to gain access to the filter location (mesh door). Take the filter out
of its packaging and install it in the unit. Close the mesh door properly.
min. 24"


