9
Instruction Manual for SANUVAIR
®
S100
1-
778-877-3454
www.
blueg
old
labs
.com
How to Clean your Product
There is very little maintenance to be done on the SANUVAIR
®
S100.
Periodic cleaning of the inlet filter may be performed. Filter media should be cleaned at least once every 6 months for optimal
performance to be kept free of dust and residue deposit. Clean when necessary with mild soap or rubbing alcohol. The lamp
may be cleaned once a year with a microfiber cloth and isopropyl alcohol. Follow the same instructions and precautions as for
lamp replacement. To clean the unit exterior, use a damp cloth with general purpose detergent. Always spot test the cleaner to
make sure it does not damage the surface.
CAUTION:
Under no circumstance should water be sprayed or splashed onto the product.
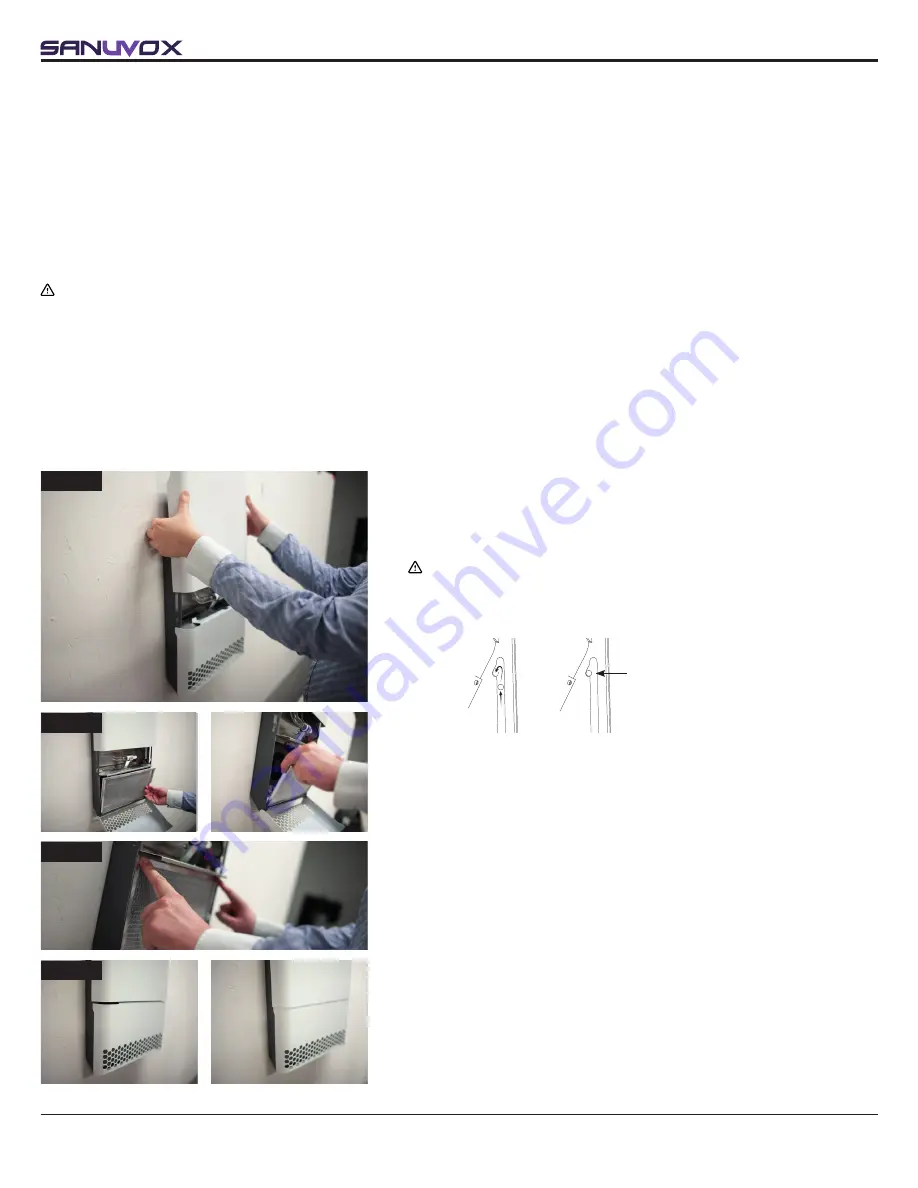
Step by Step Filter Cleaning
Example for a wall-mounted unit. The same step by step process applies for a ceiling-mounted unit.
NOTE:
The filter can be removed for cleaning while the unit is installed on the ceiling or wall. Another option is to remove the unit
from the ceiling or wall, and then access the filter with the unit lying on a flat surface with the access doors facing up. Besides,
this option is preferable for a wall unit.
1. Open the unit by sliding down its cover and pull on the non-mesh end of
the filter door to gain access to the filter location.
NOTE:
Unit must be disconnected from the supply before servicing filter.
CAUTION: When unit is wall-mounted, its cover may slide down
if not properly locked on open. When you slide the unit cover up,
make sure to push it up and toward the wall until it clips in place and
stays up on its own.
STEP 1
2. Remove the filter and and clean it.
NOTE:
The filter can be washed with mild soap or rubbing alcohol.
4.
Close the filter door and the unit cover properly.
NOTE: To unlock and slide down the unit cover when the unit is
wall-mounted, pull the unit cover toward you and down. Make sure to
close the unit cover for the unit to restart.
3. When filter is dry, reinstall it in the unit.
STEP 2
STEP 4
STEP 3
The cover must clip in place
inside the unit
A.
B.


