-8-
Lamp Replacement
How to check Lamp Used Time
The LAMP REPLACE indicator will light yellow when
the total lamp used time (Corresponding value) reaches
3,000 hours. This is to indicate that lamp replacement is
required.
The total lamp used time is calculated by using the be-
low expression,
Total lamp used time =
t
eco
+
t
normal
x 1.5
t
eco
: used time in the Eco mode
t
normal
: used time in the Normal mode
You can check the lamp used time following to the below
procedure.
1
Press and hold the
oN/StANd-BY
button on the pro-
jector for more than 0 seconds.
2
The projector used time and lamp used time will be
displayed on the screen briefly as follows.
Lamp replacement
WArNING:
- For continued safety, replace with a lamp assembly of the same type.
- Allow the projector to cool for at least 45 minutes before you open the
lamp cover. The inside of the projector can become very hot.
- Do not drop the lamp module or touch the glass bulb! The glass can
shatter and cause injury.
Procedure
1
Turn off the projector and disconnect the AC cord.
2
Loosen 1 screw with a screwdriver and remove the lamp cover.
3
Loosen 3 screws and pull out the lamp assembly by grasping the ledges.
4
Replace the lamp with a new one and tighten the 3 screws back into
position. Make sure that the lamp is set properly. Replace the lamp
cover and tighten the screw.
5
Connect the AC cord to the projector and turn on.
6
Reset the lamp replacement counter, see below explanation.
Note
- The projector cannot be turned-on with lamp cover removed, because
when the lamp cover is removed, the lamp cover switch is also re-
leased to switch off the lamp circuit.
How to reset Lamp Replace Counter
1
Turn the projector on, press the
MeNu
button and the
On-Screen Menu will appear. Press the
7
or
8
but-
ton
to move the red frame pointer to the Setting Menu
icon.
2
Press the
d
button
to move the red frame pointer to
the Lamp counter reset item and then press the
Se-
Lect
button. Select "Reset" and press the
SeLect
button. The message "Lamp replace counter Reset?"
is displayed. Move the pointer to [Yes] and then press
the
SeLect
button.
* Refer to owner's manual for further information.
recommendation
Should the air filter become clogged with dust particles,
it will reduce the cooling fan’s effectiveness and may re-
sult in internal heat build up and short lamp life. We rec-
ommend cleaning the air filter after the projection lamp
is replaced.
Refer to “Air Filter Cleaning”.
Lamp
Lamp Cover
Screw
Screw
Screw
Counter
Projector
525H
Lamp
Normal 150H
Eco 375H
Corresponding value 600H
Total lamp used time
Projector used time
order rePLAceMeNt LAMP
Type No.
Service Parts No.
POA-LMP107
610 330 4564
WArNING : turN oFF tHe uV LAMP BeFore oPeNING tHe LAMP coVer.
uSe uV rAdIAtIoN eYe ANd SKIN ProtectIoN durING SerVIcING.
Screw
Summary of Contents for 1 122 356 20
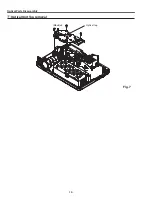
Page 18: ... 18 Optical Parts Disassembly m Optical Unit Top removal M3x8 x5 Optical top Fig 7 ...
Page 53: ... 53 IC Block Diagrams FA5502 P F Control IC621 L3E6100D D A S H LCD Driver IC501 IC531 IC561 ...
Page 54: ... 54 IC Block Diagrams L3E07072 LCD Driver Gamma Correction IC401 M62393 DAC IC3531 ...
Page 55: ... 55 IC Block Diagrams NJW1141 Audio Control IC5001 ...
Page 81: ...KR6 XW55A00 KP6 XW50A00 81 Mechanical Parts List ...
Page 82: ... KR6AD Jun 2007 DC 350 Printed in Japan SANYO Electric Co Ltd ...


